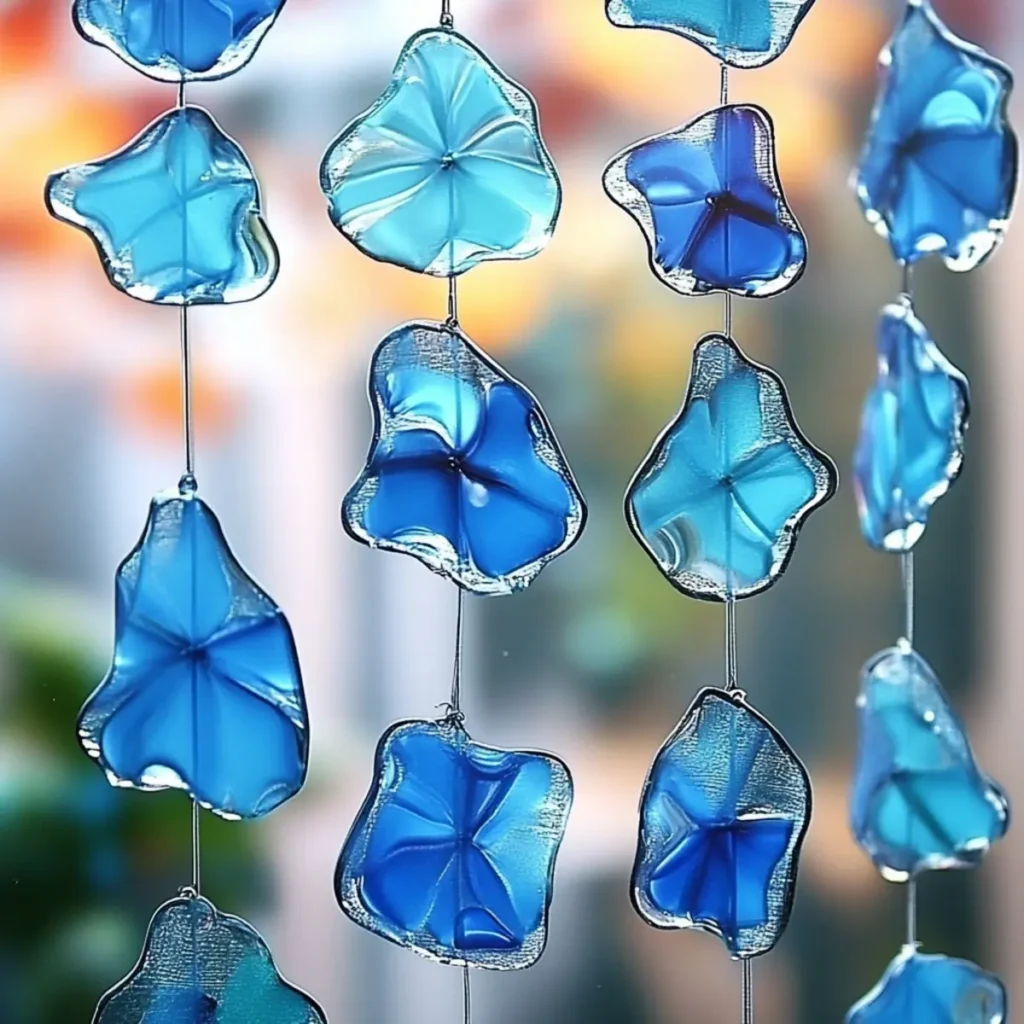
When the sunlight streams through my window, it often brings a little magic along with it. Recently, I found myself craving a pop of color to brighten up my space and stumbled on a delightful craft project: DIY Blue Crayon Suncatchers. These vibrant creations are not just beautiful; they also serve as a wonderful way to recycle old crayons and indulge in some creative fun, especially with the kids.
In just 30 minutes and with minimal supplies, you can transform ordinary art materials into dazzling pieces that dance with light. Picture your finished suncatcher glimmering in shades of blue, adding an artistic touch that rivals any store-bought decoration. Whether you're enjoying a sunny afternoon at home or looking for a great weekend activity, this craft project promises to fill your day with joy and creativity. Let's gather our materials and make something that not only enhances our home but also warms our hearts!
Why You'll Love These DIY Blue Crayon Suncatchers?
Creativity Unleashed: This project allows you to express your artistic side, turning simple crayons into stunning art.
Kid-Friendly Fun: Engage your little ones in crafting; they'll love the hands-on experience and colorful results!
Fast and Easy: With only 30 minutes needed, it's a perfect afternoon activity that delivers quick satisfaction.
Eco-Friendly Crafting: Transform unwanted crayons into vibrant decor, making this a sustainable option for your home.
Versatile Designs: Experiment with different shapes and colors, creating unique pieces that reflect your style.
Light Play: Watch as sunlight filters through, casting mesmerizing colors around your space and brightening your day!
DIY Blue Crayon Suncatcher Ingredients
For the Suncatcher
- Blue Crayons - These are the primary coloring agents; mix light and dark shades for an added depth of color.
- Waxed Paper - Essential for melting the crayons; two sheets are perfect for each suncatcher.
- Crayon Sharpener - You'll need this to create fine crayon shavings that melt beautifully.
- Iron - Make sure it's set to a low heat; adult supervision is a must for safety during the melting process.
For Finishing Touches
- Scissors - Use them to cut out fun shapes once your suncatcher has cooled down.
- Hole Punch - Make a hole at the top of the suncatcher for easy hanging.
- Embroidery Floss/String/Thread - This is your handy tool for displaying your stunning DIY blue crayon suncatchers in the window.
Unleash your creativity with these fun and easy materials to brighten up your home!
How to Make DIY Blue Crayon Suncatchers
-
Preheat the Iron: Set your iron to a low heat setting. This will ensure that your crayons melt gently without burning, keeping the colors vibrant.
-
Create Crayon Shavings: Use your crayon sharpener to gather shavings from the various blue crayons, mixing in shades for depth. This is where the magic begins!
-
Layer Crayon Shavings: Place a thick layer of crayon shavings between two sheets of waxed paper. Arrange them to create a striking mix of colors that will blend beautifully when melted.
-
Melt the Crayons: Gently press the iron down on the waxed paper. Hold for about 10-15 seconds until the crayons start to melt and blend together, creating a shimmering effect.
-
Cool and Cut: Once melted, carefully remove the waxed paper from the iron and let it cool for a few minutes. Afterward, use scissors to cut your suncatcher into fun shapes!
-
Create a Hanging Hole: Use a hole punch to make a small hole at the top of your suncatcher, ensuring it's aligned for easy hanging.
-
Thread for Display: Finally, thread your suncatcher with embroidery floss or string. Hang it in a sunny spot where it can catch the light and brighten up your space!
Optional: Pair with a decorative ribbon for an added touch of flair.
Exact quantities are listed in the recipe card below.
What to Serve with DIY Blue Crayon Suncatchers?
Imagine a sunny afternoon filled with creativity and laughter as you craft these vibrant decorations-what better way to elevate the experience?
- Bright Fruit Snacks: Fresh fruit slices like oranges and apples provide a refreshing burst of flavor, perfect in contrast to the hands-on crafting.
- Colorful Veggie Platter: Pair your suncatcher-making session with a platter of crisp vegetables and hummus; it adds a crunchy element while keeping everyone energized.
- Refreshing Lemonade: Chill out with some homemade lemonade, offering a tangy sweetness that feels as uplifting as your colorful creations!
- Mini Sandwiches: Simple finger sandwiches filled with cheese and cucumber are quick to make and easy to eat, ideal for little hands busy with crafting.
- Popcorn Treats: Whip up some popcorn drizzled with a bit of melted chocolate; it's a delightful, sweet snack that everyone can enjoy while being creative.
- Artisan Iced Teas: Serve refreshing iced teas infused with fruits or herbs, providing a soothing drink to sip on while the crayons melt and transform.
- Chocolate-Dipped Pretzels: These treats bring a sweet and salty element to your crafting party, making snack time as fun as the crafting itself!
- Colorful Cupcakes: Add a festive touch with cupcakes adorned in bright frosting, mirroring the beautiful hues of your suncatchers and making the day feel even more special!
Make Ahead Options
These DIY Blue Crayon Suncatchers are perfect for eager crafters who want to save time! You can prepare the crayon shavings up to 24 hours in advance by using your sharpener and storing them in an airtight container to maintain their quality and vibrancy. Simply layer the shavings between sheets of waxed paper, ready for melting. When you're ready to complete the project, just preheat your iron and follow the melting and cutting steps as directed. This way, you'll enjoy a fun, swift crafting session while putting your beautiful suncatchers on display without the last-minute hassle!
How to Store and Freeze DIY Blue Crayon Suncatchers
-
Storage Location: Keep your completed suncatchers in a dry, cool place away from direct sunlight to prevent them from warping or fading. They can last for years when stored properly.
-
Handling with Care: To avoid scratches, consider wrapping each suncatcher in a soft cloth or placing them in a small container if you plan to store multiple pieces together.
-
Display Duration: You don't need to freeze your suncatchers; they are meant to be enjoyed year-round! Just make sure to place them in a window where they can shine brightly, adding a splash of color to your home.
-
Reusing Materials: If you ever want to refresh your designs, you can carefully melt down old suncatchers and create new ones using the same DIY blue crayon suncatchers method-this makes for fun recycling!
DIY Blue Crayon Suncatcher Variations
Feel free to let your imagination run wild as you customize these delightful suncatchers!
-
Color Mix: Combine blue with other vibrant colors like yellow or green for a lively, multi-colored effect. A splash of contrast can elevate your design beautifully!
-
Patterned Papers: Use patterned waxed paper instead of plain for a fun twist. This adds intricate designs that will dance in the sunlight, creating even more visual interest.
-
Different Shapes: Beyond classic circles, experiment with fun shapes like butterflies, flowers, or geometric patterns. Each unique design tells a different story and enhances your decor.
-
Glittery Touch: Sprinkle some glitter over the crayon shavings before melting for an extra sparkle that catches the light. It's a fun surprise that adds a magical finish!
-
Themed Suncatchers: Create themed suncatchers for holidays-reds and greens for Christmas, pastels for Easter. Seasonal art can brighten any celebration in your home.
-
Layered Effects: Try layering darker shades on the bottom and lighter on top for a beautiful ombre effect. The stunning gradient transforms your suncatcher into an art piece.
-
Dried Flowers: Add a few dried flower petals into your crayon layers before melting for a nature-inspired touch. This twist gives them an earthy charm that feels organic and inviting.
-
Sunset Shades: While keeping blue as the base, incorporate warm colors like orange or pink for lovely sunset-inspired suncatchers. It evokes the calming feel of sunset at home.
Expert Tips for DIY Blue Crayon Suncatchers
-
Keep It Safe: Always supervise children during the melting process and handle the iron yourself to avoid any accidents.
-
Prevent Mess: Place parchment paper above and below the waxed paper while melting to prevent crayon residue from sticking to your iron.
-
Layering Creativity: Experiment with layers of blue shades; mixing light and dark crayons creates a mesmerizing depth that's visually stunning.
-
Shape Matters: Use templates for cutting shapes; stars, hearts, or geometric patterns can add an artistic twist to your suncatchers.
-
Display Tips: Hang your suncatchers in direct sunlight; the more light they catch, the more vibrant and dazzling they will appear!
DIY Blue Crayon Suncatchers Recipe FAQs
What type of crayons should I use for my suncatchers?
Absolutely, blue crayons are the primary choice for this project! I recommend mixing different shades of blue, such as light and dark, to create depth and dimension in your suncatcher. For an added sparkle, you can include some white or metallic crayons!
How should I store my completed suncatchers?
Great question! To keep your DIY blue crayon suncatchers looking vibrant, store them in a dry, cool location, away from direct sunlight. They can last for years if handled properly. Wrapping them in a soft cloth or placing them in a small container will help prevent scratches.
Can I freeze my suncatchers for preservation?
No need to freeze your suncatchers; they are designed for enjoyment year-round! Just ensure they are displayed in a sunny spot to catch the light, enhancing the vibrant colors you've created. If you ever want to refresh your design, you can melt them down and make new ones!
What should I do if my crayon shavings aren't melting properly?
If you're facing this issue, make sure the iron is set to a low heat, as too much heat can burn the crayons rather than melting them smoothly. Hold the iron down on the waxed paper for about 10-15 seconds. If needed, try moving the iron in small circles to ensure even melting across the shavings.
Are there any allergies I should be aware of when using these materials?
While melting crayons is generally safe, it's essential to ensure that no one involved in the project has sensitivities to the materials used. Crayons can contain paraffin wax and other additives. Always check the packaging and opt for non-toxic crayons if you're working with young children!
Can I customize the shapes of my suncatchers?
Definitely! This is part of the fun and creativity in your crafting! Use templates or freehand for different shapes like stars, hearts, or even abstract forms. The more variety in your shapes, the more unique your suncatchers will be!

DIY Blue Crayon Suncatchers: Easy Colorful Window Art!
Equipment
- Iron
- Crayon Sharpener
- scissors
- Hole punch
Ingredients
For the Suncatcher
- 5 pieces Blue Crayons Mix light and dark shades for depth.
- 2 sheets Waxed Paper Essential for melting crayons.
- 1 unit Crayon Sharpener To create fine shavings.
- 1 unit Iron Set to low heat; adult supervision needed.
For Finishing Touches
- 1 unit Scissors For cutting fun shapes.
- 1 unit Hole Punch For hanging holes.
- 1 string Embroidery Floss/String/Thread For displaying the suncatchers.
Instructions
How to Make DIY Blue Crayon Suncatchers
- Preheat the Iron: Set your iron to a low heat setting.
- Create Crayon Shavings: Use your crayon sharpener to gather shavings from various blue crayons.
- Layer Crayon Shavings: Place a thick layer of shavings between two sheets of waxed paper.
- Melt the Crayons: Gently press the iron on the waxed paper for about 10-15 seconds.
- Cool and Cut: Remove from iron, let cool, and cut into fun shapes.
- Create a Hanging Hole: Punch a hole at the top of the suncatcher.
- Thread for Display: Thread your suncatcher with embroidery floss or string.


Leave a Reply