
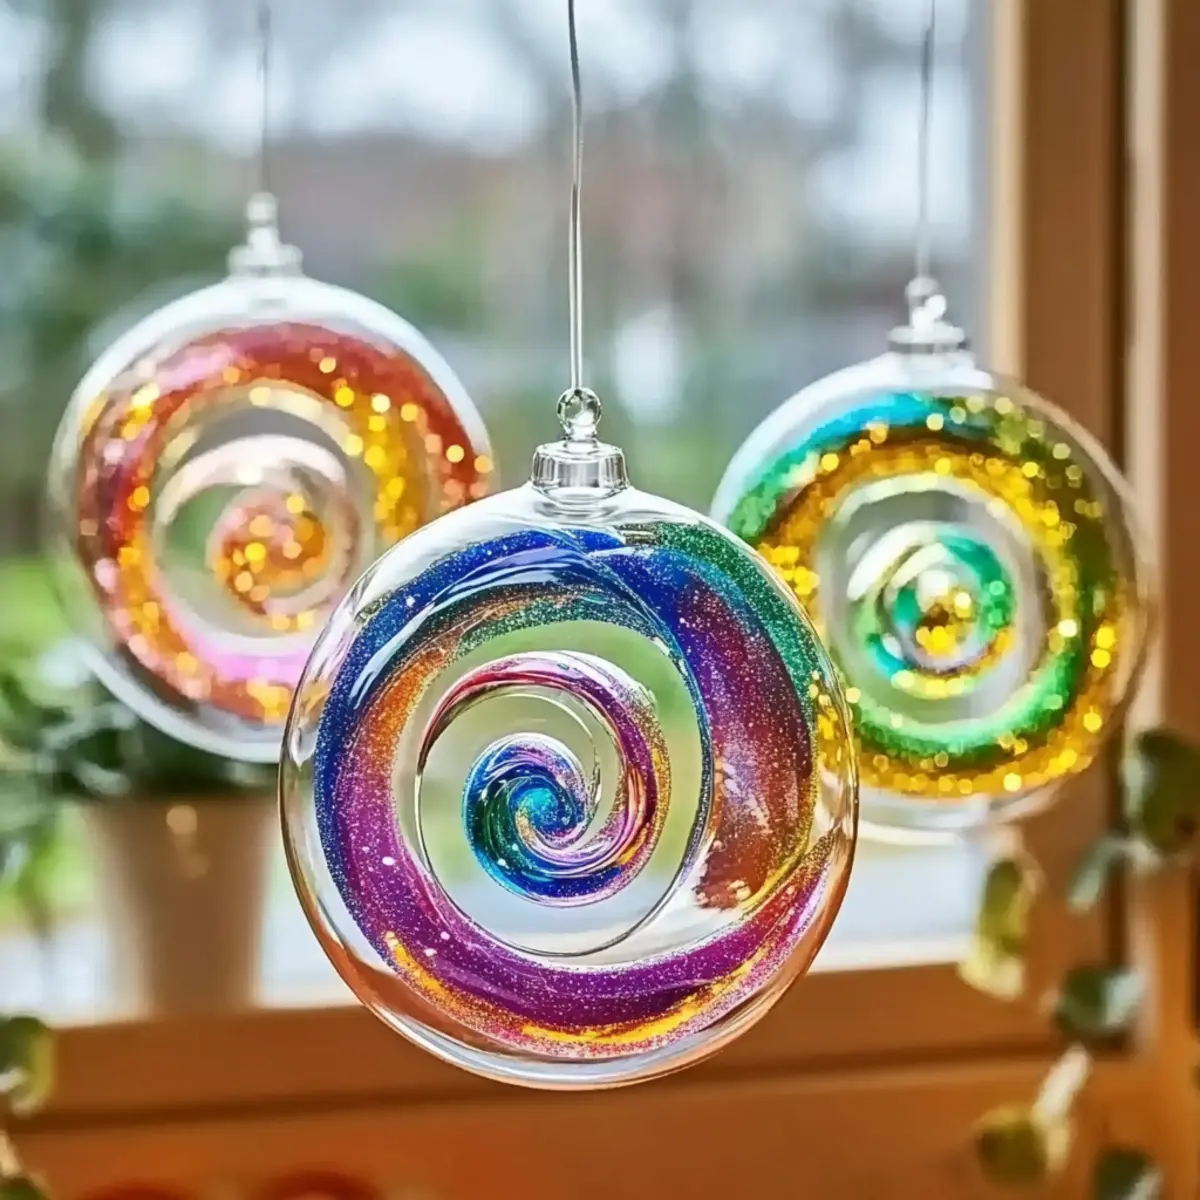
The morning light streaming through my window has always brought a sense of joy and warmth into our home. Recently, I decided to bring a splash of color to that light with a delightful DIY project-a clear glue suncatcher! This craft isn't just for kids; it's for anyone looking to add a whimsical touch to their decor while enjoying a bit of creativity.
As I gathered my supplies-clear school glue, vibrant food coloring, and a few special additions like glitter and sequins-I could almost feel the excitement bubbling up. Each swirl of color felt like painting a miniature masterpiece! Not only is this project incredibly easy to pull together, but it also opens the door to endless customization. You can create enchanting patterns and designs that will dazzle anyone who walks by.
So, whether you're searching for a fun activity to share with children or simply looking to embrace your artistic side, let's dive into the world of colorful suncatchers that brighten your space and spirit alike!
Why will you love this Clear Glue Suncatcher?
Whimsical Creativity: This craft offers an enjoyable outlet for all ages, making it perfect for family bonding.
Vibrant Customization: Mix and match colors, glitter, and decorations to create a unique masterpiece!
Simple Supplies: Made with everyday ingredients like clear school glue and a plastic lid, you'll hardly need to shop.
Quick Drying: With just 24 hours of drying time, you can quickly display your cheerful creation.
Cherished Keepsake: These personalized suncatchers can become treasured decorations, adding joy to your home.
Fun for Everyone: Whether young or young at heart, everyone will delight in the magical effects of sunlight streaming through their handcrafted suncatchers!
Clear Glue Suncatcher Ingredients
For the Suncatcher Base
• Clear School Glue - A must-have for binding the materials and achieving that glossy finish; try Elmer's for best results.
• Plastic Lid - This will serve as your base; yogurt containers or clear plastic sheets are great alternatives.
For the Color Mixture
• Food Coloring or Liquid Watercolor Paints - These vibrant colors will paint your glue mixture; add sparingly for a gentle swirl effect.
• Toothpick or Paintbrush - Use this to swirl the colors beautifully into the glue.
For Decoration (Optional)
• Glitter - Sprinkle in some sparkle for extra flair in your suncatcher.
• Sequins - These can be added for texture and charm.
• Beads - Embedding these can add delightful dimension to the design.
For Final Touch
• String or Suction Cup Hook - Essential for hanging your dazzling masterpiece once it's dried.
Have fun creating your clear glue suncatcher!
How to Make a Clear Glue Suncatcher
-
Prepare Your Work Area: Cover your crafting surface with wax or parchment paper to ensure a mess-free experience while creating your suncatcher.
-
Pour the Glue: Take your clear school glue and pour a generous layer into the plastic lid, creating a secure base for your colorful masterpiece.
-
Add Color: Sprinkle in a few drops of your chosen food coloring or liquid watercolor paints. Grab a toothpick or paintbrush to gently swirl the colors together, creating a beautiful mix.
-
Sprinkle Decorations: If you wish, add glitter, sequins, or beads into the glue mixture for added charm and dimension-let your creativity run wild!
-
Allow to Dry: Let your suncatcher dry completely for 24 hours in a safe spot, ensuring no one bumps into it during this time.
-
Peel and Trim: Once dry, carefully peel the suncatcher from the plastic lid. Use scissors to trim any rough edges so it looks perfect!
-
Hang Your Creation: Attach a string or suction cup hook to your new work of art, and find the perfect spot in your window for it to shine brightly in the sunlight!
Optional: Use different shapes for your lids to create a variety of unique suncatcher designs.
Exact quantities are listed in the recipe card below.

Make Ahead Options
These Clear Glue Suncatchers are perfect for busy crafters looking to save time! You can prepare the glue and color mixture up to 3 days in advance by mixing the clear school glue with your chosen food coloring, and storing it in an airtight container. When ready to create, simply pour the mixture into your plastic lid and add any optional decorations like glitter or sequins-this ensures they stay fresh and vibrant. Allow your creation to dry completely for 24 hours. This makes it easy to have colorful suncatchers ready for your next craft day without the last-minute rush! Just remember to keep them flat between wax papers to maintain their shape until you're ready to hang them up.
What to Serve with DIY Colorful Suncatcher?
Bring the excitement of crafting into your home with delightful decorative touches that everyone will adore.
- Sunshine Lemonade: The refreshing tang of homemade lemonade complements the vibrant colors, making it a perfect crafting sip.
- Colorful Fruit Skewers: Bright fruits on a stick not only please the palate but also inspire the colorful designs of the suncatcher, making it a great snack while you craft.
- Tasty Trail Mix: A crunchy blend of nuts, seeds, and dried fruits provides energy for your creative session, fueling your artistic spirit.
- Rainbow Veggie Platter: Crisp veggies paired with a zesty dip resemble the joyful colors of your suncatcher-healthy and fun for kids to enjoy while crafting!
- Mini Cupcakes: These sweet bites can be adorned with colorful frosting-great for celebrating your finished masterpiece.
- Crafty Mocktails: Create a vibrant drink with sparkling water, fruit purees, and fresh herbs-perfectly mirroring the joyful spirit of crafting suncatchers!
- Artistic Cookies: Let your cookies mirror the whimsical designs of the suncatcher for a fun treat that sparks creativity as you enjoy them.
- Fruit-Infused Water: Keep hydrated with refreshing mixtures of fruits and herbs in water, enhancing the crafting experience with a refreshing twist.
- Whimsical Artsy Smoothies: Blend colorful fruits, yogurt, and spinach for a nutritious drink that brings more inspiration to your colorful creations.
Tips for the Best Clear Glue Suncatcher
- Color Mixing: Be gentle when swirling colors; too much mixing can create a muddy appearance. Aim for beautiful, bold contrasts!
- Layering Technique: For a thicker suncatcher, consider adding layers of glue and color, letting each layer dry before adding the next one.
- Creative Decorations: Don't shy away from adding extra embellishments like beads or glitter; just be mindful not to overcrowd your design.
- Drying Spot: Always allow the suncatcher to dry flat; moving it too soon can lead to warped shapes and undesired effects.
- Storage Care: When storing your suncatchers, place wax paper between them to prevent sticking and keep them looking fresh for future use.
Storage Tips for Clear Glue Suncatcher
- Room Temperature: Store your clear glue suncatcher flat in a cool, dry area, away from direct sunlight to avoid warping or melting.
- Fridge: If you need to store it for longer than a few days, place it in the fridge; just be sure to keep it flat between sheets of wax paper.
- Labeling: Use a labeled envelope or container to organize your suncatcher for seasonal reuse, which also helps in keeping the colors vibrant and intact.
- Reheating: If necessary, briefly let your suncatcher warm up to room temperature before hanging it up again, ensuring it'll return to its beautiful, glossy form.
Clear Glue Suncatcher Variations
Feel free to personalize your suncatcher and let your creativity shine through various twists and exciting additions!
- Theme Colors: Choose colors based on seasons or holidays, like pastels for spring or warm hues for autumn. It's a charming way to decorate your space throughout the year!
- Texture Boost: Incorporate small natural elements like dried flowers or leaves for a rustic touch. These bits of nature can add a delightful organic feel to your suncatcher.
- Glow-in-the-Dark: Mix in glow-in-the-dark paint for a unique twist! Imagine your suncatcher glowing softly in the evening, creating a magical atmosphere.
- Layered Designs: Create multiple layers of color by letting one layer dry before adding another. This technique adds depth and complexity, making each suncatcher truly one-of-a-kind.
- Shape Variety: Experiment with different shapes of bases, such as hearts or stars. Changing the silhouette can give your suncatcher a distinctly different aesthetic!
- Mosaic Effect: Cut colorful paper into small pieces and embed them into the glue for a mosaic look. This can heighten the suncatcher's visual intrigue and complexity!
- Confetti Suncatcher: Use biodegradable confetti for a fun party vibe! When the light hits, the colors will shimmer and dance, perfect for festive occasions.
- Metallic Accents: Add a touch of metallic paint or glitter for a stunning shine! This will make your suncatcher shimmer brilliantly when illuminated by sunlight.
Clear Glue Suncatcher Recipe FAQs
What type of clear glue should I use for the suncatcher?
Definitely go for clear school glue, like Elmer's, as it binds the materials effectively and dries with a beautiful glossy finish. Avoid using white glue since it won't provide that translucent look you desire.
How should I store my completed suncatcher?
To keep your suncatcher in pristine condition, store it flat in a cool, dry area. Layer it between sheets of wax paper and place it in a labeled envelope. This way, it will avoid bending and keep those vibrant colors intact. Check on them every few months!
Can I freeze my suncatcher for storage?
While it's not usually recommended to freeze your suncatcher, if you're concerned about the heat affecting it, you can place it flat in the fridge for a little while. Just remember, avoid any direct sunlight exposure, as this could warp or damage the glue over time.
What if my suncatcher has bubbles in the glue?
No worries! If you notice bubbles when you pour the glue, gently tap the base or use a toothpick to pop them. This also works if the colors seem too blended; a gentle touch can help restore those lovely swirls and shine. If the bubbles persist after drying, don't fret-each piece tells its own unique story!
Are there any allergy considerations with the materials?
Yes! Always check the ingredients in your materials, especially if crafting with kids or in a group. Most school glues are non-toxic, but if someone has a glue allergy, consider using a clear craft adhesive made specifically for sensitive users. Be cautious with decorations-glitter and sequins can be a choking hazard for younger children, so supervise accordingly.
Can we customize the colors for different seasons?
Absolutely! One of the best parts about the clear glue suncatcher is the ability to give it a seasonal twist! For example, use pastel colors for spring, bright hues for summer, rich reds and oranges for fall, and icy blues or whites for winter. Have fun creating themes tailored to your favorite celebrations!
Clear Glue Suncatcher Craft: Easy Whimsical Fun for Everyone
Equipment
- Plastic lid
- Toothpick or paintbrush
Ingredients
For the Suncatcher Base
- 1 cup Clear School Glue Elmer’s is recommended.
- 1 piece Plastic Lid Yogurt containers or clear plastic sheets can be alternatives.
For the Color Mixture
- few drops Food Coloring or Liquid Watercolor Paints Add sparingly for effect.
- 1 piece Toothpick or Paintbrush For swirling colors.
For Decoration (Optional)
- to taste Glitter For extra sparkle.
- to taste Sequins For added texture.
- to taste Beads For dimension.
For Final Touch
- 1 piece String or Suction Cup Hook For hanging.
Instructions
How to Make a Clear Glue Suncatcher
- Prepare Your Work Area: Cover your crafting surface with wax or parchment paper to ensure a mess-free experience while creating your suncatcher.
- Pour the Glue: Take your clear school glue and pour a generous layer into the plastic lid, creating a secure base for your colorful masterpiece.
- Add Color: Sprinkle in a few drops of your chosen food coloring or liquid watercolor paints. Grab a toothpick or paintbrush to gently swirl the colors together, creating a beautiful mix.
- Sprinkle Decorations: If you wish, add glitter, sequins, or beads into the glue mixture for added charm and dimension—let your creativity run wild!
- Allow to Dry: Let your suncatcher dry completely for 24 hours in a safe spot, ensuring no one bumps into it during this time.
- Peel and Trim: Once dry, carefully peel the suncatcher from the plastic lid. Use scissors to trim any rough edges so it looks perfect!
- Hang Your Creation: Attach a string or suction cup hook to your new work of art, and find the perfect spot in your window for it to shine brightly in the sunlight!


Leave a Reply