
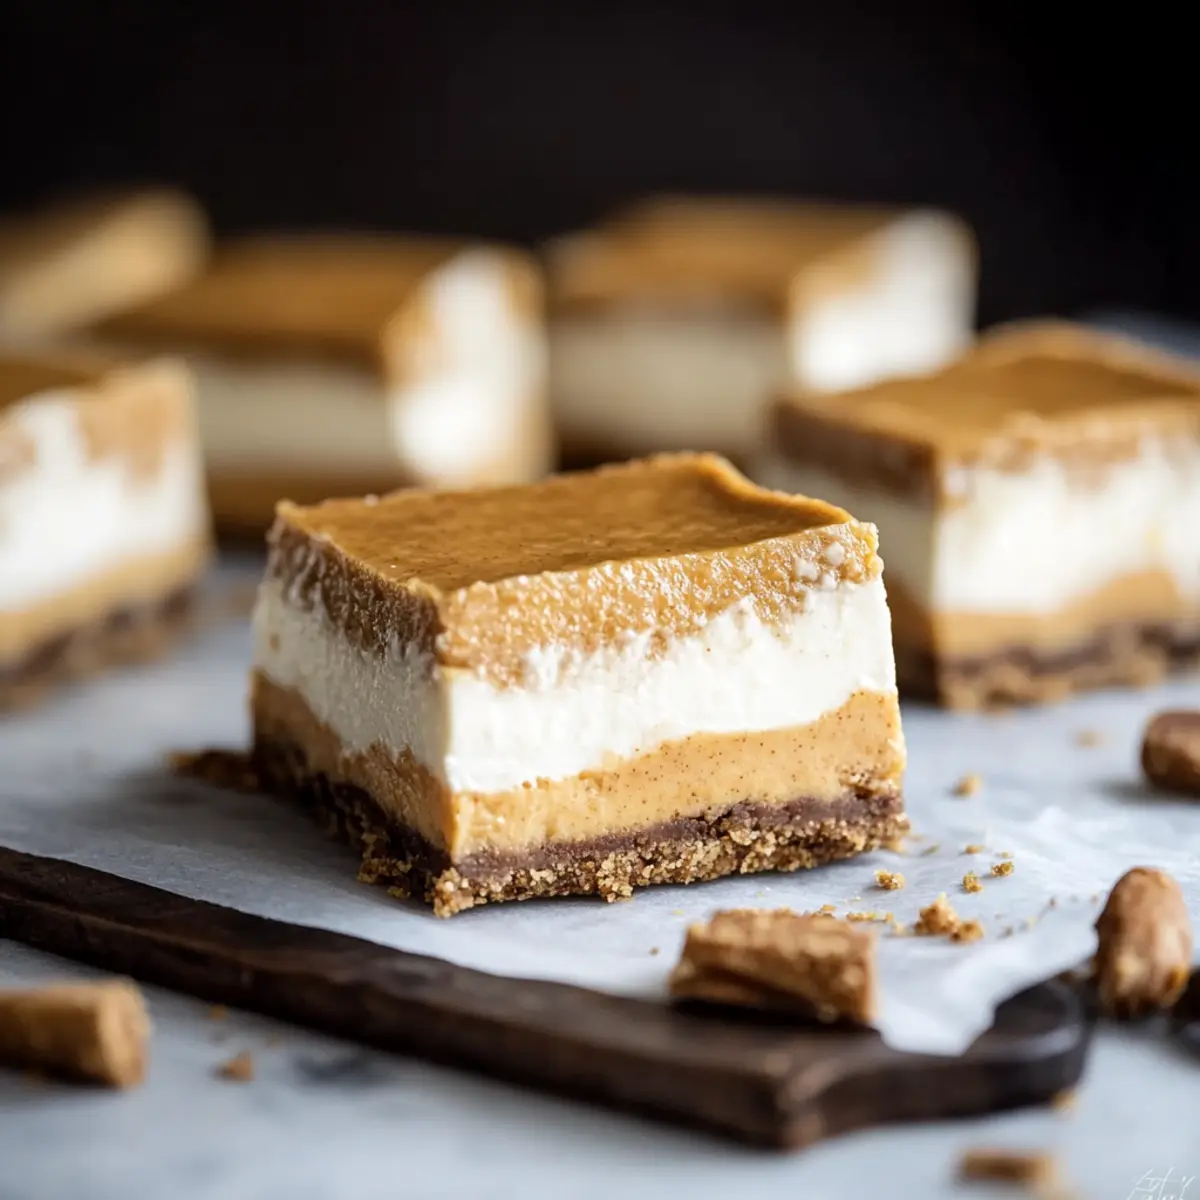
Imagine a warm, golden slice of dessert that effortlessly melds the rich, creamy decadence of cheesecake with the earthy sweetness of sweet potatoes. On those balmy evenings when turning on the oven feels like an unnecessary effort, these No-Bake Sweet Potato Cheesecake Bars come to the rescue! This delightful recipe layers a smooth cheesecake filling over a graham cracker crust, infused with the wholesome goodness of sweet potatoes, creating a luscious treat that pleases both the eye and the palate.
Whether you're hosting a potluck or simply craving a satisfying sweet, these bars will elevate any occasion with their unique blend of flavors. The best part? You can whip them up in no time, and the chilling process allows the flavors to deepen beautifully. So gather your ingredients, and let's dive into making this creamy delight that's sure to impress friends, family, and even yourself!
Why are No-Bake Sweet Potato Cheesecake Bars a must-try?
Irresistible Flavor: Experience the perfect balance of creamy cheesecake and sweet potato that's simply divine.
No Oven Needed: Enjoy a delicious dessert without the heat of the oven, making it perfect for those warm days.
Quick Preparation: These bars come together in a snap, letting you spend more time enjoying and less time in the kitchen.
Versatile Treat: Customize with your favorite nuts or spices, allowing creativity to shine in every bite.
Crowd-Pleasing Dessert: Whether at a gathering or a cozy night in, expect rave reviews from family and friends!
Ultimate Chill Factor: Let flavors meld beautifully in the refrigerator, creating a rich taste that truly captivates.
No-Bake Sweet Potato Cheesecake Bars Ingredients
For the Crust
• Graham Crackers - Provides crunch and structure; substitute with gluten-free crackers for a gluten-free version.
• Brown Sugar - Adds sweetness and a rich flavor to the crust; regular sugar can be used if brown sugar is unavailable.
• Butter - Binds the crust ingredients together; coconut oil can be a dairy-free alternative.
For the Cheesecake Layer
• Cream Cheese - Forms a smooth and creamy cheesecake layer; Neufchâtel cheese is a lighter alternative.
• Sugar - Sweetens the cheesecake layer; adjust to taste or switch to a sugar substitute for low-calorie options.
• Whipped Topping - Lightens the cheesecake and gives it a fluffy texture; homemade whipped cream can be used as a substitute.
For the Sweet Potato Layer
• Sweet Potatoes - Stars in the sweet potato layer, adding flavor and nutrition; canned sweet potato puree can be used for convenience.
Remember, these No-Bake Sweet Potato Cheesecake Bars are a creamy dessert that will delight your taste buds!
How to Make No-Bake Sweet Potato Cheesecake Bars
-
Prepare Sweet Potatoes: Begin by peeling, cubing, and boiling the sweet potatoes for about 30 minutes, or until they become tender. Once done, drain and mash them in a bowl, then set aside to cool.
-
Make Crust: Take a ziplock bag and crush the graham crackers inside. In a mixing bowl, combine the crushed crackers with brown sugar and melted butter until it holds together well. Firmly press this mixture into the bottom of an 8x8 or 9x9 dish lined with parchment paper for easy removal.
-
Create Cheesecake Layer: In a separate bowl, blend the cream cheese, sugar, and vanilla until smooth. Gently fold in the whipped topping, creating a light and airy mixture. Spread this cheesecake layer evenly over the crust.
-
Prepare Sweet Potato Layer: Combine the cooled mashed sweet potatoes with sugar and vanilla, mixing until smooth. Carefully pour this mixture over the cheesecake layer, making sure it is evenly distributed.
-
Chill: Pop the dish into the refrigerator and allow it to chill for at least 8 hours, which will help the bars to set perfectly. Once firm, cut into squares and serve chilled to enjoy the delightfully creamy texture.
Optional: Top each square with a sprinkle of cinnamon or a drizzle of caramel for extra flavor!
Exact quantities are listed in the recipe card below.
What to Serve with No-Bake Sweet Potato Cheesecake Bars?
These creamy delights deserve a spot on the table among equally satisfying accompaniments that enhance their flavors.
-
Whipped Cream: A dollop of fluffy whipped cream adds an airy, sweet contrast that elevates each bite. It's the perfect finishing touch for an already luscious dessert.
-
Caramel Drizzle: Drizzling caramel sauce over each bar introduces a rich, buttery flavor that pairs beautifully with the sweet potatoes, creating a delightful taste experience.
-
Fruit Salad: A vibrant fruit salad of seasonal berries and citrus brightens up the plate, adding a refreshing burst of flavors that balances the richness of the cheesecake.
-
Chai Spice Tea: Enjoy a cozy cup of chai spice tea that complements the warm notes of sweet potato and spices in the bars. The aromatic spices create a lovely contrast.
-
Chocolate Ganache: Drape some warm chocolate ganache on top for a decadent twist. The creamy chocolate brings an indulgent flavor that kids and adults will adore.
-
Vanilla Ice Cream: A scoop of vanilla ice cream is a classic pairing that adds a delightful creaminess, making each bite an indulgent yet refreshing treat.
These pairing options will not only enhance your No-Bake Sweet Potato Cheesecake Bars but also create a memorable dessert experience.
Make Ahead Options
These No-Bake Sweet Potato Cheesecake Bars are perfect for busy home cooks looking to save time! You can prepare the crust and the cheesecake layer up to 24 hours in advance, ensuring a delightful treat whenever you need it. To do so, mix the graham cracker crust and press it into your dish as directed, then make the cheesecake layer and spread it on top. Simply refrigerate them separately, covered, to maintain freshness and prevent sogginess. When you're ready to serve, mix the sweet potato layer and pour it over the chilled cheesecake, then let it set in the fridge for an additional 8 hours. Just like that, you'll have a delicious dessert ready to impress!
Storage Tips for No-Bake Sweet Potato Cheesecake Bars
Fridge: Store leftover bars in an airtight container in the refrigerator for up to 5 days to maintain freshness and creamy texture.
Freezer: For longer storage, wrap individual bars in plastic wrap and place them in a well-sealed freezer bag. They can be frozen for up to 3 months.
Thawing: To enjoy frozen No-Bake Sweet Potato Cheesecake Bars, simply transfer them to the fridge the night before serving to thaw slowly while retaining their creamy goodness.
Reheating: These bars are best served chilled directly from the fridge, preserving their delightful layers and textures.
No-Bake Sweet Potato Cheesecake Bars Variations
Customize these delightful bars to suit your taste and mood, creating an equally delicious experience!
-
Nutty Crust: Replace graham crackers with crushed pecans or almonds for a unique, crunchy base. The nutty flavor adds a lovely depth to each bite.
-
Spicy Twist: Add a pinch of ginger or pumpkin spice to the sweet potato layer for a warm, cozy flavor reminiscent of fall. It enhances the natural sweetness of the sweet potatoes beautifully.
-
Caramel Drizzle: Swirl in some caramel sauce before refrigerating for a decadent treat. The rich sweetness pairs perfectly with the creamy layers.
-
Fruit Infusion: Mix in some pureed mango or banana into the sweet potato layer for a fruity twist that brightens the overall flavor profile.
-
Chocolate Lover's Delight: Fold in mini chocolate chips into the cheesecake layer for a gooey chocolate surprise. Each bite becomes a delightful chocolate experience blended with creaminess.
-
Dairy-Free Option: Substitute cream cheese and whipped topping with plant-based alternatives to make this a dairy-free dessert without sacrificing creaminess.
-
Extra Crunch: Sprinkle chopped pecans or walnuts atop the sweet potato layer before chilling for an added crunch and a nutty finish.
-
Coconut Cream Topping: Instead of traditional whipped cream, use whipped coconut cream to top off your bars, adding a tropical twist that pairs wonderfully with sweet potatoes.
Expert Tips for No-Bake Sweet Potato Cheesecake Bars
- Cool First: Allow the sweet potato mixture to cool before pouring it over the cheesecake layer. This prevents melting and keeps layers distinct.
- Press Firmly: Ensure the crust is tightly pressed into the dish to avoid crumbling when cutting the No-Bake Sweet Potato Cheesecake Bars.
- Check for Smoothness: Use a hand mixer to blend the cheesecake and sweet potato layers until smooth, ensuring no lumps remain for a creamy texture.
- Chill Time: Don't rush the chilling process; letting the bars set for at least 8 hours allows flavors to meld beautifully.
- Customizable Flavors: Feel free to add spices like cinnamon or nutmeg to the sweet potato layer for an autumn twist that enhances the taste.
No-Bake Sweet Potato Cheesecake Bars Recipe FAQs
What's the best way to select sweet potatoes?
Absolutely! Choose firm sweet potatoes without any dark spots or blemishes. Look for those with smooth skin and vibrant color. Smaller to medium-sized sweet potatoes tend to be sweeter and creamier when mashed.
How should I store leftover No-Bake Sweet Potato Cheesecake Bars?
Store any leftover bars in an airtight container in the refrigerator for up to 5 days. If you want to keep them longer, wrap each bar in plastic wrap and place them in a freezer bag. They can be frozen for up to 3 months, just ensure they're well-sealed to prevent freezer burn.
Can I freeze No-Bake Sweet Potato Cheesecake Bars? How do I do it?
Yes, you can freeze these delightful bars! After preparing and cutting them into squares, wrap each piece in plastic wrap individually for well-sealed storage. Then place them in a freezer-safe container or bag. To thaw, simply transfer to the refrigerator the night before you plan to enjoy them; this keeps the texture creamy!
What should I do if my sweet potato layer is too runny?
If your sweet potato layer seems too runny, don't worry! You can cook the mashed sweet potatoes a little longer to evaporate excess moisture. Alternatively, consider adding a small amount of cornstarch mixed with water to thicken it up before pouring it over the cheesecake layer.
Are these bars suitable for people with nut allergies?
Definitely! The basic recipe is nut-free, but always check the labels of any store-bought ingredients. If you're concerned about cross-contamination, opt for nut-free alternatives and avoid adding any nuts as a garnish.
Is there a way to make these bars lower in calories?
Very! Use reduced-fat cream cheese and a sugar substitute in the cheesecake layer to cut down on calories. You can swap regular graham crackers for a whole grain or low-calorie version and consider using coconut oil instead of butter for a healthier crust.
Decadent No-Bake Sweet Potato Cheesecake Bars You’ll Love
Equipment
- Mixing Bowl
- 8x8 or 9x9 Dish
- Ziplock Bag
Ingredients
For the Crust
- 1 package Graham Crackers Substitute with gluten-free crackers if desired.
- ¼ cup Brown Sugar Regular sugar can be used if brown sugar is unavailable.
- ½ cup Butter Coconut oil can be a dairy-free alternative.
For the Cheesecake Layer
- 8 oz Cream Cheese Neufchâtel cheese is a lighter alternative.
- ½ cup Sugar Adjust to taste or switch to a sugar substitute.
- 1 cup Whipped Topping Homemade whipped cream can be used as a substitute.
For the Sweet Potato Layer
- 1 cup Sweet Potatoes Canned sweet potato puree can be used for convenience.
Instructions
Preparation Steps
- Begin by peeling, cubing, and boiling the sweet potatoes for about 30 minutes, or until they become tender. Once done, drain and mash them in a bowl, then set aside to cool.
- Take a ziplock bag and crush the graham crackers inside. In a mixing bowl, combine the crushed crackers with brown sugar and melted butter until it holds together well. Firmly press this mixture into the bottom of an 8x8 or 9x9 dish lined with parchment paper for easy removal.
- In a separate bowl, blend the cream cheese, sugar, and vanilla until smooth. Gently fold in the whipped topping, creating a light and airy mixture. Spread this cheesecake layer evenly over the crust.
- Combine the cooled mashed sweet potatoes with sugar and vanilla, mixing until smooth. Carefully pour this mixture over the cheesecake layer, making sure it is evenly distributed.
- Pop the dish into the refrigerator and allow it to chill for at least 8 hours. Once firm, cut into squares and serve chilled to enjoy the delightfully creamy texture.
Leave a Reply