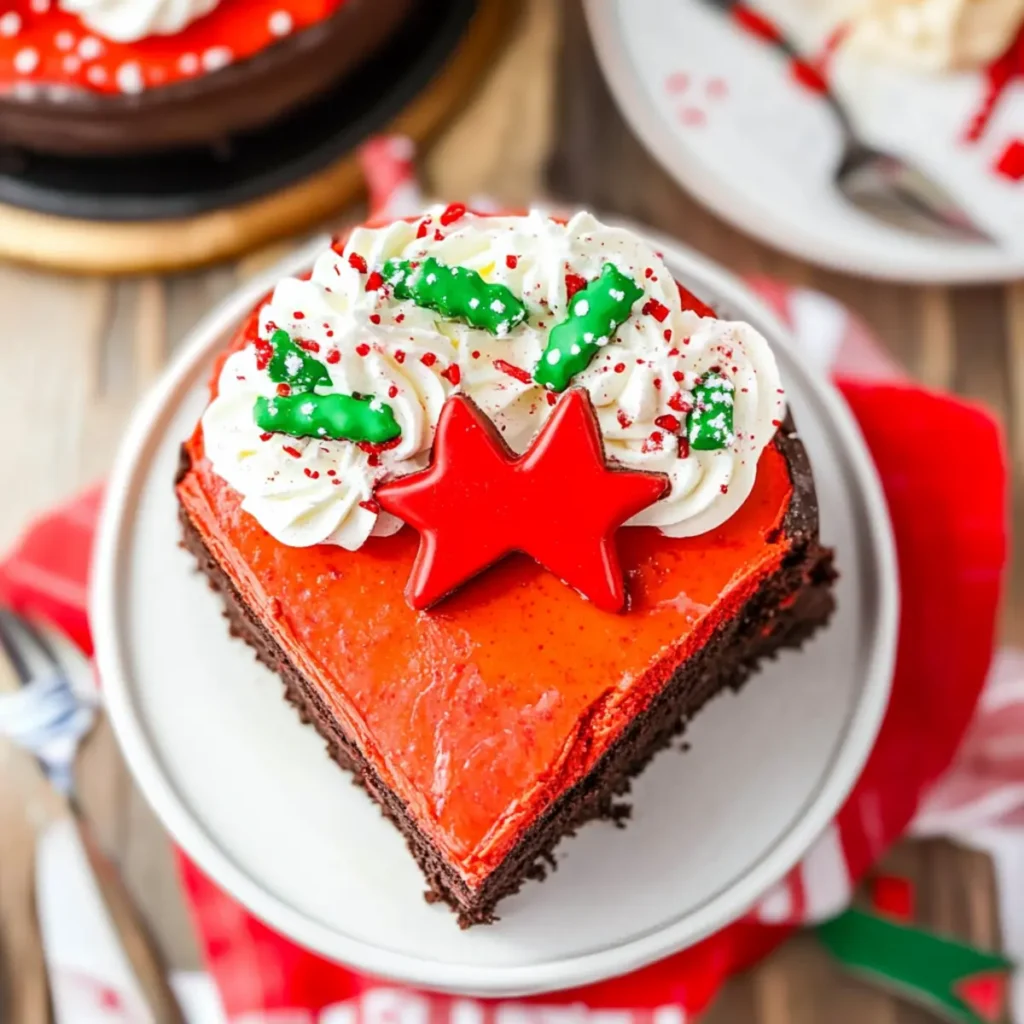
As the holiday season approaches, I find myself searching for that one showstopper dessert that will bring joy and warmth to our festive gatherings. That's when I stumbled upon this No Bake Christmas Red Velvet Cheesecake recipe-a delightful blend of creamy decadence and vibrant colors that could elevate any dessert table. The moment I took my first bite, I was transported by the rich, chocolatey undertones enhanced by the lightness of whipped cream. It's not just about the taste; the beautiful marbled texture, adorned with festive sprinkles, makes every slice a feast for the eyes.
No oven is required, which means less stress and more time spent with loved ones. This cheesecake is simple enough to whip up in advance, leaving you free to enjoy the season's magic without worrying about the details. Perfect for holiday parties or cozy family dinners, this easy Christmas Red Velvet Cheesecake is bound to become a cherished tradition in your home. So let's dive into this recipe and create a stunning dessert that everyone will be raving about!
Why Choose This Easy Christmas Red Velvet Cheesecake?
Irresistible flavor: The combination of rich cream cheese and chocolatey undertones creates a mouthwatering delight.
No baking required: Skip the fuss of the oven and enjoy a simple preparation that saves time.
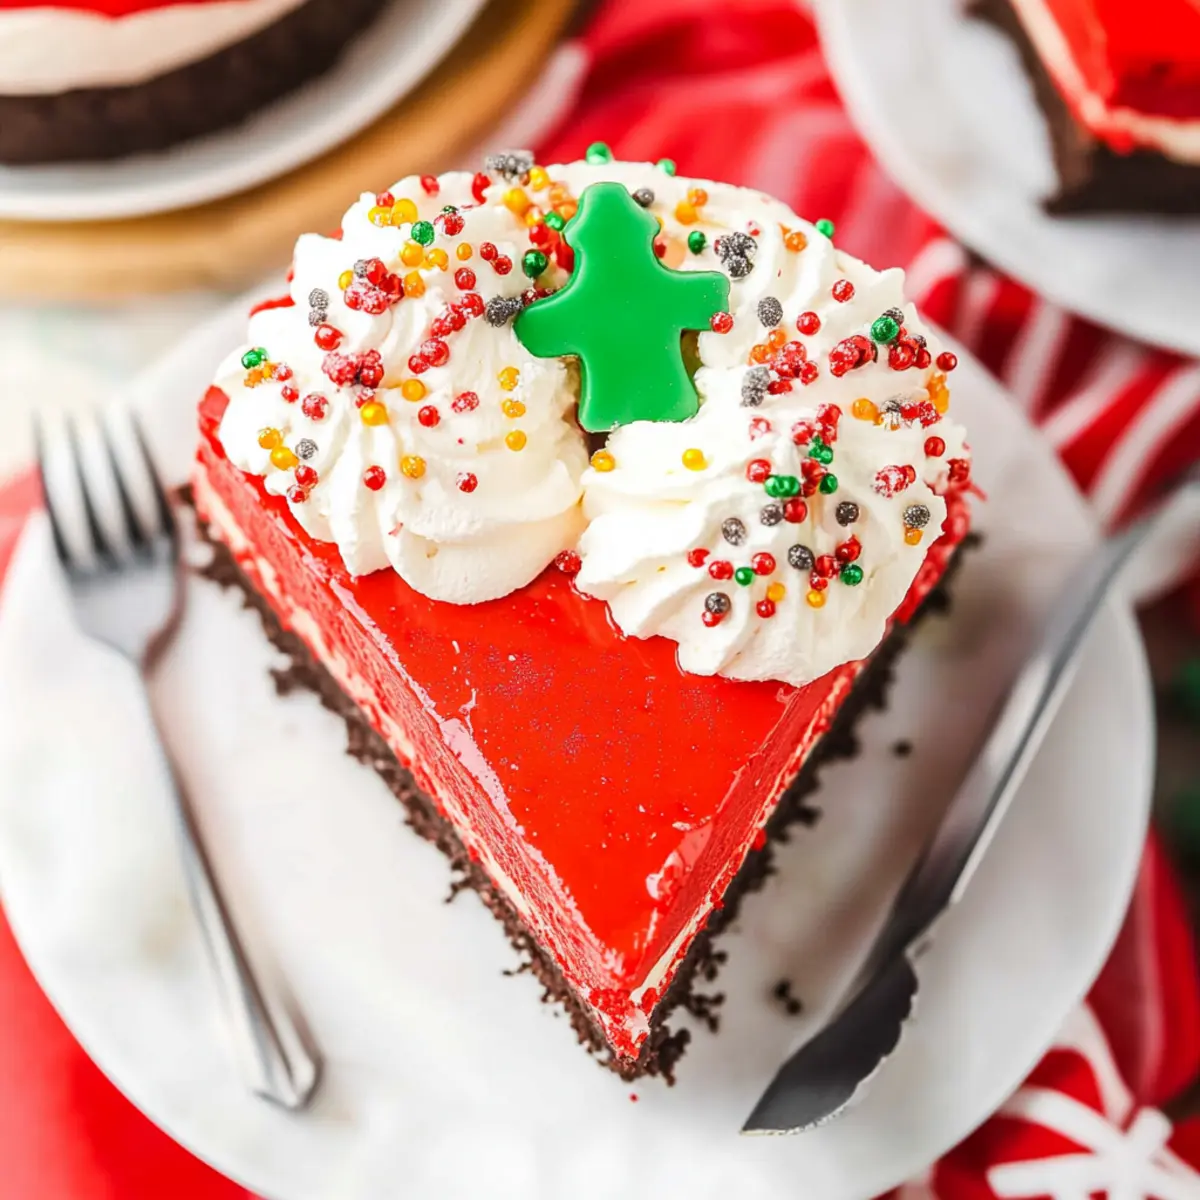
Visually stunning: The marbled red and white layers are a feast for the eyes, perfect for festive presentations.
Make-ahead convenience: Prepare it in advance and chill overnight for flavors that meld beautifully, making it a stress-free option.
Versatile: Easily adaptable for different occasions or even with fun variations, like peppermint or layered cups. Enjoy your holiday gatherings with this easy Christmas Red Velvet Cheesecake that everyone will adore!
Easy Christmas Red Velvet Cheesecake Ingredients
-
For the Crust
-
Oreo cookies - A base of rich chocolaty flavor; use whole cookies, cream included, for the best result.
-
Butter (melted) - Binds the crust together and adds richness; can use margarine if dairy-free for an easy swap.
-
For the Filling
-
Cream cheese (softened) - Delivers the creamy texture and tangy flavor; make sure it's at room temperature for easy blending.
-
White sugar - Sweetens the cheesecake; adjust to taste for more or less sweetness.
-
Heavy whipping cream - Creates an airy, mousse-like consistency when whipped; Cool Whip can be used as a shortcut if needed.
-
Vanilla extract - Enhances overall flavor; try almond or peppermint extract for an interesting twist.
-
Cocoa powder - Essential for the classic red velvet flavor; ensure to use unsweetened cocoa for the best outcome.
-
Red food coloring - Achieves the signature red hue; adjust the amount to get your preferred color depth.
-
For the Decorations
-
Christmas sprinkles - Adds a festive touch to your dessert; swap with seasonal sprinkles for different occasions.
-
Whipped cream (for topping) - Provides lightness and adds visual appeal.
-
Mini Oreos - Perfect for additional crunch and decoration on top; crushed Oreos or chocolate curls can also be used for variety.
Enjoy creating this easy Christmas Red Velvet Cheesecake that's as delightful to look at as it is to eat!
How to Make Easy Christmas Red Velvet Cheesecake
-
Process the crust: Start by blending the Oreo cookies into fine crumbs. Mix in the melted butter until combined, then press this mixture firmly into the bottom of an 8-9 inch springform pan. Chill for about 30 minutes to set.
-
Whip the cream: In a mixing bowl, beat the heavy whipping cream until stiff peaks form. Set this luscious whipped cream aside for later, ensuring it maintains its airy texture.
-
Blend the cream cheese: In another bowl, blend the softened cream cheese and white sugar until smooth and creamy. Add in vanilla extract to enhance the flavor; ensure everything is well mixed.
-
Fold in the whipped cream: Gently fold the whipped cream into the cream cheese mixture until fully combined. This will keep your cheesecake light and fluffy, creating that dreamy texture.
-
Color the filling: Divide the mixture into two separate bowls. In one bowl, mix in cocoa powder and a few drops of red food coloring until you achieve your desired shade. In the second bowl, fold in the festive Christmas sprinkles.
-
Layer and swirl: Take spoonfuls from each colored mixture and alternate them into the chilled crust. Use a knife to gently swirl the mixture, creating a delightful marbled effect.
-
Chill the cheesecake: Cover the cheesecake with plastic wrap and refrigerate for at least 4 hours, or preferably overnight. This helps the flavors meld beautifully and ensures it sets perfectly.
-
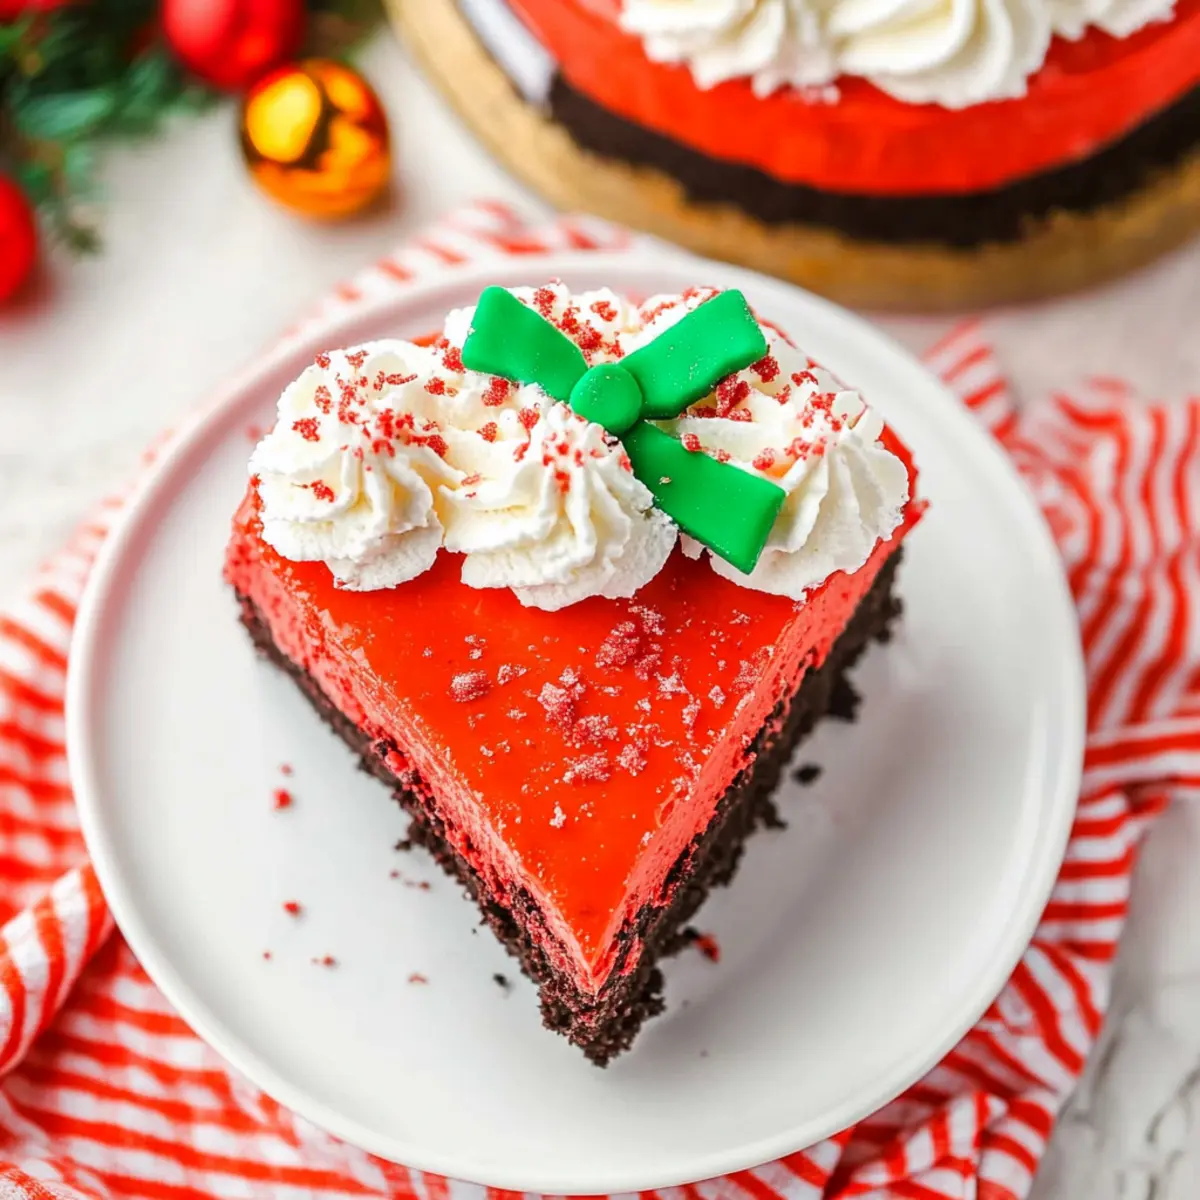
Decorate before serving: Right before serving, top your cheesecake with whipped cream, mini Oreos, and a sprinkle of extra festive sprinkles to make it extra special!
Optional: Add crushed candy canes for a peppermint twist.
Exact quantities are listed in the recipe card below.
Make Ahead Options
This Easy Christmas Red Velvet Cheesecake is perfect for those busy holiday seasons! You can prepare the cheesecake up to 24 hours in advance, allowing the flavors to meld for a creamy treat that's just as delicious when served. Start by making the crust and filling the pan as directed, but hold off on the toppings until just before serving; instead, cover and refrigerate the cheesecake. If you choose to freeze it, ensure it's well-wrapped (without toppings) for up to 2 months, and if needed, simply thaw overnight in the refrigerator. This will save you precious time on the day of your gathering, allowing you to enjoy the festive spirit with your loved ones!
Easy Christmas Red Velvet Cheesecake Variations
Feel free to get creative and make this cheesecake truly your own with delightful twists that enhance flavor and experience.
- Peppermint Twist: Add crushed candy canes to the filling for a refreshing minty flavor that perfectly complements the festive season.
- Oreo Bar Delight: Press the filling into a square pan instead of a springform for bite-sized red velvet Oreo bars that are perfect for parties.
- Layered Cheesecake Cups: Serve the cheesecake in clear cups for individual portions; layer with crushed cookies for extra texture and fun presentation.
- Chocolaty Ganache: Drizzle chocolate ganache over the top before serving for a rich, decadent finish that adds an elegant touch.
- Fruit Fusion: Top with fresh raspberries or strawberries for a burst of fruity flavor that beautifully contrasts with the creaminess of the cheesecake.
- Nutty Crunch: Incorporate toasted pecans or walnuts into the crust for added crunch and a delightful nutty flavor to complement the richness.
- Spiced Pumpkin Layer: Fold in some pumpkin puree and pumpkin spice in one layer for a seasonal twist that celebrates both Christmas and Thanksgiving flavors.
- Low-Sugar Alternative: Use a sugar substitute in the filling to create a lighter version of this cheesecake, without sacrificing the delightful taste.
With these variations, your Easy Christmas Red Velvet Cheesecake will stand out at any gathering, bringing warmth and joy to all who savor it!
Expert Tips for Easy Christmas Red Velvet Cheesecake
- Soften Your Cheese: Make sure the cream cheese is fully softened (at room temperature) to avoid any lumps in your creamy filling.
- Stiff Peaks Matter: Whip heavy cream until stiff peaks form to ensure your cheesecake achieves that light, airy mousse-like texture.
- Chill for Success: Refrigerate your cheesecake for at least 4 hours, ideally overnight, to meld flavors and set properly for the best easy Christmas Red Velvet Cheesecake experience.
- Decorate Last Minute: Add toppings like whipped cream and sprinkles just before serving to keep them fresh and visually appealing.
- Don't Overmix: When combining the mixes for the marbled effect, be gentle to avoid losing the beautiful swirls; you want it to look festive!
What to Serve with No Bake Christmas Red Velvet Cheesecake?
Create a delightful festive feast around this luscious dessert, pairing flavors that enhance every bite.
- Hot Cocoa: Rich and chocolatey, a warm cup of cocoa complements the creamy texture of the cheesecake beautifully.
- Peppermint Bark: Offer this sweet treat alongside to add a refreshing minty twist that balances the richness of the cheesecake.
- Spiced Mulled Wine: The warm spices lend a cozy vibe, making it a perfect drink for holiday gatherings, pairing beautifully with your cheesecake.
- Fresh Berries: A medley of strawberries and raspberries adds a tart sweetness, providing a fresh contrast to the creamy dessert.
- Gingerbread Cookies: These spiced cookies bring a nostalgic touch to the dessert table, enhancing the holiday spirit in every bite.
- Festive Fruit Salad: Mixed fruits with citrus notes help cleanse the palate, ensuring every taste of cheesecake remains delightful.
- Vanilla Ice Cream: A scoop of creamy vanilla ice cream alongside your cheesecake adds an extra layer of indulgence and cold contrast.
- Nutty Biscotti: Perfect for a crunchy texture, nutty biscotti pairs well with cheesecake, creating a fun, textured experience.
Let your dessert shine with these thoughtful accompaniments that ensure every holiday gathering feels special!
Storage Tips for Easy Christmas Red Velvet Cheesecake
- Fridge: Store the cheesecake covered in the refrigerator for up to 4 days to maintain its freshness and creamy texture.
- Freezer: For longer storage, the cheesecake can be frozen (without toppings) for up to 2 months. Ensure it's wrapped tightly to avoid freezer burn.
- Thawing: When ready to enjoy, thaw the cheesecake overnight in the refrigerator for the best texture and flavor.
- Reheating: There's no need to reheat, as this easy Christmas Red Velvet Cheesecake is served chilled. Add toppings just before serving for an inviting presentation.
Easy Christmas Red Velvet Cheesecake Recipe FAQs
How do I choose the best Oreo cookies for the crust?
Absolutely! For the best results, I recommend using whole Oreo cookies, cream included. This will give your crust a rich chocolaty flavor that complements the creamy filling beautifully. Look for freshly packaged cookies to ensure maximum taste and texture.
How should I store the cheesecake, and how long will it last?
You can store your Easy Christmas Red Velvet Cheesecake in the refrigerator, covered with plastic wrap or a lid, for up to 4 days. This keeps it fresh and maintains the creamy texture. Just remember, it's best enjoyed chilled, so take it out right before serving!
Can I freeze the cheesecake, and how do I do it?
Very! This cheesecake can be frozen for up to 2 months without the toppings. Here's how:
- Once set, carefully remove it from the springform pan.
- Wrap the cheesecake tightly in plastic wrap, then in aluminum foil to prevent freezer burn.
- Store it in an airtight container if available.
To thaw, simply place it in the refrigerator overnight before you're ready to serve.
What if my cream cheese is lumpy?
No worries! If you find lumps in your cream cheese mixture, it usually means the cream cheese wasn't softened enough. Ensure it's at room temperature before mixing. If lumps appear after blending, try vigorous mixing or pass the mixture through a sieve to create a smooth filling.
Is there a way to make this cheesecake dairy-free?
Yes! To make a dairy-free Easy Christmas Red Velvet Cheesecake, substitute the cream cheese with a dairy-free cream cheese alternative and use lactose-free heavy cream. You can even try coconut cream for a slight twist! Just ensure your Oreos are dairy-free as well-most are, but it's always good to check.
Can I use other types of food coloring for a different color?
Absolutely! If you want to switch up the color, feel free to use natural food colorings or gel food colorings. Adjust the amount based on the desired hue. For a festive twist, try using green for a holiday vibe or even mixing colors for a unique marbling effect!
These FAQs should help you create the perfect festive cheesecake! Enjoy every bite of your Easy Christmas Red Velvet Cheesecake!

Irresistibly Easy Christmas Red Velvet Cheesecake Recipe
Equipment
- mixing bowls
- Springform Pan
- electric mixer
- spatula
Ingredients
Crust
- 24 cookies Oreo cookies Use whole cookies, cream included.
- ½ cup Butter (melted) Can use margarine if dairy-free.
Filling
- 16 ounces Cream cheese (softened) Ensure it's at room temperature.
- ¾ cup White sugar Adjust to taste.
- 1 cup Heavy whipping cream Cool Whip can be used as a shortcut.
- 1 teaspoon Vanilla extract Almond or peppermint extract can be used.
- 2 tablespoons Cocoa powder Use unsweetened for best results.
- 1 tablespoon Red food coloring Adjust for desired color depth.
Decorations
- ¼ cup Christmas sprinkles Add festive touch.
- 1 cup Whipped cream (for topping) For lightness and visual appeal.
- 10 pieces Mini Oreos For additional crunch.
Instructions
Preparation
- Blend the Oreo cookies into fine crumbs. Mix in the melted butter until combined, then press into the bottom of an 8-9 inch springform pan. Chill for about 30 minutes to set.
- In a mixing bowl, beat the heavy whipping cream until stiff peaks form and set aside.
- In another bowl, blend the softened cream cheese and white sugar until smooth. Add in the vanilla extract and mix well.
- Gently fold the whipped cream into the cream cheese mixture until fully combined.
- Divide the mixture into two bowls. In one, mix cocoa powder and red food coloring. In the second, fold in Christmas sprinkles.
- Take spoonfuls from each bowl and alternate into the chilled crust. Use a knife to swirl together.
- Cover with plastic wrap and refrigerate for at least 4 hours or overnight.
- Before serving, top with whipped cream, mini Oreos, and sprinkles.
Leave a Reply