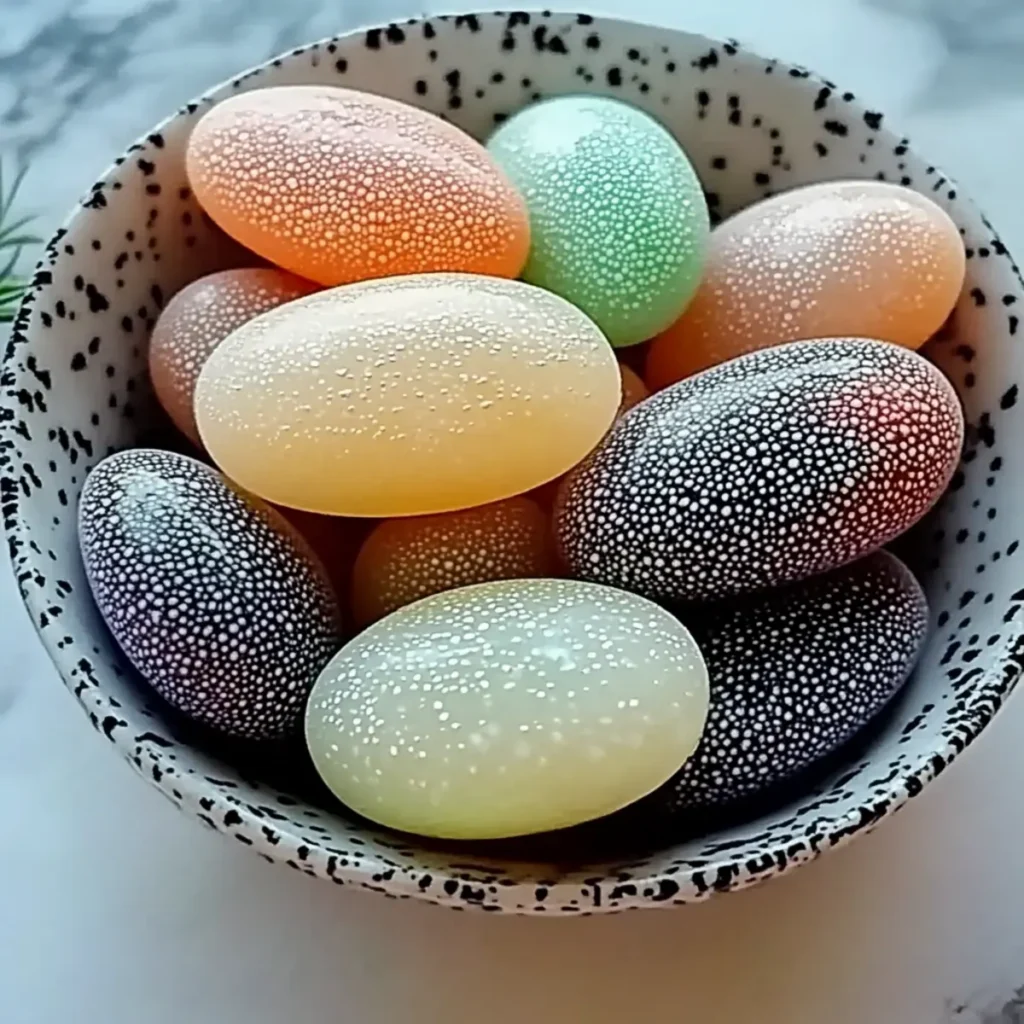
Have you ever wished you could fill your home with delightful fragrances without relying on synthetic air fresheners? When I first started exploring natural alternatives, I stumbled upon the idea of DIY Essential Oil Stones, and it's been a game-changer for me! Whipping up these beautiful, aromatic stones is not only easy-taking just 15 minutes-but it also allows me to customize scents that perfectly match my mood and the season.
Picture this: the warm and inviting scent of lavender wafting through your living space or the invigorating aroma of peppermint filling the air. These eco-friendly air fresheners are crafted from simple ingredients you likely already have in your pantry. Plus, they add a charming touch to any corner of your home, making them a hit whether in the living room, closet, or even as thoughtful gifts. Join me in creating these fragrant, natural stones that will uplift your home and let your creativity shine!
DIY Aroma Stones: Why Make Your Own?
Customizable scents allow you to mix and match essential oils to create the perfect fragrance for any mood or season. Eco-friendly materials mean that you can enjoy aromatic bliss without the guilt of using synthetic products. Quick and easy to prepare, these stones take just 15 minutes to whip up! Visually appealing, they add a lovely touch to your decor, brightening any space. And don't forget-these make for thoughtful gifts that showcase your creativity! For a delightful twist, try experimenting with variations in texture or scent.
DIY Aroma Stones Ingredients
• Discover the simple components needed to craft your own fragrant and beautiful natural air fresheners at home!
For the Basic Mixture
- Baking Soda - Absorbs odors and holds fragrance well.
- Cornstarch - Binds ingredients for a smooth texture, providing a silky finish.
- Warm Water - Activates the mixture into a moldable paste; use just the right amount for desired consistency.
For the Fragrance
- Essential Oil - Adds delightful scents such as lavender, lemon, peppermint, or eucalyptus; blend for a bespoke aroma.
- Natural Coloring (optional) - Enhances visual appeal; use mica powder or food coloring while adjusting the amount based on the desired intensity.
How to Make DIY Aroma Stones
-
Mix Ingredients: In a mixing bowl, combine ½ cup of baking soda and ½ cup of cornstarch. This duo forms the base of your aroma stones, helping to absorb odors effectively.
-
Add Water: Gradually pour in ¼ cup of warm water, stirring continuously to form a smooth paste. Make sure the mixture is moldable but not too runny-this is a crucial step!
-
Incorporate Fragrance: Stir in 15-30 drops of your chosen essential oil, mixing well to ensure an even distribution of fragrance. Let your creativity flow; choose your scent based on your mood or the season!
-
Color It Up: If you desire, add a few drops of natural coloring to the mixture and stir until the color is uniform. This step is optional but adds a lovely visual touch to your stones.
-
Mold Them: Spoon your mixture into silicone molds or any shaped container you like. Pat down the mixture gently to ensure it takes shape well.
-
Allow to Dry: Let the stones dry for 24 hours at room temperature. Keep an eye on humidity, as it may affect drying time; using a fan can help.
-
Unmold and Store: Once dry, carefully remove the stones from their molds. Store your beautiful aroma stones in an airtight container and refresh their scent with more essential oil as needed.
Optional: For a fresher scent, place them near air vents or in enclosed spaces for an uplifting aroma.
Exact quantities are listed in the recipe card below.
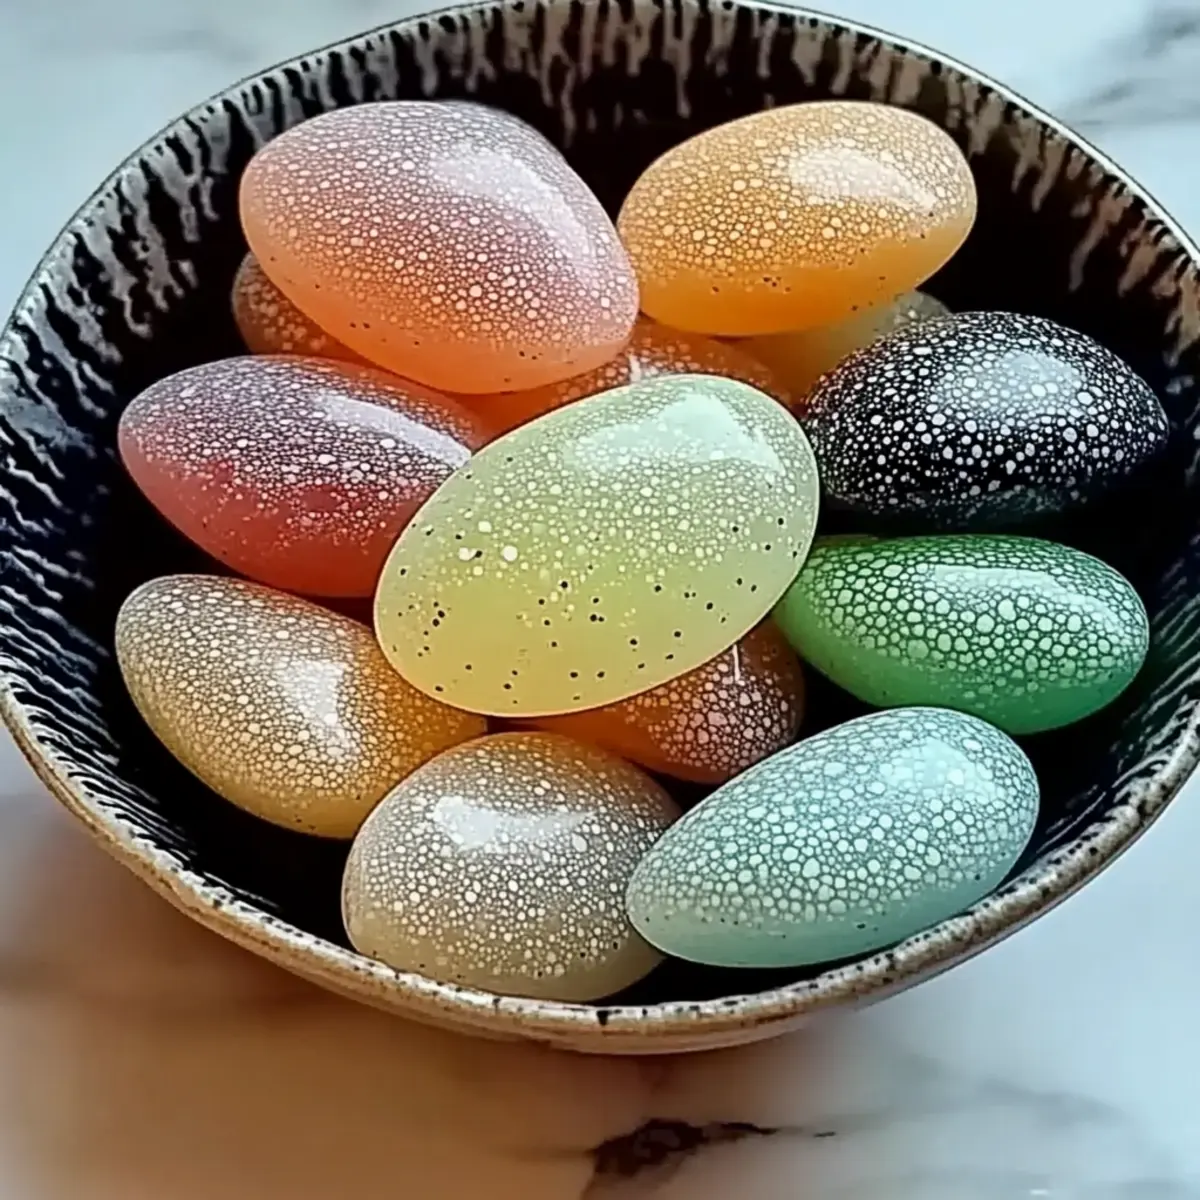
DIY Aroma Stones: Customization Ideas
Feel free to get creative with this recipe by exploring different scents and finishes to make your aroma stones truly your own!
- Scent Blend: Combine different essential oils like lemon and eucalyptus for a refreshing citrusy scent that energizes your space.
- Color Variation: Use different natural colorings for each batch, creating a visually stunning display that adds charm to any room.
- Texture Twist: Adjust the baking soda to cornstarch ratio for a firmer or softer stone-experiment until you find your perfect texture!
- Herbal Infusion: Add dried herbs like lavender flowers or mint leaves to your mixture for an extra touch of fragrance and texture.
- Seasonal Scents: Create stones that match the seasons; think cinnamon and clove for winter or citrus and peppermint for summer.
- Sensory Addition: For a unique touch, incorporate a few drops of vanilla extract to deepen the sweetness of your aroma blend.
- Heat Level: Enhance certain fragrances with spices like peppermint oil for a more invigorating scent or ginger for a cozy, warm aroma.
- Gift-Worthy Designs: Shape your stones into fun forms like hearts or stars, perfect for gifting to friends and family who appreciate personalized touches!
What to Serve with DIY Essential Oil Stones?
Transform your space into a fragrant oasis with these delightful creations that can complement your home's ambiance in unexpected ways.
- Fresh Flowers: A lively bouquet adds visual beauty and natural scents that blend harmoniously with the aroma stones.
- Scented Candles: Pair your stones with flickering candles for a warm, inviting atmosphere, creating a multi-layered sensory experience.
- Essential Oil Diffuser: Use an essential oil diffuser in the same room to amplify the fragrance while promoting relaxation and calm.
- Herbal Tea: Sip on a cup of soothing chamomile or invigorating peppermint tea while enjoying the enveloping scents around you.
- Incense Sticks: For those who love deep, resonating fragrances, incense sticks can provide an earthy complement to the sweetness of the aroma stones.
- Aromatic Sachets: Tuck handmade sachets in drawers or closets alongside your stones to create layered fragrances that invite surprise.
- Gratitude Journal: Settle down with a journal reflecting on the day's blessings; the serene atmosphere created by scents can enhance your writing experience.
- Meditation Playlist: Create a calming ambiance by playing gentle music or nature sounds, encouraging relaxation in conjunction with your DIY aroma stones.
Expert Tips for DIY Aroma Stones
-
Humidity Matters: High humidity can slow drying time. Consider using a fan or dehumidifier to ensure your DIY aroma stones dry properly.
-
Use the Right Mold: Make sure molds are well-coated or lined for easy removal. Silicone molds work best for ensuring a smooth exit.
-
Fragrance Strength: Adjust the number of essential oil drops based on your preference. Start with fewer drops and add more for a stronger scent to avoid overwhelming aromas.
-
Choose Quality Oils: Opt for high-quality essential oils to really enhance the scent profile of your DIY aroma stones. Synthetic oils may not deliver the desired fragrance.
-
Experiment with Ratios: For varied textures, tweak the baking soda and cornstarch ratios. This can lead to different firmness and absorption levels, making your DIY aroma stones unique.
-
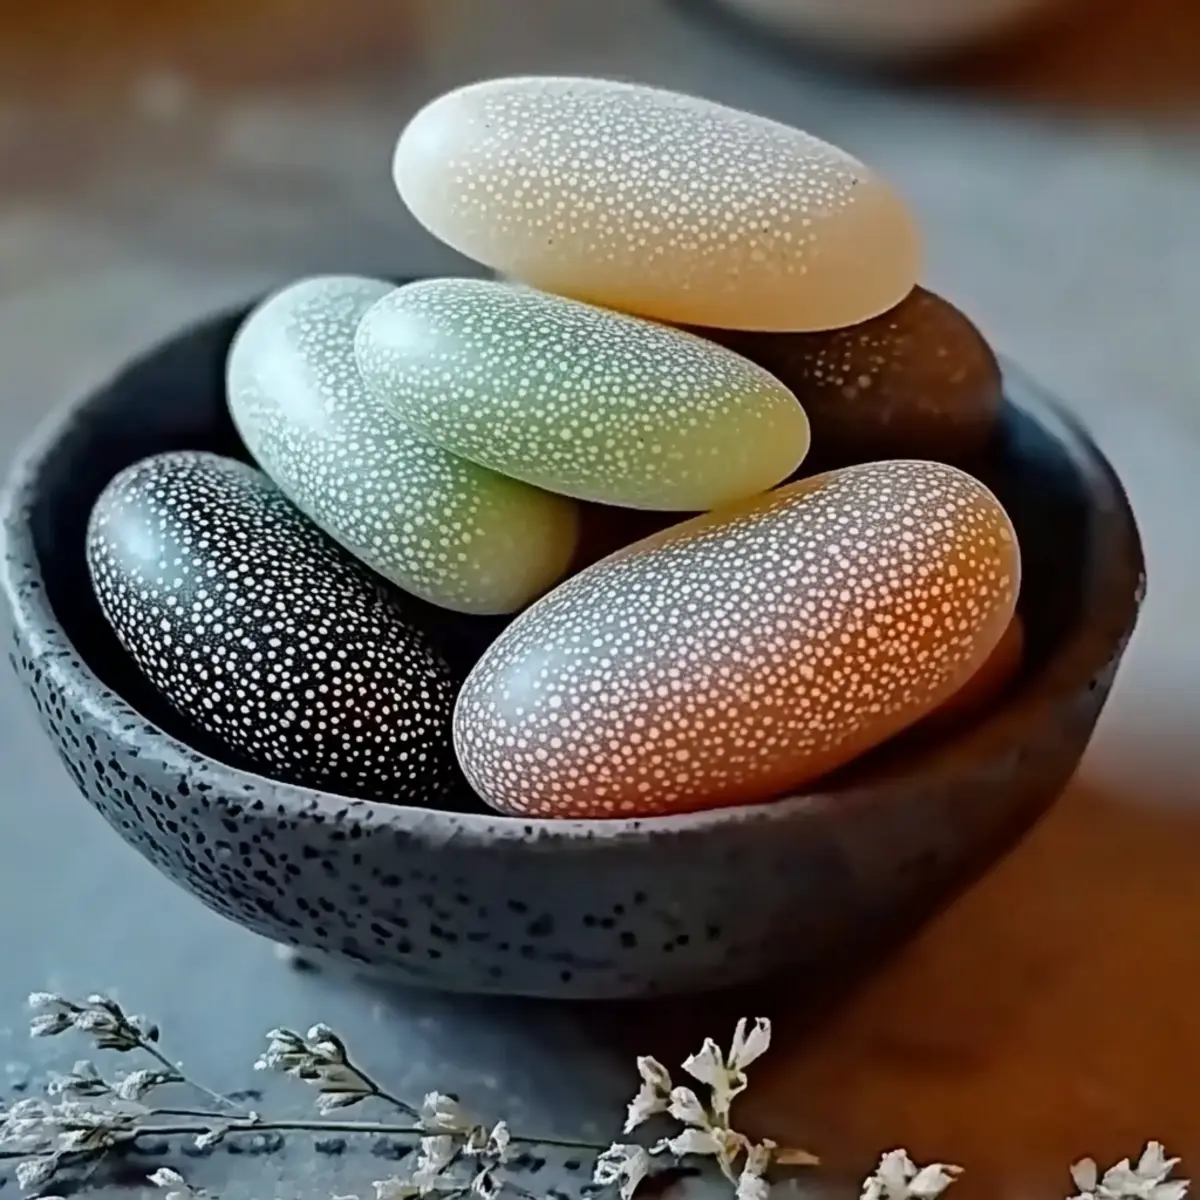
Gift Idea: These stones not only freshen your space but also make delightful personalized gifts. Package them creatively to showcase your thoughtful craftsmanship!
How to Store and Freeze DIY Aroma Stones
Airtight Container: Keep unused DIY Aroma Stones in an airtight container to maintain their fragrance and texture for up to 6 months.
Refreshing Scents: To revitalize their scent, add a few drops of your favorite essential oil every couple of weeks, enhancing the aroma experience.
Avoid Moisture: Store the container in a cool, dry place, away from direct sunlight and humidity, which can affect their quality.
Reheating Tip: If the stones lose their fragrance, gently warm them near a heat source for a few minutes to help release essential oils again.
Make Ahead Options
These DIY Essential Oil Stones are perfect for busy home cooks looking to save time without sacrificing aroma and charm! You can prepare the mixture up to 24 hours in advance. Simply follow the steps to combine baking soda, cornstarch, and warm water, incorporating essential oils and color as desired. Then, spoon the mixture into molds and let it dry. For best results, store the uncured stones in a cool, dry place to maintain their quality. When you're ready to enjoy your beautiful creations, simply remove them from molds and store them in an airtight container. These delightful DIY Essential Oil Stones will be just as fragrant and visually appealing, providing an eco-friendly alternative for freshening your home!

DIY Essential Oil Stones Recipe FAQs
What essential oils work best for DIY Aroma Stones?
Absolutely! You can use any essential oils you love, such as lavender for calming, lemon for freshness, peppermint for invigoration, or eucalyptus for a spa-like scent. Feel free to mix and match to create a unique fragrance blend that suits your mood or the season!
How long do DIY Aroma Stones last?
Homemade aroma stones can maintain their delightful scent for up to 6 months if stored properly in an airtight container. To keep them fresh, refresh their aroma with some drops of essential oil every couple of weeks to ensure they remain fragrant.
Can I freeze DIY Aroma Stones?
Yes, you can freeze your DIY aroma stones to preserve their fragrance! First, wrap each stone in plastic wrap, place them in an airtight container or freezer bag, and store them in the freezer for up to 3 months. When you're ready to use them again, simply allow them to thaw at room temperature, and their scent will come back to life!
What should I do if my aroma stones are too crumbly?
If you find your stones are crumbly instead of firm, it's likely that too much cornstarch was used or not enough water. To fix this, try a quick remix by adding a little warm water to the mixture, stirring until a paste forms again. Then, remold and let them dry properly.
How should I store unused aroma stones?
Store unused DIY aroma stones in a cool, dry place away from direct sunlight. An airtight container works best to keep moisture out and preserve fragrance. This way, they can last for up to 6 months while retaining their lovely scent.
Are DIY Aroma Stones safe for pets?
It's important to note that while most essential oils are safe for humans, some can be harmful to pets, particularly cats and dogs. Always research the specific oils you plan to use and consult your veterinarian if unsure. Generally, it's best to keep the stones out of reach of pets, just to be safe.
Create Gorgeous DIY Aroma Stones: Easy Natural Air Fresheners
Equipment
- Mixing Bowl
- silicone molds
Ingredients
For the Basic Mixture
- ½ cup baking soda absorbs odors and holds fragrance well
- ½ cup cornstarch binds ingredients for a smooth texture
- ¼ cup warm water activates the mixture into a moldable paste
For the Fragrance
- 15-30 drops essential oil choose scents like lavender, lemon, peppermint, or eucalyptus
- natural coloring optional, use mica powder or food coloring
Instructions
How to Make DIY Aroma Stones
- In a mixing bowl, combine ½ cup of baking soda and ½ cup of cornstarch.
- Gradually pour in ¼ cup of warm water, stirring continuously to form a smooth paste.
- Stir in 15-30 drops of your chosen essential oil, mixing well.
- If desired, add a few drops of natural coloring and stir until the color is uniform.
- Spoon the mixture into silicone molds and pat down gently.
- Let the stones dry for 24 hours at room temperature.
- Once dry, carefully remove the stones from their molds and store in an airtight container.


Leave a Reply