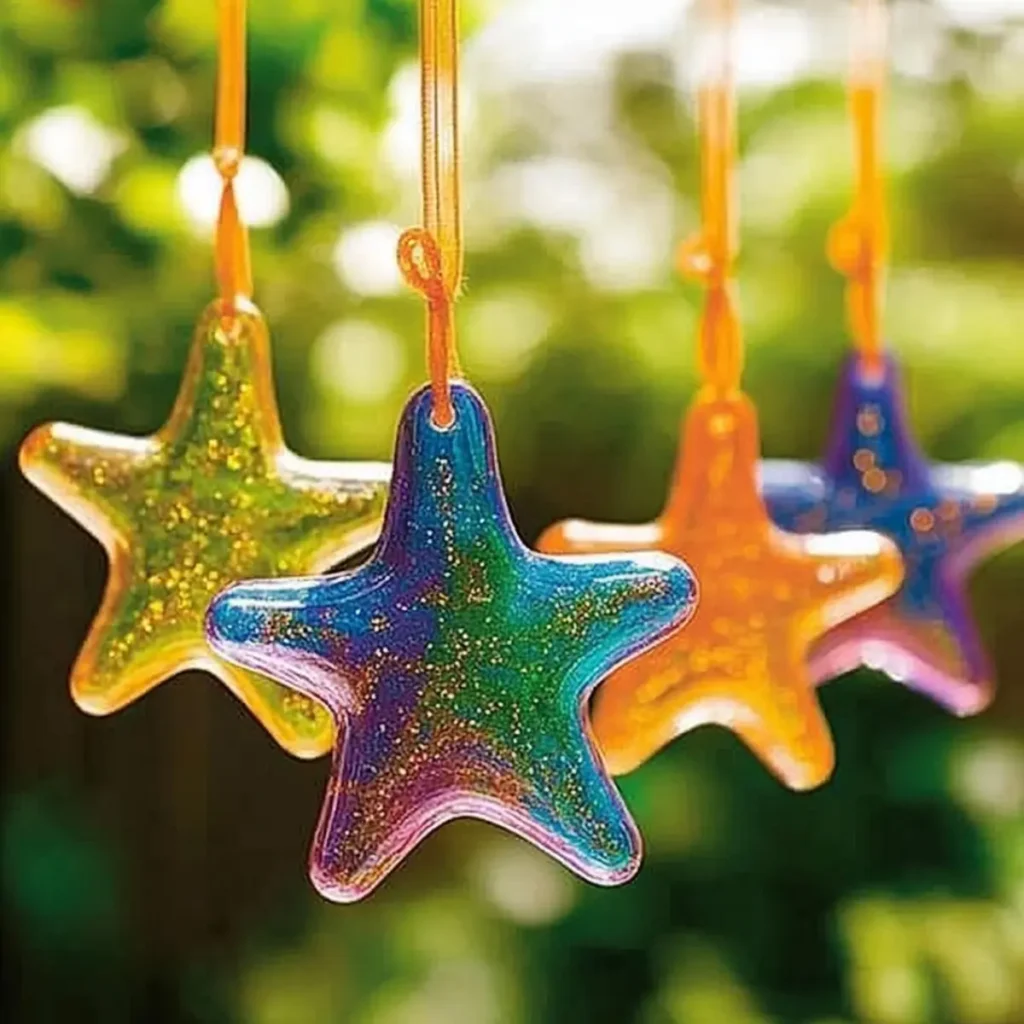
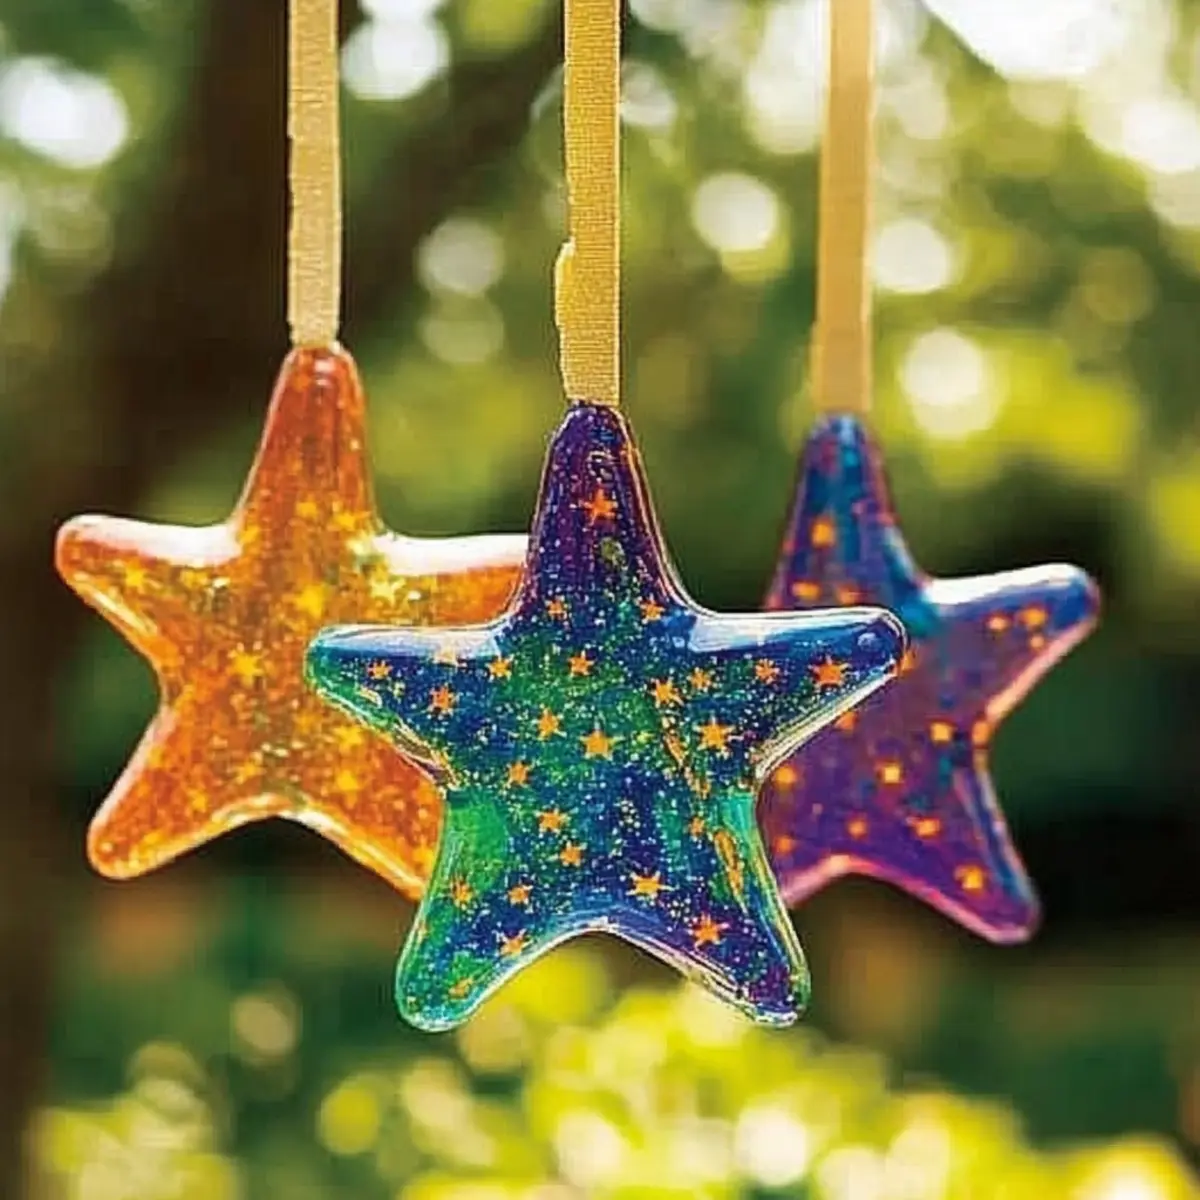
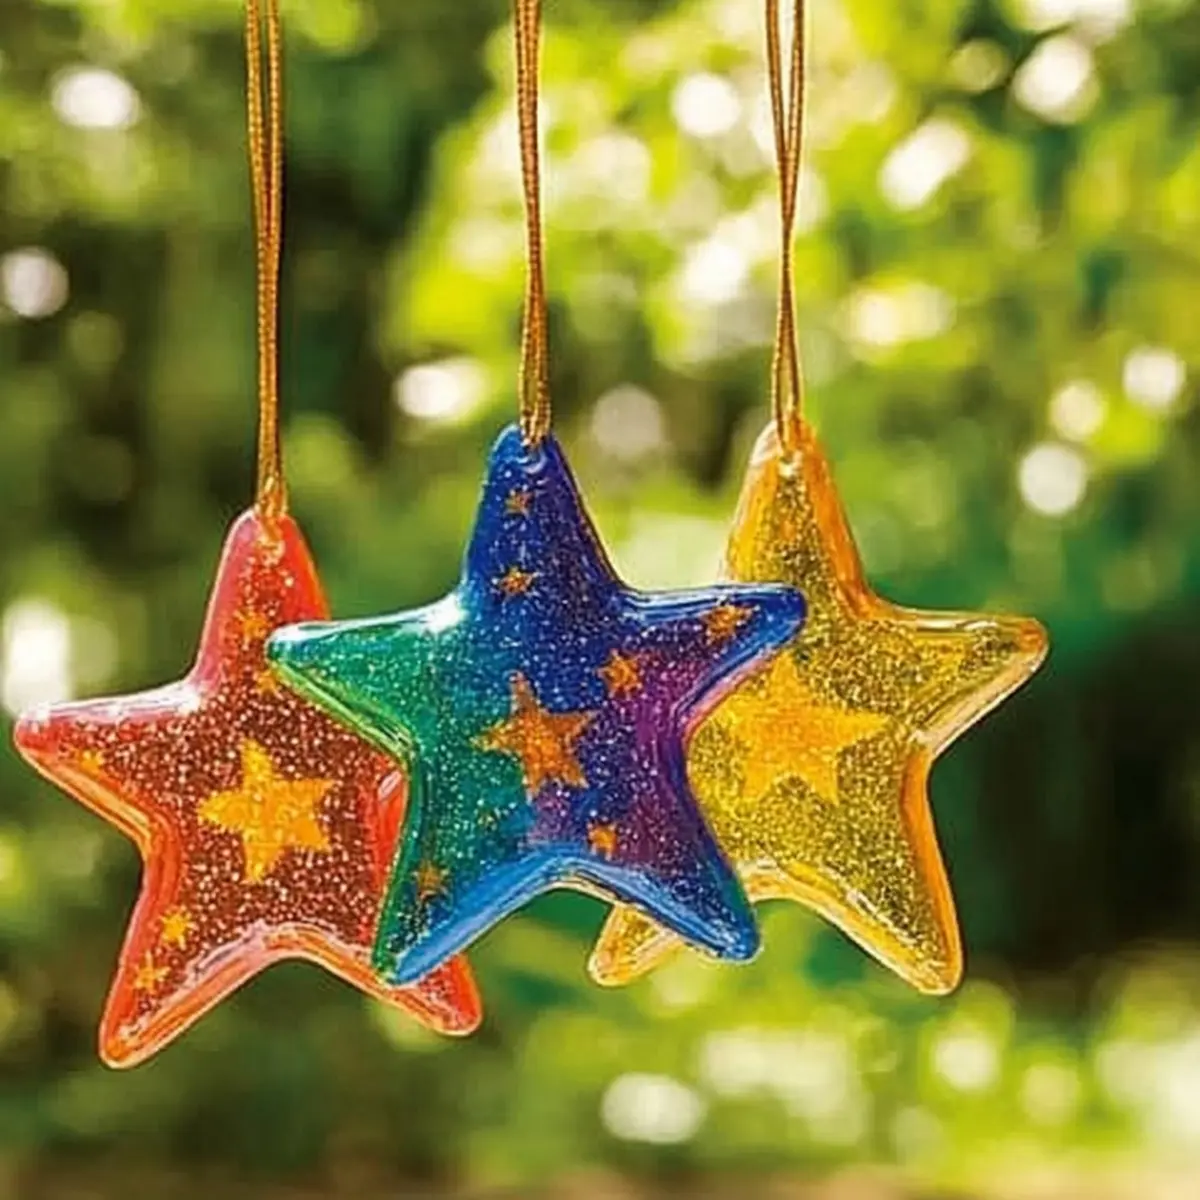
There's nothing quite like the excitement of turning everyday items into colorful treasures, especially when it comes to keeping little hands busy! Picture this: a cozy afternoon filled with laughter and creativity as you and your kids transform old, worn-out crayons into vibrant crayon star suncatchers that dance with light. These sparkling decorations not only add a cheerful touch to your windows but also teach the invaluable concept of upcycling.
With just a few simple supplies and a little bit of imagination, you can whip up this delightful DIY project in no time. From swirling shades to playful shapes, each suncatcher is a unique masterpiece waiting to catch the sunlight. So, gather those forgotten crayons and let's bring some color into your home while making lasting memories together!
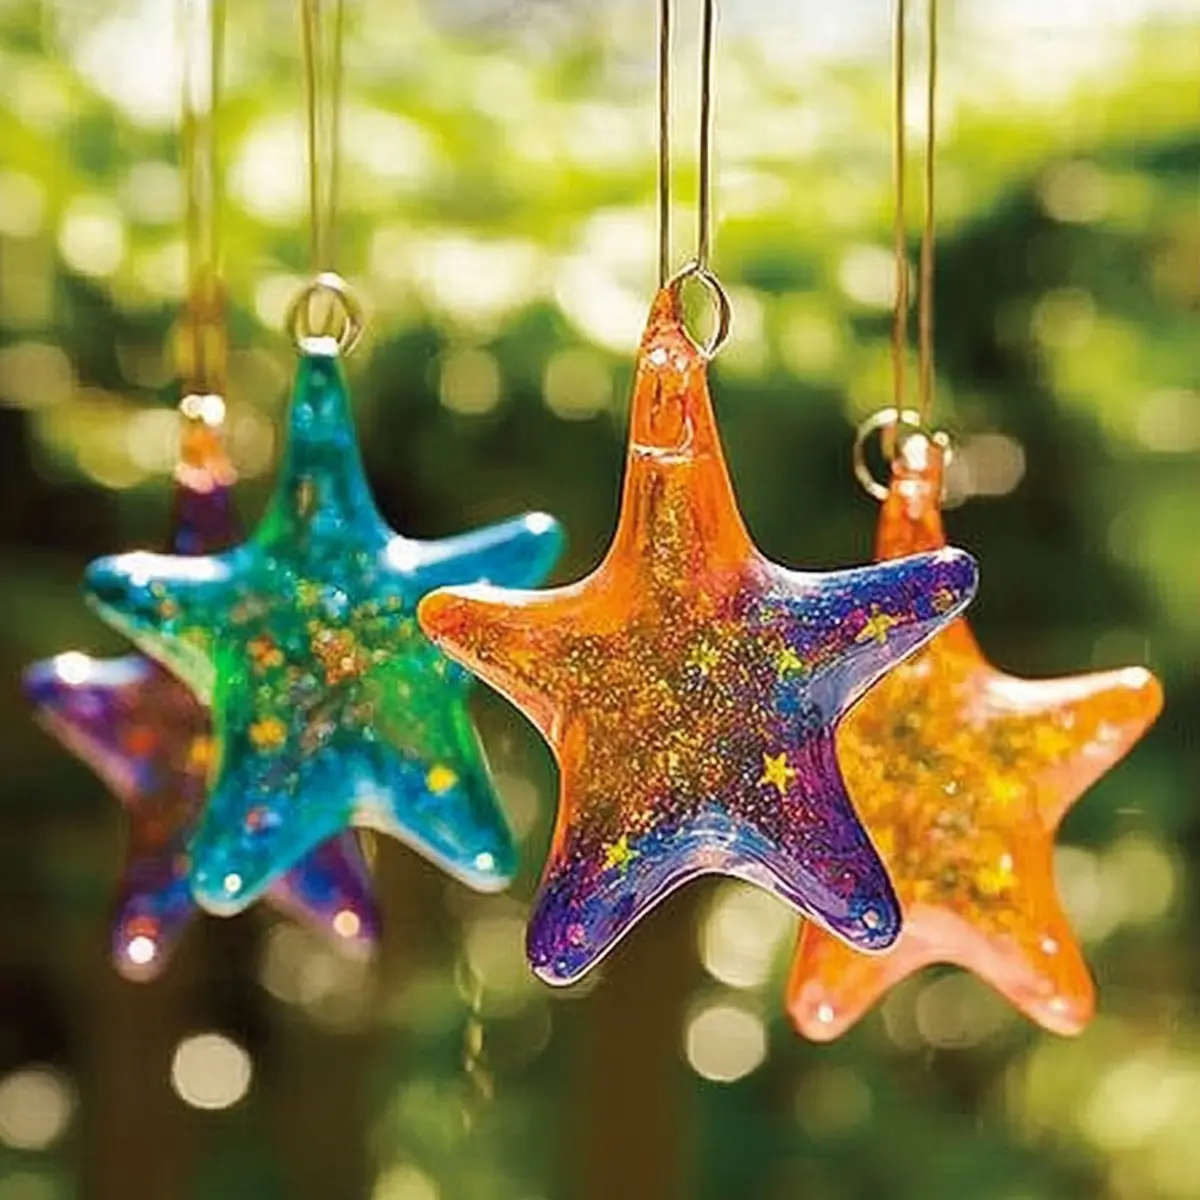
Why Crayon Star Suncatchers Will Delight You?
Creativity Unleashed: Embrace the artistic potential of your kids as they transform old crayons into stunning suncatchers. Joyful Memories: Spend quality time together, cultivating laughter and imagination. Vibrant Decor: These colorful creations brighten any room, adding a playful touch to your windows. Quick & Easy: With just a few materials, you can complete this project in no time. Eco-Friendly Fun: Teach valuable lessons on recycling while having a blast. Dive into your craft stash and explore more exciting projects like our DIY Upcycled Crafts for endless creative inspiration!
Crayon Star Suncatchers Ingredients
• Gather your supplies to create colorful suncatchers that will brighten your windows!
For the Suncatcher
- Old Crayons - Use any variety for bright colors; this is the heart of your project!
- Wax Paper - Essential for holding the melted crayon design; it keeps your masterpiece intact.
- Parchment Paper - Protects your iron and work surface from messy crayon residue.
For Shaping & Hanging
- Star Stencil or Cookie Cutter - Choose your favorite shape to cut out the melted crayons and create beautiful designs.
- Baker's Twine or String - Perfect for hanging your crayon star suncatchers for all to admire.
- Hole Punch - Use this handy tool to create holes for the string, allowing easy hanging.
Tools Required
- Manual Sharpener or Knife - For making fine crayon shavings; supervision is essential to keep kids safe.
- Iron - Set it on low heat to melt the crayon shavings beautifully without burning them.
Now that you have all your ingredients, you're ready to unleash creativity and make dazzling crayon star suncatchers that shine in the sunlight! ☀️🌈
How to Make Crayon Star Suncatchers
-
Preheat the Iron: Set your iron to low heat and let it warm up. This step is crucial as it prepares for melting the crayons smoothly without scorching them.
-
Create Crayon Shavings: Using a manual sharpener or knife, carefully make fine shavings from your old crayons. Mix and match colors to create your desired vibrant shades!
-
Layer Crayon Shavings: Place a good amount of crayon shavings between two pieces of wax paper. Gently press them together, ensuring they're distributed evenly for a beautiful melted effect.
-
Melt the Crayons: Press the warm iron over the wax paper for a few seconds. You'll see the colors melt together, creating a lovely mix! Peek underneath to check when the crayons are fully melted.
-
Cut Out Shapes: Once slightly cooled but still pliable, remove the top layer of wax paper and use a star stencil or cookie cutter to cut out fun shapes from the melted crayons.
-
Prepare for Hanging: Use a hole punch to create a small hole at the top of each star shape. Thread your baker's twine or string through the hole to create a way to hang your suncatcher.
Optional: Add a dab of clear glue for extra shimmer on your suncatchers.
Exact quantities are listed in the recipe card below.
How to Store and Freeze Crayon Star Suncatchers
-
Room Temperature: Keep your crayon star suncatchers in a cool, dry place. They can last up to 2 weeks as long as they are kept away from direct sunlight to avoid melting.
-
Fridge: If you want to prolong their life, consider placing them in the fridge for a short time, where they can stay fresh for about 1 month. Just ensure they're wrapped to prevent moisture buildup.
-
Freezer: While it's not common to freeze suncatchers, if you choose to make them in bulk, you can freeze them for up to 3 months. Stack them between sheets of wax paper to prevent sticking.
-
Reheating & Display: If your suncatchers lose their shape, warm them gently with a hairdryer to reshape. Always ensure they are fully cooled before hanging them again! The crayon star suncatchers are a delightful way to brighten windows and teach kids about recycling.
Make Ahead Options
These Crayon Star Suncatchers are perfect for busy home cooks looking to make the most of their crafting time! You can prepare the crayon shavings up to 3 days in advance and store them in an airtight container to keep them fresh and vibrant. To maintain their color, keep the container in a cool, dry place away from direct sunlight. When you're ready to craft, simply layer the shavings between wax paper and melt them as directed. This way, the actual assembly of the suncatchers becomes a fun, quick project, allowing your kids to create colorful masterpieces in no time! Enjoy the bonus of less time spent on crafting during busy weeks.
What to Serve with Crayon Star Suncatchers?
Create a delightful atmosphere filled with color and creativity as you showcase your whimsical suncatchers!
-
Bright Fruit Skewers:
Colorful and nutritious, these eye-catching snacks are perfect for complementing your vibrant suncatchers while keeping energy levels high. -
Playful Rainbow Veggie Platter:
A selection of fresh veggies accompanied by a tangy dip offers a refreshing, crunchy contrast to your artistic afternoon. -
Craft-Time Lemonade:
Nothing says summer like a glass of chilled lemonade. This sweet-tart drink perfectly pairs with the fun you're having. -
Mini Cupcakes:
Tiny, decorated cupcakes add a touch of sweetness to your crafting session; their pastel hues are like edible suncatchers! -
Savory Cheese and Crackers:
A platter of assorted cheeses and crunchy crackers provides a satisfying savory balance amid all the sweet delights. -
Art-Inspired Cookies:
Bake cookies in a variety of fun shapes and decorate them with colorful icing; they'll add to the whimsical theme and creativity of the day. -
Craft-Themed Party Punch:
Mix sparkling water with colorful fruit juices for a fun, fizzy drink that brightens your table just like your new suncatchers!
Don't forget to savor every moment as the light dances through your creations!
Expert Tips for Crayon Star Suncatchers
- Color Blending: Experiment with different color combinations by layering crayon shavings; this creates a mesmerizing, marbled effect in your suncatchers.
- Perfect Shapes: While stars are fun, don't hesitate to try other shapes like hearts, circles, or even animals for added variety.
- Supervision Needed: Always supervise children closely when using sharp tools and heated items to ensure safety throughout the craft project.
- Cool Down Time: Allow your melted creations to cool fully before handling; this prevents any accidental mess and helps maintain shape.
- Hanging Ideas: While windows are perfect, consider hanging your suncatchers in trees, doorways, or even as seasonal decorations to brighten different spaces.
Crayon Star Suncatchers Variations
Feel free to add your unique twist to this colorful DIY project and let your imagination run wild!
- Shape Explorations: Use different cookie cutters like hearts or animals for a wider variety of suncatcher shapes.
- Color Themes: Choose themed color palettes based on holidays or seasons, like warm reds and golds for fall.
- Layering Textures: Mix fine shavings with larger chunks of crayon to add an exciting texture contrast to your suncatchers.
- Glow-in-the-Dark: Incorporate glow-in-the-dark crayons for a magical effect after sunset, making them a nighttime delight.
- Nature's Touch: Press small leaves or flowers between the layers for a beautiful botanical spin.
- Personalized Messages: Write short inspirational quotes on the wax paper before layering, creating a meaningful gift.
- Bling it Up: Embellish your suncatchers with a sprinkle of glitter for an eye-catching sparkle that dances in the sunlight.
- Suncatcher Garland: Connect multiple suncatchers with string to create a colorful garland perfect for celebrations or home decor.
Each of these variations encourages further creativity, making your crafting experience even more enriching!
Crayon Star Suncatchers Recipe FAQs
How do I select the right old crayons for this project?
Absolutely, you can use any variety of old crayons! Look for crayons that are not broken into too many pieces, as larger chunks will make it easier to create fine shavings. If your crayons have dark spots or are very worn, they may produce a less vibrant color. Mixing different colors can create stunning results, so have fun experimenting!
What is the best way to store crayon star suncatchers?
It's best to keep your crayon star suncatchers in a cool, dry place away from direct sunlight. They can last around 2 weeks this way. For longer storage, you can wrap them and keep them in the fridge for up to 1 month, or if you plan to make several at once, stack them with wax paper in between and freeze them for up to 3 months!
Can I freeze crayon star suncatchers for later use?
Yes! While it's not a common practice, you can freeze crayon star suncatchers for up to 3 months. Just ensure you stack them carefully between sheets of wax paper to avoid sticking together. When you're ready to display them, simply allow them to thaw at room temperature before hanging.
What should I do if my suncatchers lose their shape?
If your suncatchers become misshapen, don't worry! Simply use a hairdryer on a low setting to gently warm them until they become pliable again. Once they're warm, reshape them as desired and let them cool fully before hanging. This way, they will be back to their lovely star shapes!
Are there any safety concerns to be aware of when making these suncatchers?
Absolutely! It's essential to supervise children closely when using sharp tools like knives and when handling the iron. Always ensure the iron is on low heat to prevent burns, and make it a fun, safe bonding experience while encouraging creativity!
Can pets safely be around these suncatchers?
Generally, yes, but it's always good to keep them away from the craft area, especially while the project is in progress. Ensure that the suncatchers are hung out of reach to avoid any curious pets from chewing on them, as there may be small shavings or strings involved in the craft.

Crayon Star Suncatchers: A Fun DIY to Brighten Your Windows!
Equipment
- Iron
- Manual Sharpener or Knife
- Hole punch
Ingredients
For the Suncatcher
- Old crayons Crayons Use any variety for bright colors
- 1 sheet Wax Paper Essential for holding the melted crayon design
- 1 sheet Parchment Paper Protects your iron and work surface
For Shaping & Hanging
- 1 Star Stencil or Cookie Cutter Choose your favorite shape
- 1 length Baker’s Twine or String Perfect for hanging your suncatchers
- 1 Hole Punch Create holes for easy hanging
Instructions
How to Make Crayon Star Suncatchers
- Preheat the Iron: Set your iron to low heat and let it warm up.
- Create Crayon Shavings: Carefully make fine shavings from your old crayons.
- Layer Crayon Shavings: Place crayon shavings between two pieces of wax paper.
- Melt the Crayons: Press the warm iron over the wax paper for a few seconds.
- Cut Out Shapes: Use a star stencil or cookie cutter to cut out shapes from the melted crayons.
- Prepare for Hanging: Use a hole punch to create a small hole and thread the string.


Leave a Reply