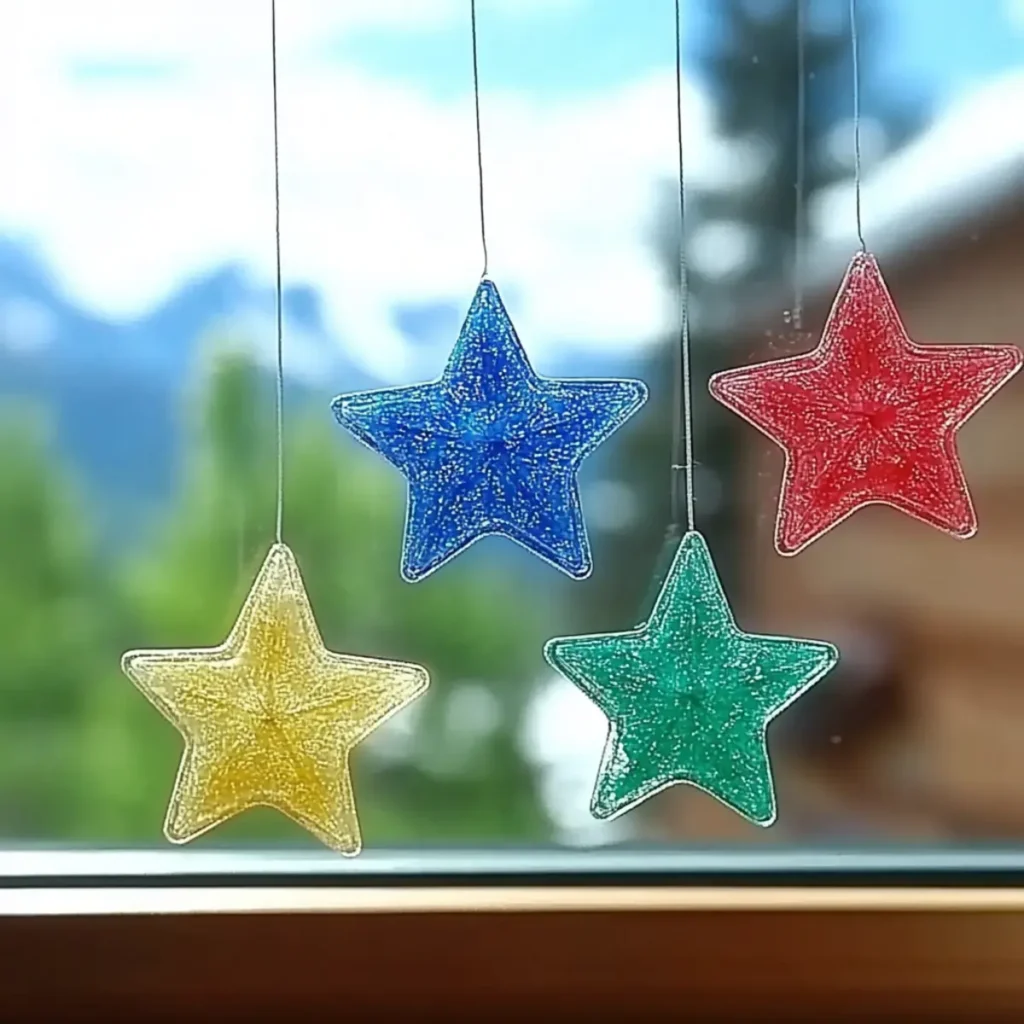
As I was rummaging through my kitchen drawer the other day, I stumbled upon a trove of broken crayons, remnants of countless coloring sessions long past. Instead of tossing them out, I decided to embark on a colorful journey, transforming what once seemed like useless scraps into beautiful Crayon Star Sun Catchers! There's something utterly delightful about melting those vibrant waxes, watching them blend and swirl, creating hues that dance and shimmer in the sunlight. This eco-friendly DIY craft not only lightens your heart but also provides a fantastic sensory experience for kids and adults alike.
Perfect for brightening your windows or sharing as whimsical gifts, these stained glass stars are a playful reminder of how creativity can flourish, even from the most overlooked items. Whether placed in a sunny window to catch the light or shaped into charming hearts for a friend, this project is as versatile as it is fun. So grab your old crayons, and let's transform those forgotten pieces into stunning art that radiates warmth and color in your home!
Crayon Star Sun Catchers - Why Make Them?
Vivid Creativity: Transform your old crayons into stunning sun catchers that bring delightful colors into your home.
Eco-Friendly Fun: This project promotes sustainability by giving new life to broken crayons, making it a perfect choice for eco-conscious crafters.
Easy Steps: With a simple melting process, anyone can join in on the fun-just gather your materials and get creative!
Unique Shapes: From stars to hearts, the endless design possibilities allow you to tailor your creations for any occasion.
Perfect Gift: Handmade sun catchers are whimsical gifts that will surely bring smiles and warmth to your loved ones.
So why not dive into this colorful adventure and check out our creative tips to get the most out of your DIY experience?
Crayon Star Sun Catcher Ingredients
Create Your Colorful Art!
For Melting and Molding
• Old Crayons - Bring vibrant colors to your sun catchers; remember to remove the paper for a cleaner melt.
• Wax Paper - Serves as the base to hold your crayon shavings during the melting process.
• Parchment Paper - Protects your iron while ensuring even melting and helps the crayon mixture release easily.
For Finishing Touches
• String or Ribbon - Perfect for hanging your sun catchers in a sunny window; choose a color that complements your design.
• Stencils or Cookie Cutters - Use these to create fun shapes like stars and hearts, adding unique flair to your creations.
By following this simple ingredient guide, you'll be well on your way to crafting delightful Crayon Star Sun Catchers that brighten any space. Happy crafting!
How to Make Crayon Star Sun Catchers
-
Prepare Crayons: Begin by removing all paper from the crayons. Use a sharpener or a knife to create colorful shavings, mixing various colors for beautiful, blended effects.
-
Assemble: Lay a 12x12" piece of wax paper on a flat surface, then sprinkle the crayon shavings evenly on top. Fold the wax paper over to contain the shavings, sealing the edges securely.
-
Melt the Crayon Mixture: Place the wax paper packet between two sheets of parchment paper. Preheat your iron to low, and gently press on the parchment in circular motions. Continue until the crayons melt into a vibrant, gooey mixture.
-
Cool and Cut: Allow your melted creation to cool completely. Once cool, use a stencil or cookie cutter to trace and cut out fun shapes like stars and hearts.
-
Finish: Make a hole near the top of each cut shape, then thread a string through the hole. Hang your delightful sun catchers in a sunny window to watch the colors shine!
Optional: Add a sprinkle of glitter to your crayon shavings for a sparkling effect!
Exact quantities are listed in the recipe card below.
Expert Tips for Crayon Star Sun Catchers
- Safety First: Always supervise children during the melting process. This not only keeps them safe but also ensures a fun crafting experience.
- Paper Removal: Make sure to remove all crayon wrappers thoroughly before melting. This helps avoid unwanted bits in your final sun catchers and gives them a cleaner look.
- Color Mixing: Don't hesitate to mix and match crayon colors! Experimenting with different combinations can result in stunningly unique Crayon Star Sun Catchers.
- Iron Settings: Keep the iron on a low setting and be cautious with your pressing technique. Too much heat can cause unwanted scorching or uneven melting.
- Cool Down Time: Be patient and let your melted creations cool completely before cutting. This prevents them from tearing or becoming misshapen during the cutting process.
- Hanging Tips: For the best display, use sunny windows that receive direct light-this will enhance the beautiful glow of your colorful creations!
Crayon Star Sun Catchers - Customize Your Craft!
Embrace your creativity and make these sun catchers uniquely yours with fun variations and substitutions!
- Shape Swaps: Use cookie cutters to create other fun shapes like butterflies or leaves for different occasions.
- Color Combinations: Experiment with different crayon brands for varied melting effects; some may produce richer hues than others.
- Add Glitter: Mix in a sprinkle of glitter with crayon shavings for a sparkling touch-perfect for festive decorations!
- Scented Crayons: Choose scented crayons for an aromatic twist that adds an extra sensory experience to your sun catchers.
- Laminating: Once cut, laminate your creations for durability; they'll last longer and maintain their bright colors.
- Mixed Media: Incorporate dried flowers or leaves in the mix for a natural touch, creating more textured and visually interesting designs.
- Heat Level: For more vibrant results, try melting at a slightly higher temperature-just be cautious not to scorch the crayons.
- Seasonal Themes: Tailor your designs for holidays by blending appropriate colors like reds and greens for Christmas or pastels for Easter.
Now, let your imagination soar and craft Crayon Star Sun Catchers that reflect your personal style!
What to Serve with Crayon Star Sun Catchers?
Brighten your crafting experience by pairing these colorful creations with delightful treats and beverages!
- Fresh Lemonade: The tangy sweetness of lemonade is refreshing, perfectly balancing the vibrant fun of your artistic project.
- Mini Fruit Kabobs: Colorful fruit on skewers adds a playful touch that echoes the creativity of your sun catchers.
- Rainbow Cupcakes: Celebrate your colorful creations with cupcakes topped in a swirl of vibrant frosting, making a sweet snack that visually matches your craft.
- Herbal Iced Tea: Refreshing and aromatic, a glass of herbal iced tea will keep you cool as you embark on your DIY adventure.
- Colorful Vegetable Platter: Crunchy veggies paired with a delicious dip bring color and health to the table, resembling the hues in your stained glass stars.
- Chocolate Dipped Pretzels: The sweet and salty combination of these treats offers a delightful contrast to your candy-like crayons and makes for a fun snack.
- Craft-Themed Celebration: Consider hosting a small gathering complete with themed decorations and snacks that reflect the playful spirit of your Crayon Star Sun Catchers!
- Storybook Reading: While your creations cool, enjoy a cozy reading session with your favorite stories that spark creativity and imagination in every guest.
Make Ahead Options
These Crayon Star Sun Catchers are perfect for busy home cooks and crafters looking to save time! You can prepare your crayon shavings up to 3 days in advance; simply store them in an airtight container to retain their vibrant colors and avoid moisture. The wax paper can also be prepped ahead by assembling the layers with crayon shavings included and refrigerating the wrapped packet for up to 24 hours. When you're ready to melt, take the prepared wax paper out and simply heat it between the parchment as instructed. This way, you can craft stunning sun catchers for a spontaneous creative moment or planned crafting session, ensuring that the joy of crafting is always within reach!
Storage Tips for Crayon Star Sun Catchers
Room Temperature: Store your Crayon Star Sun Catchers flat between sheets of wax paper to prevent bending or damage.
Fridge: For extra care, keep them in a cool location, avoiding direct sunlight which can cause them to melt.
Avoid Heat Sources: Ensure they're placed away from heaters or hot appliances, as this could result in re-melting and distortion of their shapes.
Reheating: If your creations get misshapen, gently reheat them with a low iron setting between parchment paper, then reshape before cooling again.

Crayon Star Sun Catchers Recipe FAQs
What kind of old crayons should I use?
Absolutely! You can use any old crayons, whether they're broken or just unwanted bits from past projects. I recommend sorting them by color to make the melting process more visually exciting. Remove all paper wrappings to ensure a smooth melting experience and vibrant final product!
How long can I store my Crayon Star Sun Catchers?
These beautiful creations can last up to several years if stored properly! Keep them flat between sheets of wax paper to prevent any bending or damage. It's best to keep them in a room-temperature environment, away from direct sunlight or heat sources that might cause them to re-melt.
Can I freeze my Crayon Star Sun Catchers?
While it's not advisable to freeze them, you can keep them in a cool area of your home where they won't be exposed to heat. If they happen to lose shape due to warmth, you can always reheat them slightly and reshape them using a low iron setting between parchment paper!
What if my melted crayon mixture doesn't look uniform?
Very! If you notice uneven melting or darker spots, just adjust your technique. Ensure that the iron is on a low setting and use gentle, circular motions to distribute the heat evenly. If it seems like there are some unmelted bits, you may want to press gently on those areas again, but be sure to monitor closely to avoid scorch marks.
Are these sun catchers safe for children?
Absolutely! However, since this process involves heat, supervision is essential. I always emphasize keeping little ones at a safe distance while using the iron. You might also want to demonstrate the steps first before letting them join in on the fun.
Can these sun catchers be customized for different occasions?
Of course! That's one of the best parts! You can create various shapes for different events, like hearts for Valentine's Day, stars for summer, or snowflakes for winter. Mixing colors and adding glitter can also personalize each sun catcher, making them perfect gifts for friends and loved ones.
These FAQs will help you navigate the crafting experience while ensuring a delightful outcome with your Crayon Star Sun Catchers. Happy crafting!
Craft Colorful Crayon Star Sun Catchers for Sunny Windows
Equipment
- Iron
- Sharpener or Knife
- Flat surface
Ingredients
For Melting and Molding
- Old crayons Crayons Remove paper for a cleaner melt.
- 1 sheet Wax Paper Base to hold crayon shavings.
- 2 sheets Parchment Paper Protects iron and helps release melted mixture.
For Finishing Touches
- 1 piece String or Ribbon For hanging sun catchers.
- 1 set Stencils or Cookie Cutters To create fun shapes.
Instructions
Making Crayon Star Sun Catchers
- Remove all paper from the crayons and create colorful shavings.
- Lay a piece of wax paper on a flat surface and sprinkle the crayon shavings.
- Fold the wax paper over and seal the edges.
- Melt the crayon mixture using a low iron by pressing on parchment paper.
- Let it cool completely, then cut out shapes using stencils or cookie cutters.
- Make a hole and thread string for hanging in a sunny window.


Leave a Reply