
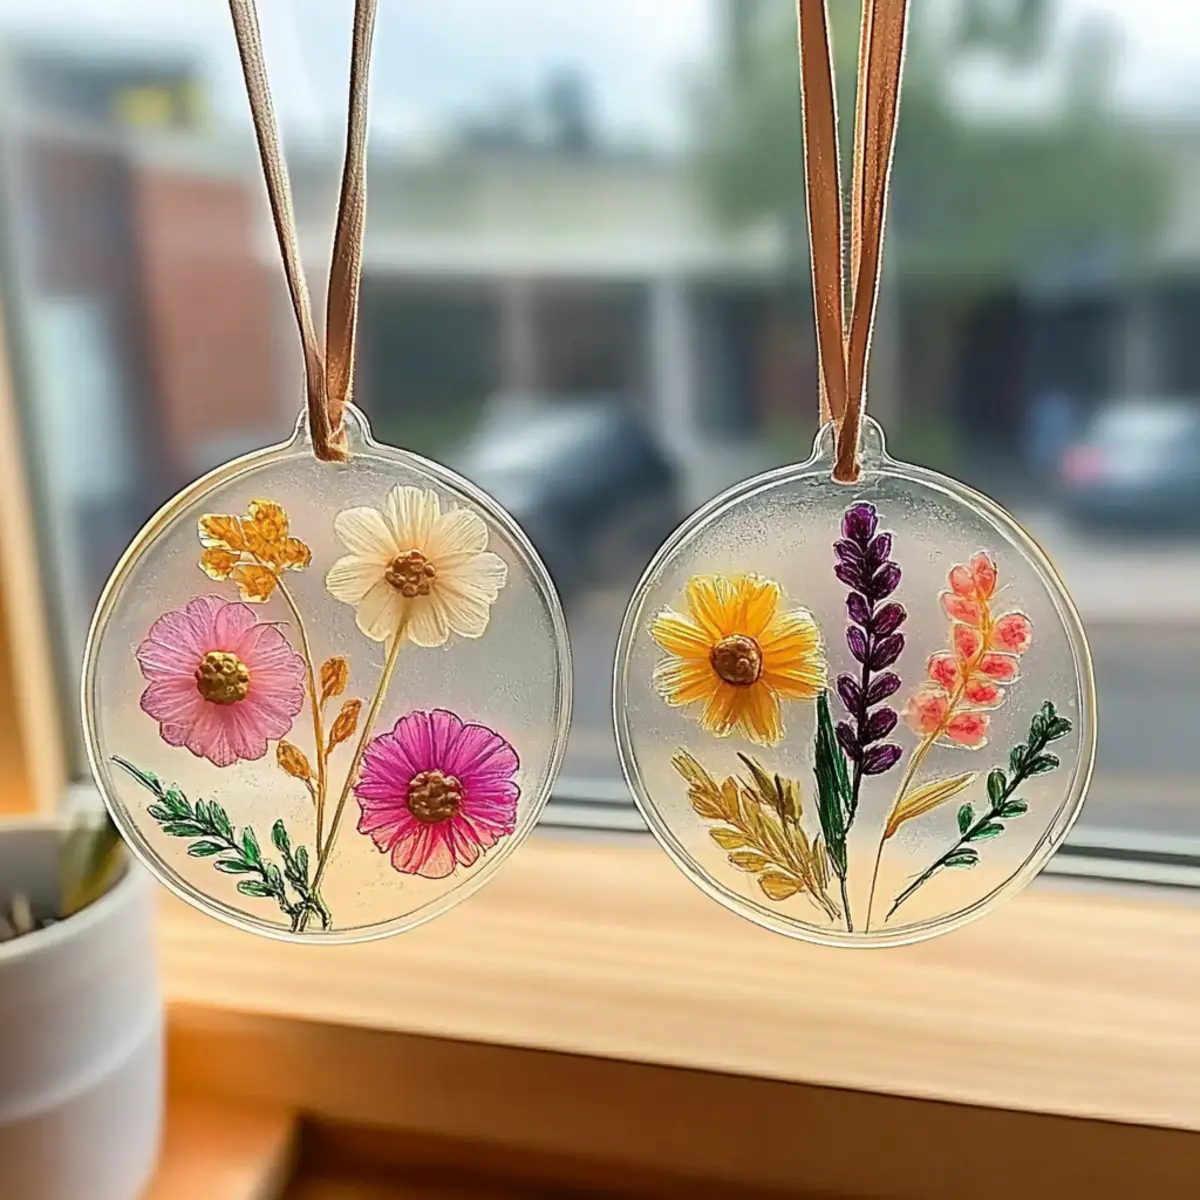
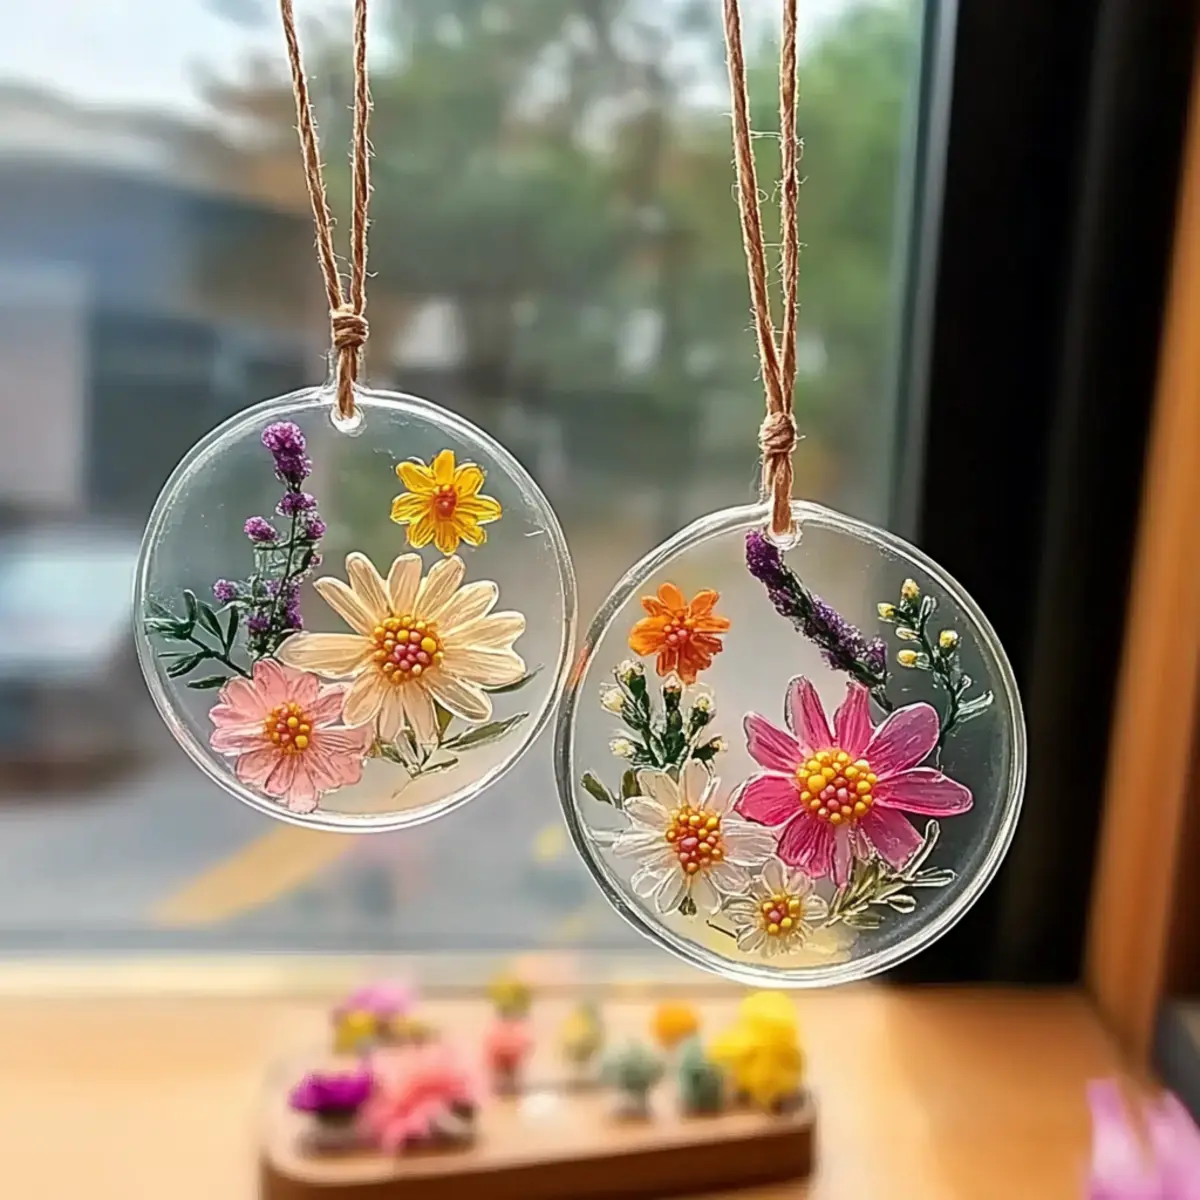
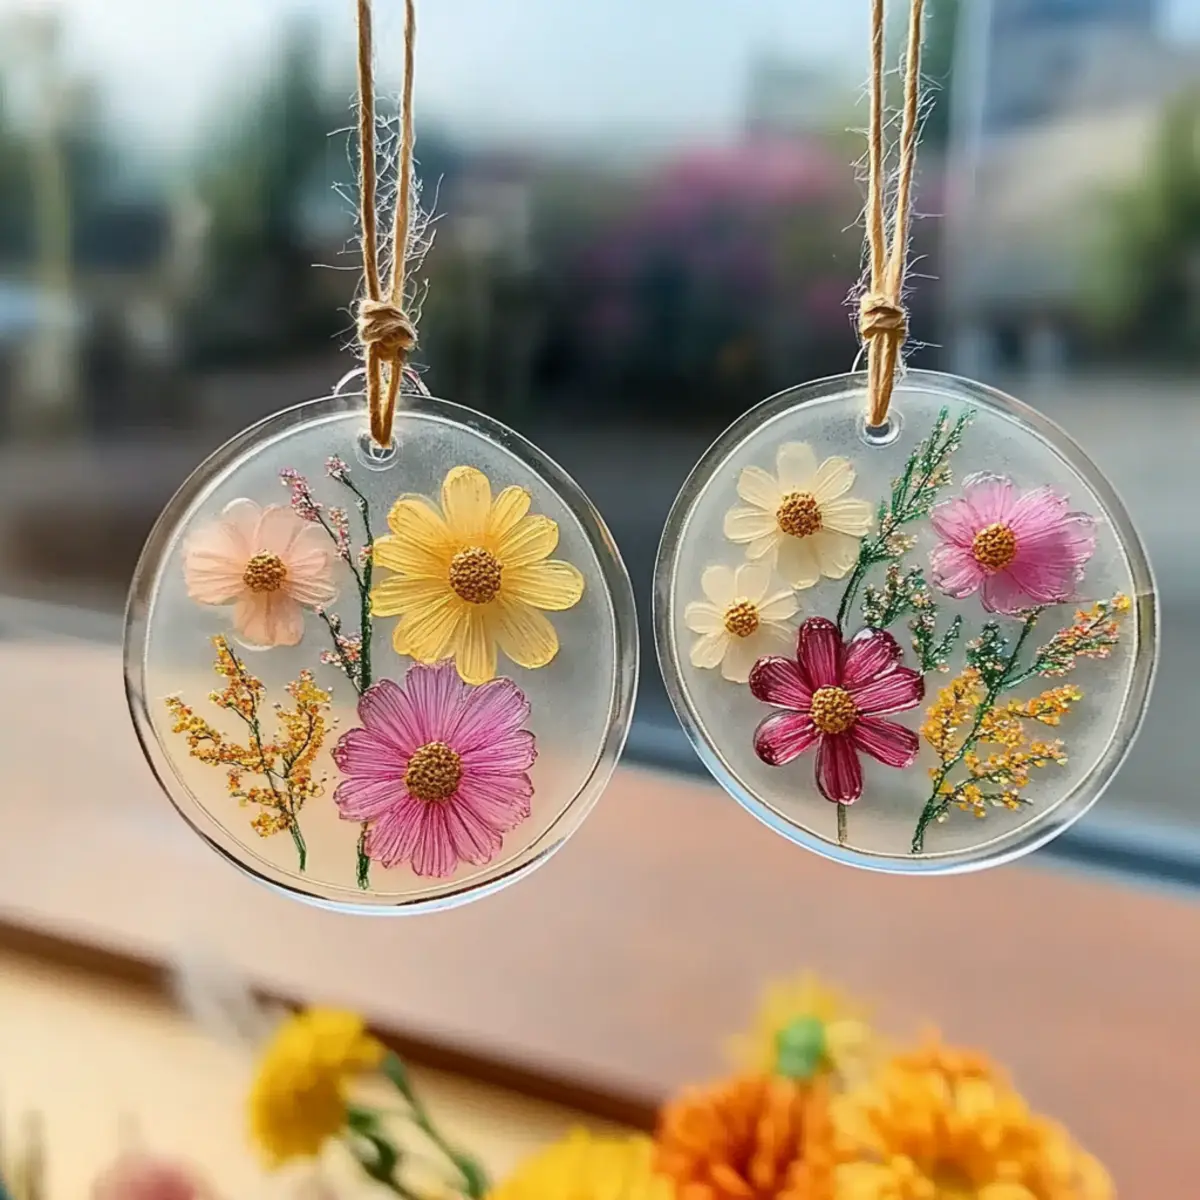
As I took my morning coffee to the window, I was instantly captivated by the way sunlight danced through the colorful remnants of nature lining my sill. That moment inspired me to create something magical-Clear Glue Flower Suncatchers! This delightful DIY craft offers not just a canvas for creativity but also a way to transform the ordinary into stunning art that catches the eye.
In just 15 minutes of easy prep and with a little patience for drying, you'll be amazed at how this simple project unfolds. Not only does it engage children in a meaningful way, but the finished sun catchers also brighten up any space, reminiscent of elegant stained glass. So, gather your materials and let's dive into a world of vibrant colors-because nothing brings a home to life quite like a splash of creativity!

Why You'll Love Clear Glue Flower Suncatchers
Delight in Simplicity: The Clear Glue Flower Suncatcher craft is incredibly easy to master, making it perfect for crafters of all ages.
Engaging for Kids: This hands-on project captivates children's imaginations, offering them a fun way to experiment with colors and nature.
Creative Expression: Use materials from your surroundings-pressed flowers, tissue paper, or glitter-allowing each creation to be a unique expression of artistry.
Brighten Your Home: Once finished, these suncatchers radiate color and light, instantly enhancing any window or glass door.
Quick Crafting: With just 15 minutes of prep time, it's an excellent option for busy families looking to squeeze in some creative fun.
For more creative ideas, check out our DIY Craft Projects to explore more fun activities!
Clear Glue Flower Suncatcher Ingredients
-
For the Base
• Clear school glue - Provides the essential foundation for your suncatcher; you can substitute it with any clear craft glue of similar viscosity.
• Plastic lid or clear acetate sheet - Serves as a sturdy platform for your design; you can easily repurpose materials from yogurt containers or takeout food packaging. -
For the Design
• Pressed flowers - Adds vibrant colors and natural beauty; feel free to use store-bought or homemade ones for a personalized touch.
• Tissue paper scraps, glitter, sequins, or dried leaves - Optional decorative elements that enhance visual appeal; mix and match based on what you have available! -
For Finishing Touches
• String or suction cup hook - Essential for hanging the suncatcher and displaying your masterpiece.
• Scissors - Required for cutting your decorative materials into desired shapes or sizes.
• Wax paper or parchment paper - Protects your workspace from glue spills, keeping things tidy!
• Black marker or construction paper (optional) - Useful for creating a decorative frame around your suncatcher for an extra touch of flair.
Gather these ingredients to start your charming Clear Glue Flower Suncatcher craft, and watch as sunlight transforms your creation into a stunning piece of art!
How to Make Clear Glue Flower Suncatchers
-
Prep Workspace: Lay down wax paper on your working surface to protect it from any glue spills. This step ensures your crafting area remains clean and ready for fun!
-
Mix Ingredients: Squeeze a thin layer of clear glue onto your plastic lid or acetate sheet. Aim for a smooth, even layer to create a perfect base for your design.
-
Create Design: Arrange the pressed flowers and optional decorative items on top of the glue. Make sure to space them evenly to allow light to shine through beautifully.
-
Drying Time: Allow your glued design to dry thoroughly. Ideally, leave it undisturbed for at least 24 hours for a flawless finish.
-
Finish & Hang: Once completely dry, gently peel your suncatcher away from the wax paper and attach string or a suction cup hook to hang it in your favorite spot.
Optional: Consider adding a decorative border with a black marker for extra flair.
Exact quantities are listed in the recipe card below.
Expert Tips for Clear Glue Flower Suncatchers
-
Thin Layers: Apply glue in thin layers to prevent cloudiness and maintain the transparency of your Clear Glue Flower Suncatchers.
-
Proper Spacing: Avoid overcrowding by leaving ample space between pressed flowers and decorations to ensure maximum light reflection.
-
Drying Time: Be patient and allow at least 24 hours of drying time to ensure your suncatcher remains intact and beautiful.
-
Workspace Prep: Always protect your workspace with wax paper or parchment, making cleanup easier and avoiding sticky messes.
-
Easily Clean Tools: Clean your scissors and glue tools right after use to prevent glue build-up and ensure they remain in great working condition.
Variations & Substitutions for Clear Glue Flower Suncatchers
Feel free to get creative and customize your suncatcher project with these fun ideas that will spark your imagination!
- Nature's Palette: Swap pressed flowers for vibrant leaves or different petals to give your suncatcher a fresh theme.
- Color Burst: Experiment with various colors of tissue paper to create a more radiant and lively design that truly pops.
- Sparkle It Up: Add glitter to your glue for shimmering details that catch the light beautifully when displayed.
- Textured Appeal: Incorporate fabric scraps or lace into your design for a unique texture that contrasts brilliantly with the glossy glue.
- Double the Fun: Layer multiple discs of acetate or plastic for a 3D effect, allowing your suncatchers to have depth and visual interest.
- Framed Elegance: Use a black marker or construction paper to draw a decorative frame around your suncatcher, giving it a polished, gallery-worthy finish.
- Seasonal Themes: Create suncatchers that reflect the seasons by using seasonal blooms, colors, or symbols like snowflakes or autumn leaves!
- Sweet Surprises: Intermix small, lightweight decorative beads or sequins throughout your design for added whimsy and an extra touch of sparkle!
How to Store and Freeze Clear Glue Flower Suncatchers
Cool, Dry Place: Store your completed Clear Glue Flower Suncatchers in a cool, dry area away from direct sunlight to maintain their vibrant colors and glossy finish for up to 6 months.
Wrapped for Protection: Wrap each suncatcher in soft cloth or place them between sheets of wax paper. This prevents scratches or damage to their delicate surfaces during storage.
Display with Care: If not hung immediately, consider displaying them in a protective setting, like a shadow box, to keep them safe and still enjoy their aesthetic appeal.
Avoid Humidity: Keep the suncatchers away from humid environments to prevent moisture from altering their appearance or causing the glue to weaken.
Make Ahead Options
These Clear Glue Flower Suncatchers are fantastic for busy home cooks and crafters who want to save time! You can prep the base designs up to 24 hours in advance by applying the glue and arranging your pressed flowers or decorations ahead of time. Just make sure to keep them in a cool, dry place to maintain clarity and avoid any cloudiness. When ready to finish, simply let your creations dry for a full day. On the day of your display, peel your beautiful suncatchers from the wax paper, attach your string or suction cup hook, and hang them up to enjoy a splash of color that brightens any window!
What to Serve with Clear Glue Flower Suncatchers?
Create a cheerful atmosphere while you craft, basking in creativity and color.
- Nature Walk: Explore local parks or gardens to source beautiful pressed flowers, enhancing your suncatcher's natural beauty.
- Prepared Snacks: Serve up a platter of easy-to-eat treats like fruit skewers or veggie sticks to keep energy levels high during crafting.
- Bright Beverages: Prepare refreshing smoothies or infused water to sip on, keeping everyone hydrated and inspired.
- Artistic Music Playlist: Create a lively playlist with upbeat tunes to make the crafting experience even more enjoyable.
- Colorful Tablecloth: Use a vibrant table cover to define the crafting space and spark joy as you work on your suncatchers.
- Family Bonding Time: Gather the whole family for a fun afternoon, encouraging teamwork while everyone creates their unique window art.
- Suncatcher Display Area: Identify the best spots around the house, like windows or glass doors, where the suncatchers will shine and spread happiness.
Clear Glue Flower Suncatchers Recipe FAQs
How do I choose the right pressed flowers for my suncatcher?
Absolutely! Opt for flowers that are completely dry, as moisture can create a cloudy effect. Look for flowers that have vibrant colors and don't wilt easily-such as pansies, daisies, or even tiny rose petals. If making your own pressed flowers, simply place them between two sheets of paper and heavy books for about 1-2 weeks until they are fully dry.
Can I store my Clear Glue Flower Suncatchers once they're made?
Very! To store your completed suncatchers, keep them in a cool, dry place away from direct sunlight to preserve their colors and sheen. They can last up to 6 months this way. It's best to wrap each one in a soft cloth or place them between sheets of wax paper to protect against scratches.
How do I freeze Clear Glue Flower Suncatchers?
While freezing isn't typically necessary for suncatchers, if you want to keep them long-term, first ensure they are fully dry. Wrap each suncatcher individually in plastic wrap and then place them inside an airtight container or a freezer bag. They can be stored this way for up to 3 months. When ready to use, thaw them in the fridge to avoid sudden temperature changes.
What should I do if my suncatcher becomes cloudy?
Great question! Cloudiness usually comes from applying too much glue or not allowing it to dry completely. If this happens, you can carefully peel it off the base and try again with a thinner layer of glue. I recommend applying it evenly and allowing ample time for it to completely dry-ideally 24 hours. Keeping spacing between the items will also help!
Can my pets safely interact with the materials used?
Absolutely, but it's good to be cautious! The materials like clear glue and dried flowers are non-toxic, but you should ensure your pet doesn't accidentally ingest any small decorative items (like glitter or sequins), as they could pose a choking hazard. Always supervise when crafting.
How do I create a decorative border for my suncatcher?
For a charming touch, you can use a black marker or construction paper to create a frame. Simply cut your construction paper into strips or shapes that can be easily adhered around your suncatcher's edge. You can use a little glue for this, but be sure to let it dry completely-just like the suncatcher itself-before hanging it up!
Enchantingly Easy Clear Glue Flower Suncatcher Craft for All Ages
Equipment
- scissors
- Plastic lid or clear acetate sheet
- Wax paper or parchment paper
Ingredients
For the Base
- 1 bottle Clear school glue or any clear craft glue of similar viscosity
- 1 unit Plastic lid or clear acetate sheet as a sturdy platform
For the Design
- 2 cups Pressed flowers store-bought or homemade
- Tissue paper scraps optional
- Glitter optional
- Sequins optional
- Dried leaves optional
For Finishing Touches
- 1 unit String or suction cup hook for hanging
- 1 piece Wax paper or parchment paper to protect workspace
- 1 unit Black marker or construction paper optional for decorative framing
Instructions
Instructions
- Lay down wax paper on your working surface to protect it from any glue spills.
- Squeeze a thin layer of clear glue onto your plastic lid or acetate sheet.
- Arrange the pressed flowers and optional decorative items on top of the glue.
- Allow your glued design to dry thoroughly for at least 24 hours.
- Once completely dry, gently peel your suncatcher away from the wax paper and attach string or a suction cup hook to hang it.
- Optional: Add a decorative border with a black marker for extra flair.


Leave a Reply