
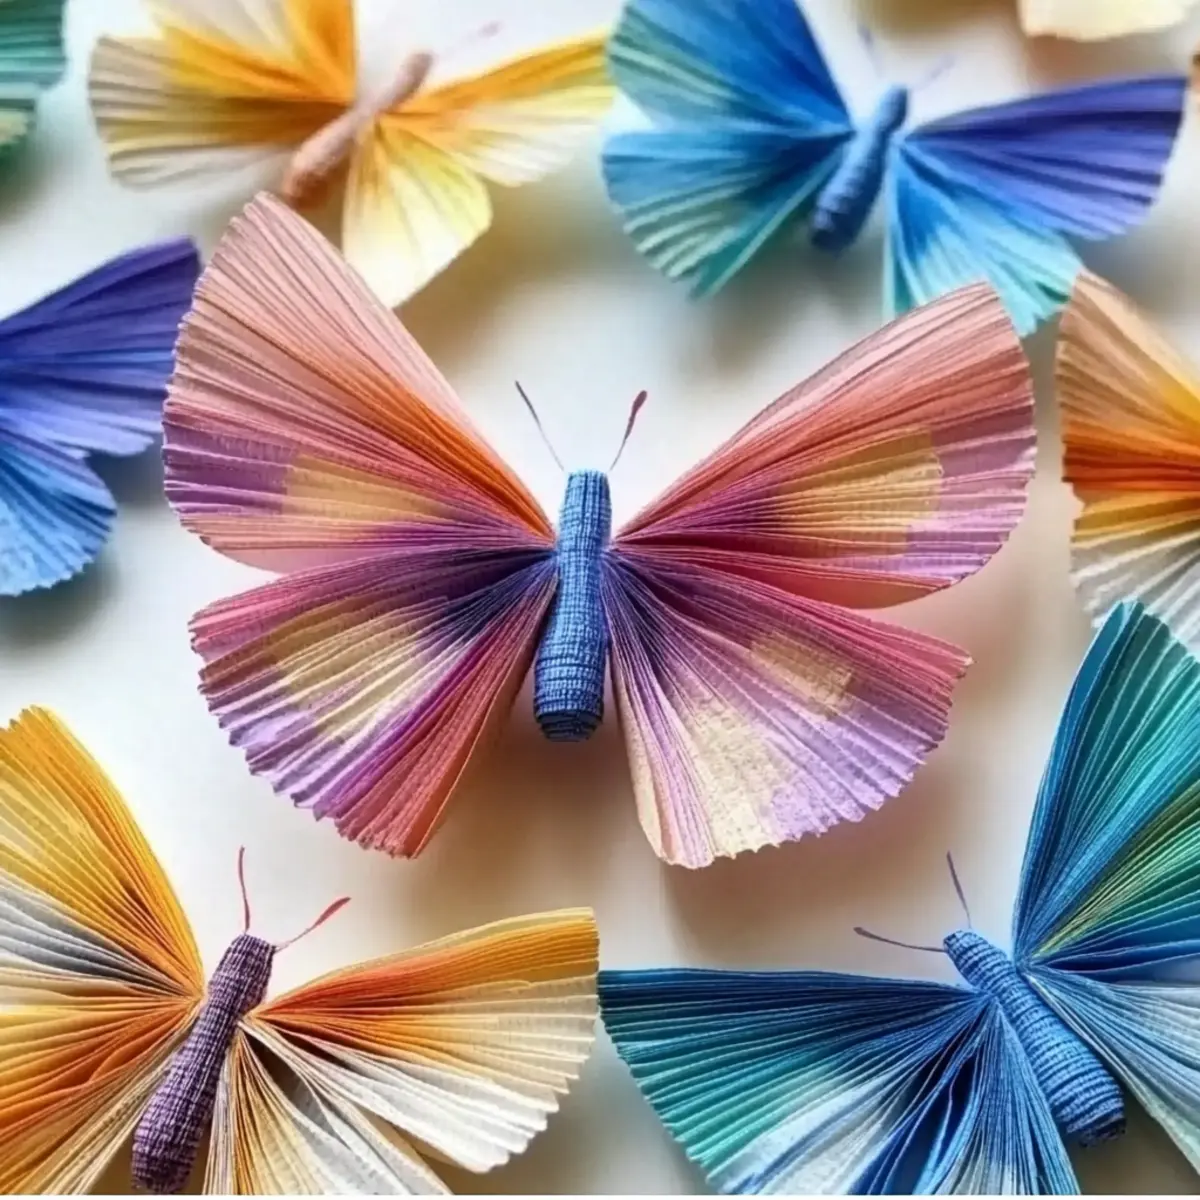
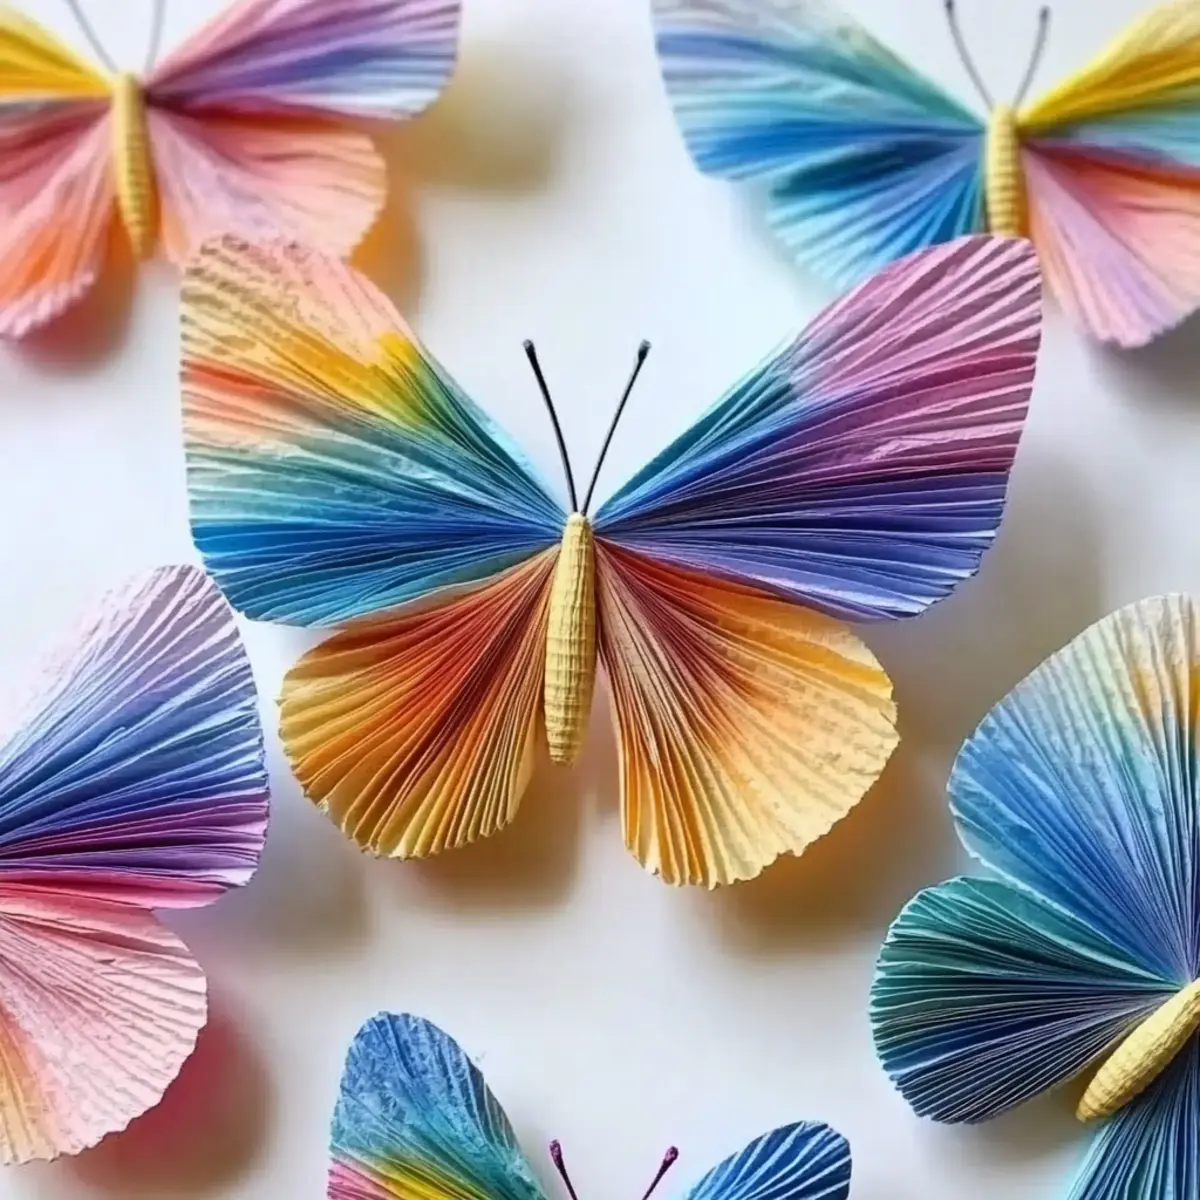
There's something truly enchanting about watching colors come to life, and that's exactly what you'll experience while creating DIY Chromatography Coffee Filter Butterflies! As I gathered some simple materials for a weekend project with my kids, I never anticipated how much fun we would have transforming ordinary coffee filters into vibrant, fluttering butterflies. Each stroke of the washable markers allowed our creativity to flourish, and when the colors began to blend and separate, it felt like a mini science experiment right in our kitchen.
Perfect for a rainy afternoon or as an entertaining classroom activity, this whimsical craft combines art and science in a way that keeps children engaged while they learn about color separation. Whether decorating a room or gifting these delicate creations, the joy of seeing each unique butterfly emerge brings a delightful sense of accomplishment. So, roll up your sleeves and prepare to let your imagination take flight with this colorful STEM project!

Why choose Chromatography Coffee Filter Butterflies?
Engaging Science: This craft brilliantly merges art and science, sparking curiosity and experimentation in children.
Vibrant Creations: With vibrant colors, each butterfly is a unique masterpiece waiting to be discovered.
Simple Materials: You only need easy-to-find household items, making it accessible and budget-friendly.
Endless Variations: Encourage creativity by experimenting with different colors, papers, or decorative elements.
Fun for Everyone: Perfect for kids and adults alike, it's a delightful hands-on project that keeps everyone engaged.
Get ready to explore the magical world of colors and have fun crafting with our step-by-step guide!
Chromatography Coffee Filter Butterflies Ingredients
For the Butterflies
• White Coffee Filters - Your canvas for this colorful project; basket-style filters yield the best results.
• Washable Markers - Vibrant colors bring your butterflies to life; using bright and dark hues enhances color separation.
• Spray Bottle or Pipette - Essential for sprinkling water, helping to activate the chromatography magic.
• Tray or Baking Sheet - Keeps your workspace tidy by catching any excess water and color.
For Assembly
• Pipe Cleaners - Form the bodies and antennae of your butterflies; easy to shape and manipulate.
• Googly Eyes, Glitter, or Stickers - Optional fun elements to personalize and add flair once your butterflies are dry.
Get your supplies ready and dive into the colorful world of Chromatography Coffee Filter Butterflies!
How to Make Chromatography Coffee Filter Butterflies
-
Prepare Workspace: Start by laying out all your materials on a flat surface. Place the tray or baking sheet underneath to catch any excess water during the process.
-
Color the Filters: Use washable markers to create fun, swirling designs on the coffee filters. The more creative you are, the more vibrant your butterflies will be, so let those imaginations run wild!
-
Apply Water: Grab your spray bottle or pipette and carefully add water to the colored filters. Watch as the colors begin to spread and separate, creating a fascinating display of hues.
-
Dry the Filters: Lay the colored filters flat on the tray or baking sheet and allow them to dry completely. Patience is key here-this is where the magic happens!
-
Assemble Butterflies: Once the filters are dry, pinch the center of each filter and wrap it with a pipe cleaner to create the body and antennae. Shape it to your liking for a personalized touch!
-
Add Final Touches: Personalize your butterflies using googly eyes, glitter, or stickers for an extra spark of creativity and fun.
Optional: For added flair, consider using ribbons or natural elements like leaves in your designs!
Exact quantities are listed in the recipe card below.
What to Serve with Chromatography Coffee Filter Butterflies?
Elevate your crafting experience with delightful presentation ideas that bring your colorful butterflies to life.
- Colorful Display Stand: Create a vibrant stand with a simple cardboard base and colorful paint, making your butterflies take center stage.
- Nature-inspired Backdrop: Place your butterflies against leaves, flowers, or twigs to add an imaginative touch, evoking a garden ambiance.
- Personalized Gift Wrap: Use your created butterflies as unique embellishments on gifts or thank-you notes, showcasing their whimsical charm.
- Thematic Classroom Decor: Hang the butterflies from the ceiling or on a bulletin board for a lively and educational art display that sparks curiosity.
- Crafty Mobile: String multiple butterflies together for a stunning mobile, perfect for adorning kids' rooms or play areas with a touch of magic.
- Interactive Learning Tool: Let your butterflies become part of a fun science demonstration on color mixing, enhancing the educational experience of your project.
- Sweet Treat Pairing: Reward your little crafters with colorful cupcakes or cookies afterward; treat them to a creative afternoon with tasty delights!
Storage Tips for Chromatography Coffee Filter Butterflies
Dry Storage: Keep your finished butterflies flat in a dry box to prevent bending or damage; excess moisture can spoil their vibrant colors.
Display Options: Consider gently clipping the butterflies onto a string or a mobile for a lovely display; this keeps them out of direct humidity.
Longevity: If stored properly, your Chromatography Coffee Filter Butterflies can last for several weeks, letting you enjoy their beauty for a long time!
Protection from Dust: If displaying, be mindful to protect them from dust and direct sunlight, which can fade their beautiful colors over time.
Make Ahead Options
These Chromatography Coffee Filter Butterflies are fantastic for meal prep enthusiasts! You can color and prepare the coffee filters up to 24 hours ahead of time to save on crafting chaos when your kids are ready to create. Simply complete steps 1 through 3, applying color and water to the filters, and then lay them flat on a tray to dry completely. Be sure to cover them lightly to prevent dust or moisture from affecting the colors. When you're ready to assemble, simply follow steps 5 and 6. This way, you'll have a fun and engaging activity waiting for you, making your craft time feel seamless and less hectic!
Expert Tips for Chromatography Coffee Filter Butterflies
- Choose Vibrant Colors: Opt for darker washable markers for bold separation; lighter shades may not display as vividly in your butterflies.
- Water Control: Apply water gently; over-saturating can cause muddled colors that detract from your beautiful creations.
- Patience is Key: Allow ample drying time for the filters; this ensures the colors settle beautifully before assembling your butterflies.
- Explore Variations: Don't be afraid to swap out coffee filters for colored paper; your Chromatography Coffee Filter Butterflies can have endless styles!
- Craft Safely: Keep an eye on little ones when using materials like scissors for assembly; safety first ensures a joyful crafting experience!
Chromatography Coffee Filter Butterflies Variations
Feel free to let your creativity soar and customize this fun craft adventure!
-
Paper Types: Use colored paper instead of coffee filters for a different texture and dynamic look. Experimenting with various papers opens a new world of possibilities.
-
Color Combinations: Try dual-color designs by applying different colors to each half of the filter. Watch how they blend for stunning effects that make each butterfly unique!
-
Decoration Elements: Add natural elements like leaves or small twigs. Wrapping these materials with the pipe cleaner gives your butterflies an organic touch sure to delight!
-
Add Sparkle: Incorporate glitter or metallic markers into your designs for a dazzling finish. Imagine the shimmer your butterflies will have as they flutter in the light!
-
Themed Creatures: Create seasonal butterflies by using colors that reflect different times of the year. Think pastels for spring or warm tones for autumn-let nature inspire you!
-
Interactive Elements: Attach small bells or beads to your pipe cleaners. This adds a fun dimension, making your butterflies not only beautiful but also whimsical sounds as they move.
-
Layered Filters: Use multiple filters stacked together with different designs. Once they dry and are assembled, you'll have a fuller display that adds depth and interest.
-
Color Mixing Experiment: Encourage kids to use primary colors and watch how they blend into secondary colors through the water application. It's a colorful science lesson wrapped in creativity!
Chromatography Coffee Filter Butterflies Recipe FAQs
Which coffee filters are the best to use for this project?
For optimal results, I highly recommend using white basket-style coffee filters. Their unique shape helps create the perfect wings for your butterflies, allowing for plenty of space to showcase your colorful designs!
How long can I store my finished Chromatography Coffee Filter Butterflies?
If stored properly, your butterflies can last for several weeks! Keep them flat in a dry box to prevent bending and avoid humidity, which can spoil their vibrant colors. It's an effective way to ensure your creations remain beautiful for a long time!
Can I freeze my butterflies for later use?
While freezing isn't necessary for these delicate creations, if you want to preserve their initial beauty, simply store them in a flat, dry box. Freezing may not preserve the colors effectively and could cause them to lose their charm upon thawing.
What do I do if my colors don't separate well?
Don't worry! If you notice the colors aren't separating as beautifully as expected, consider adjusting the amount of water you apply. A light mist will often yield better results than soaking the filters. I suggest testing a small area on a new filter before coloring the whole thing!
Are there any allergy concerns with the materials used?
Generally, the materials used for this craft are safe, but do check the markers for any potential allergens, especially if your child has sensitivity issues. Using certified non-toxic art supplies can help create a worry-free crafting environment.
Can younger children participate in this project?
Absolutely! This project is perfect for kids of all ages; however, you'll want to supervise the use of any small items like pipe cleaners and markers. Engage them by encouraging creativity in their designs, but ensure they are using safe crafting practices!

Create Magical Chromatography Coffee Filter Butterflies Today!
Equipment
- Tray or Baking Sheet
- Spray Bottle or Pipette
Ingredients
For the Butterflies
- 5 pieces White Coffee Filters Basket-style filters yield the best results.
- 3 pieces Washable Markers Use a variety of vibrant colors.
- 1 unit Spray Bottle Alternatively, a pipette can be used.
- 1 unit Tray or Baking Sheet To collect excess water.
For Assembly
- 3 pieces Pipe Cleaners To create the body and antennae.
- optional Googly Eyes For personalization.
- optional Glitter For added flair.
- optional Stickers For decoration.
Instructions
How to Make Chromatography Coffee Filter Butterflies
- Prepare Workspace: Start by laying out all your materials on a flat surface. Place the tray or baking sheet underneath to catch any excess water during the process.
- Color the Filters: Use washable markers to create fun, swirling designs on the coffee filters. Let your imaginations run wild!
- Apply Water: Grab your spray bottle or pipette and carefully add water to the colored filters. Watch as the colors spread and separate.
- Dry the Filters: Lay the colored filters flat on the tray or baking sheet and allow them to dry completely.
- Assemble Butterflies: Once dry, pinch the center of each filter and wrap it with a pipe cleaner to create the body and antennae.
- Add Final Touches: Personalize with googly eyes, glitter, or stickers for extra creativity.


Leave a Reply