There's something truly delightful about the feeling of creating a little magic right in your own kitchen. When the idea of making colorful bouncy balls sprang to mind, I couldn't help but dive into a vibrant sea of craft supplies, eagerly gathering everything I needed. Imagine a burst of colors, a hint of shimmer, and the joy of watching little ones giggle as they bring their own creations to life!
This DIY Rainbow Glow Bouncy Balls activity is the perfect antidote to the monotonous routine of everyday life, not to mention a fantastic way to unleash creativity for both kids and adults. With just a few simple ingredients and 10 minutes of prep, you'll be crafting your own rainbow orbs that not only look fabulous but also bounce with joy. So, whether you're looking to add a splash of color to a rainy afternoon or create something special for a playdate, step into this colorful adventure with me and let's make some bouncy fun together!
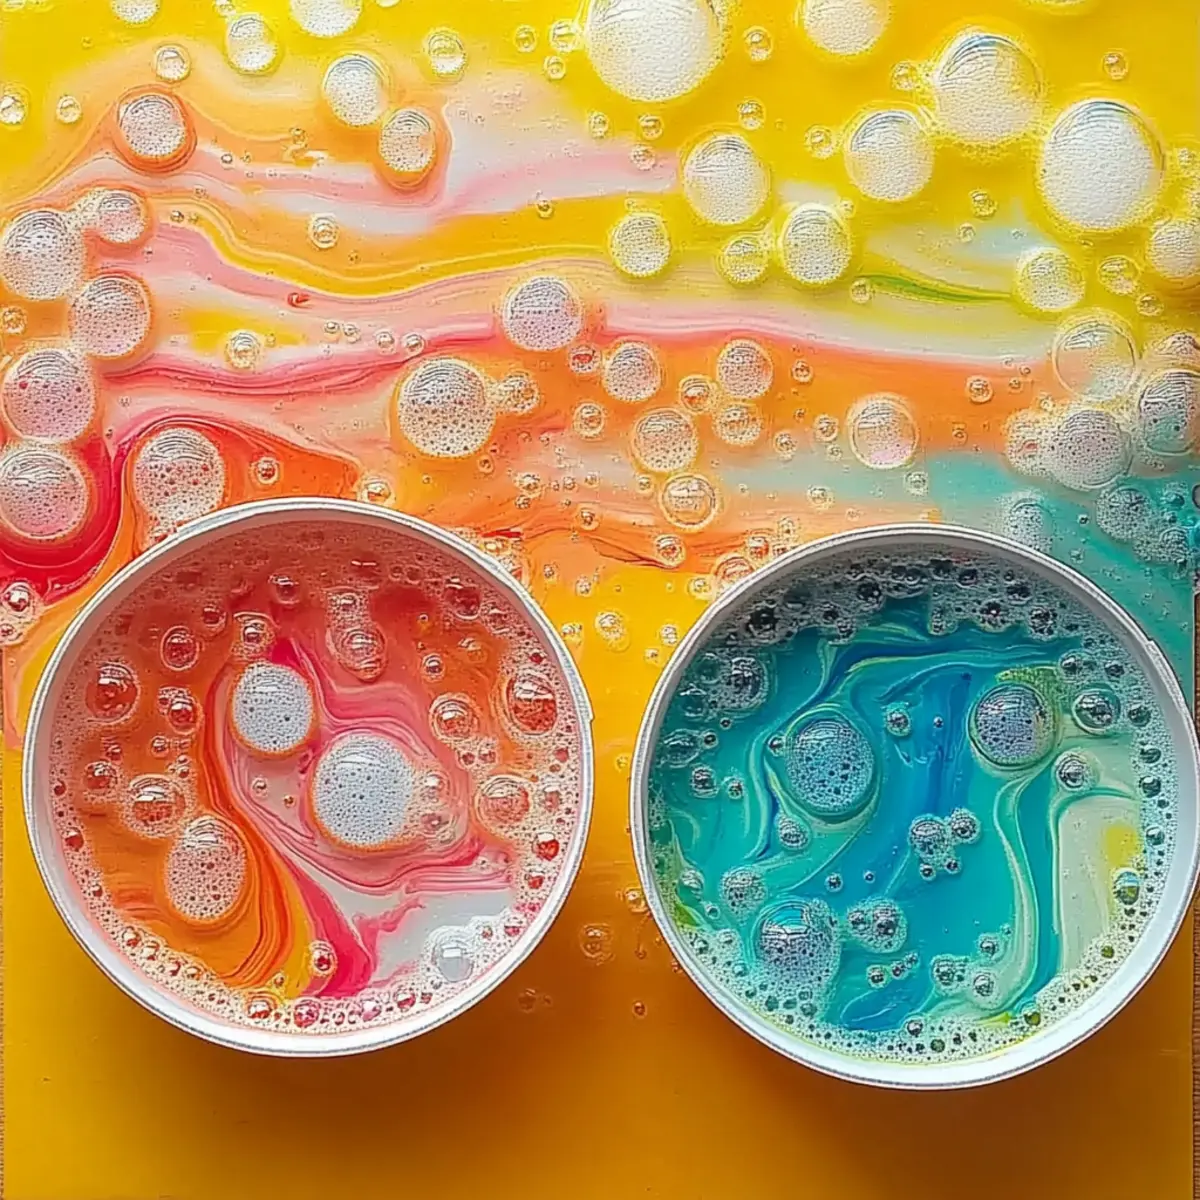
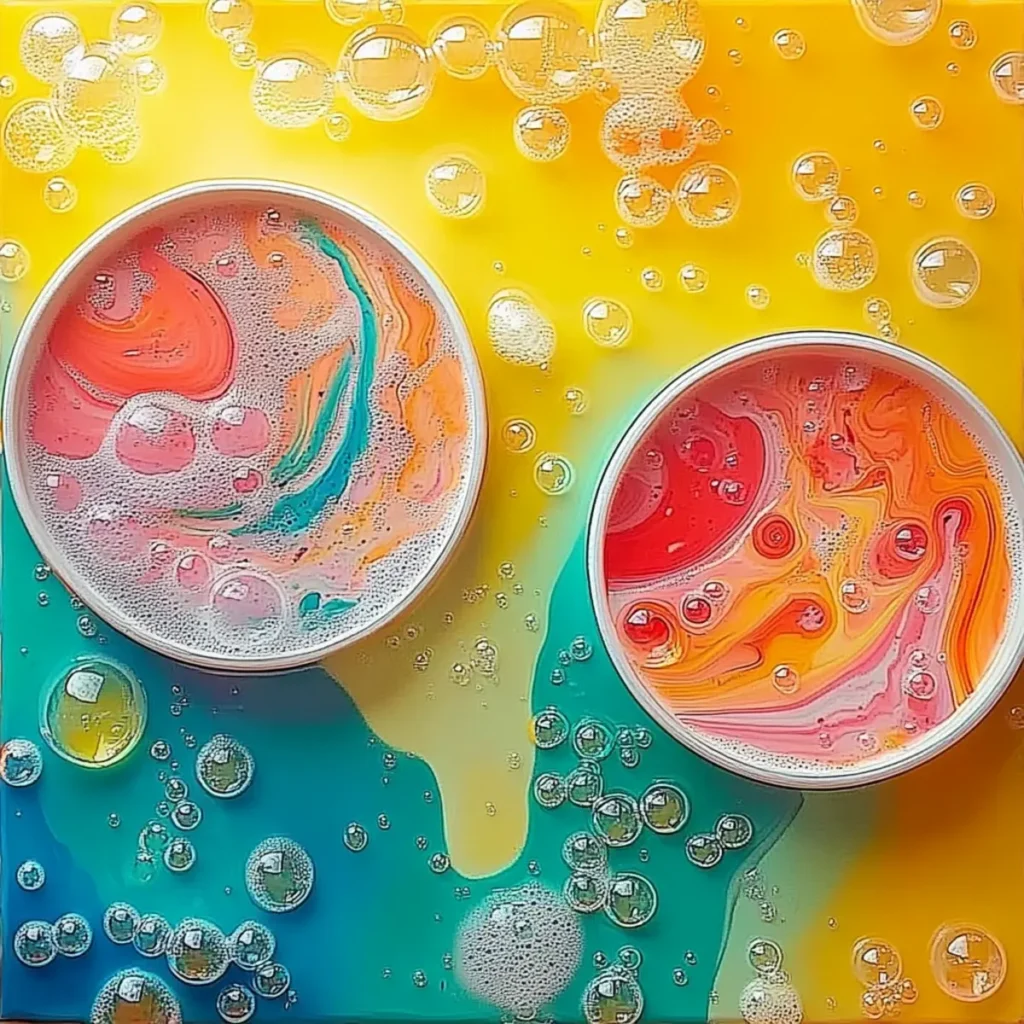
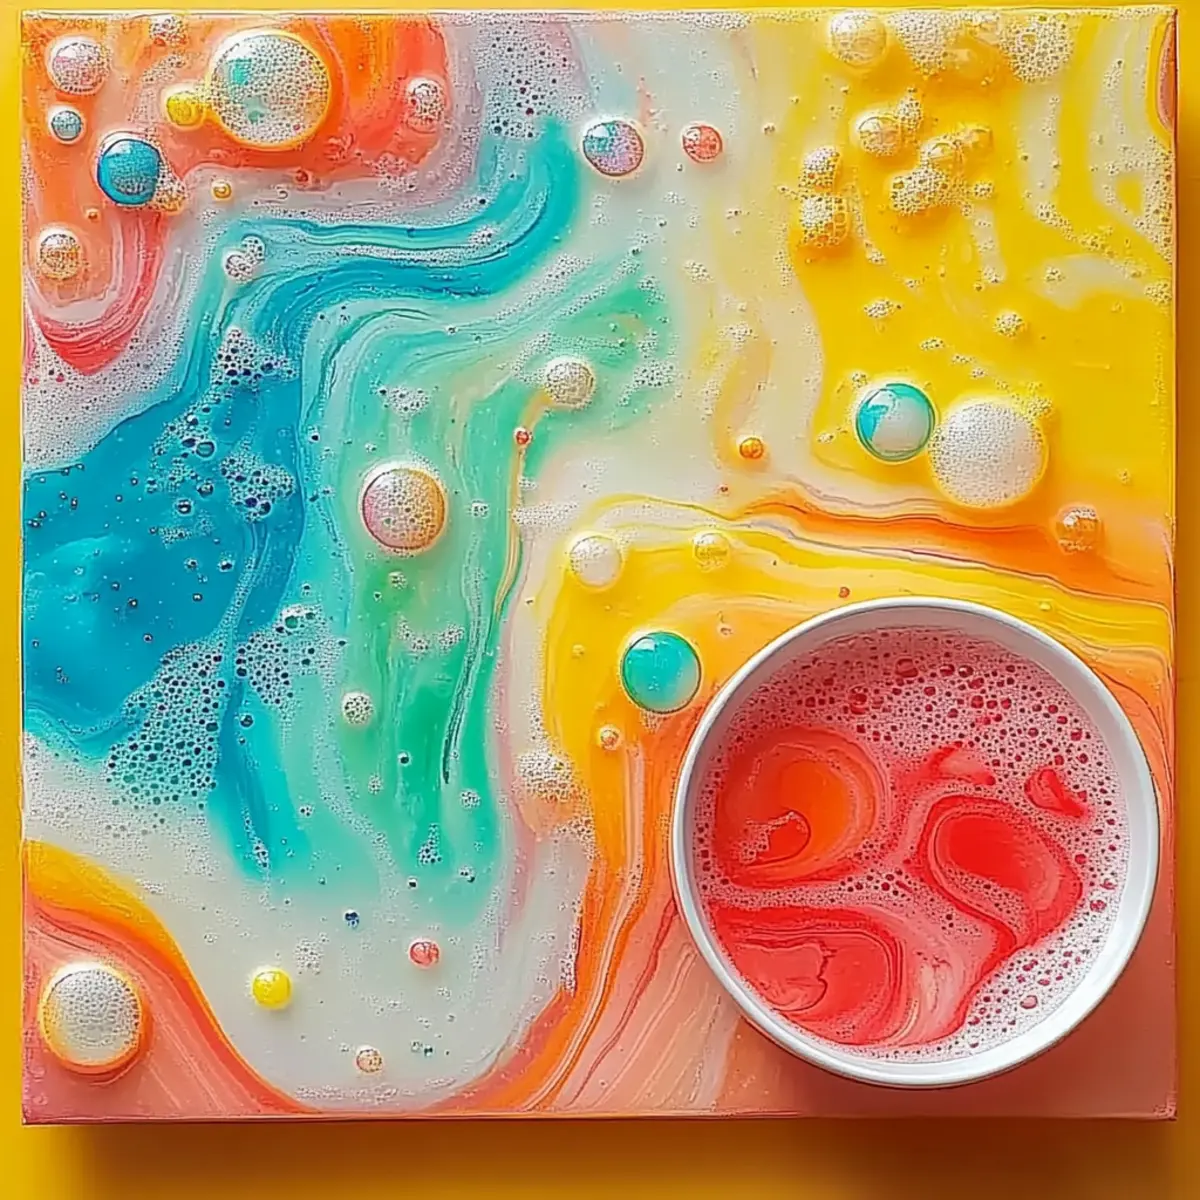
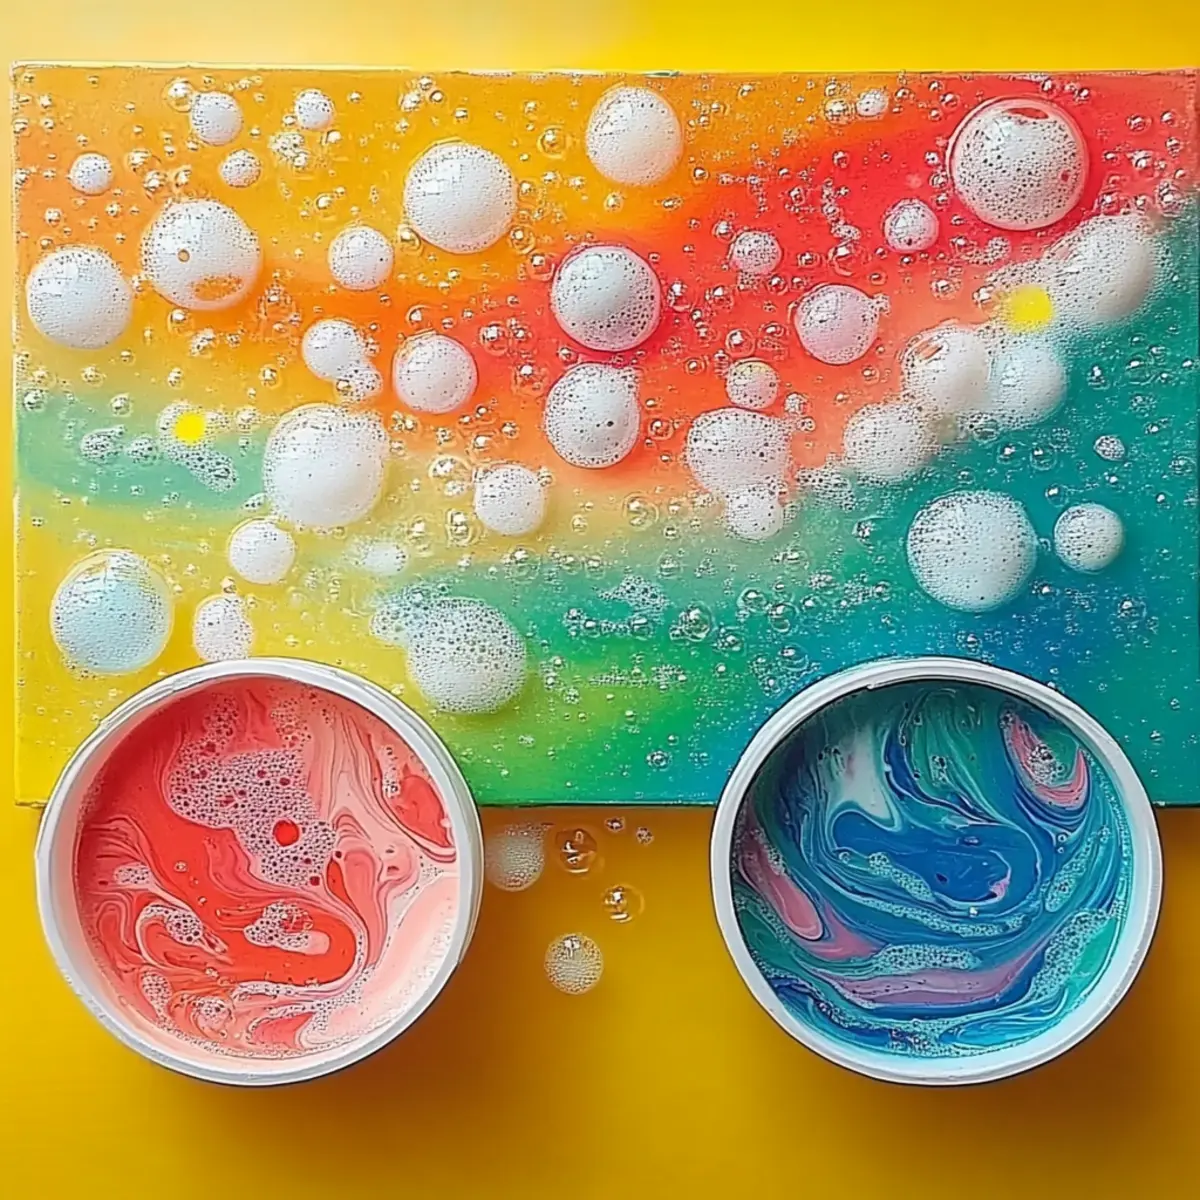
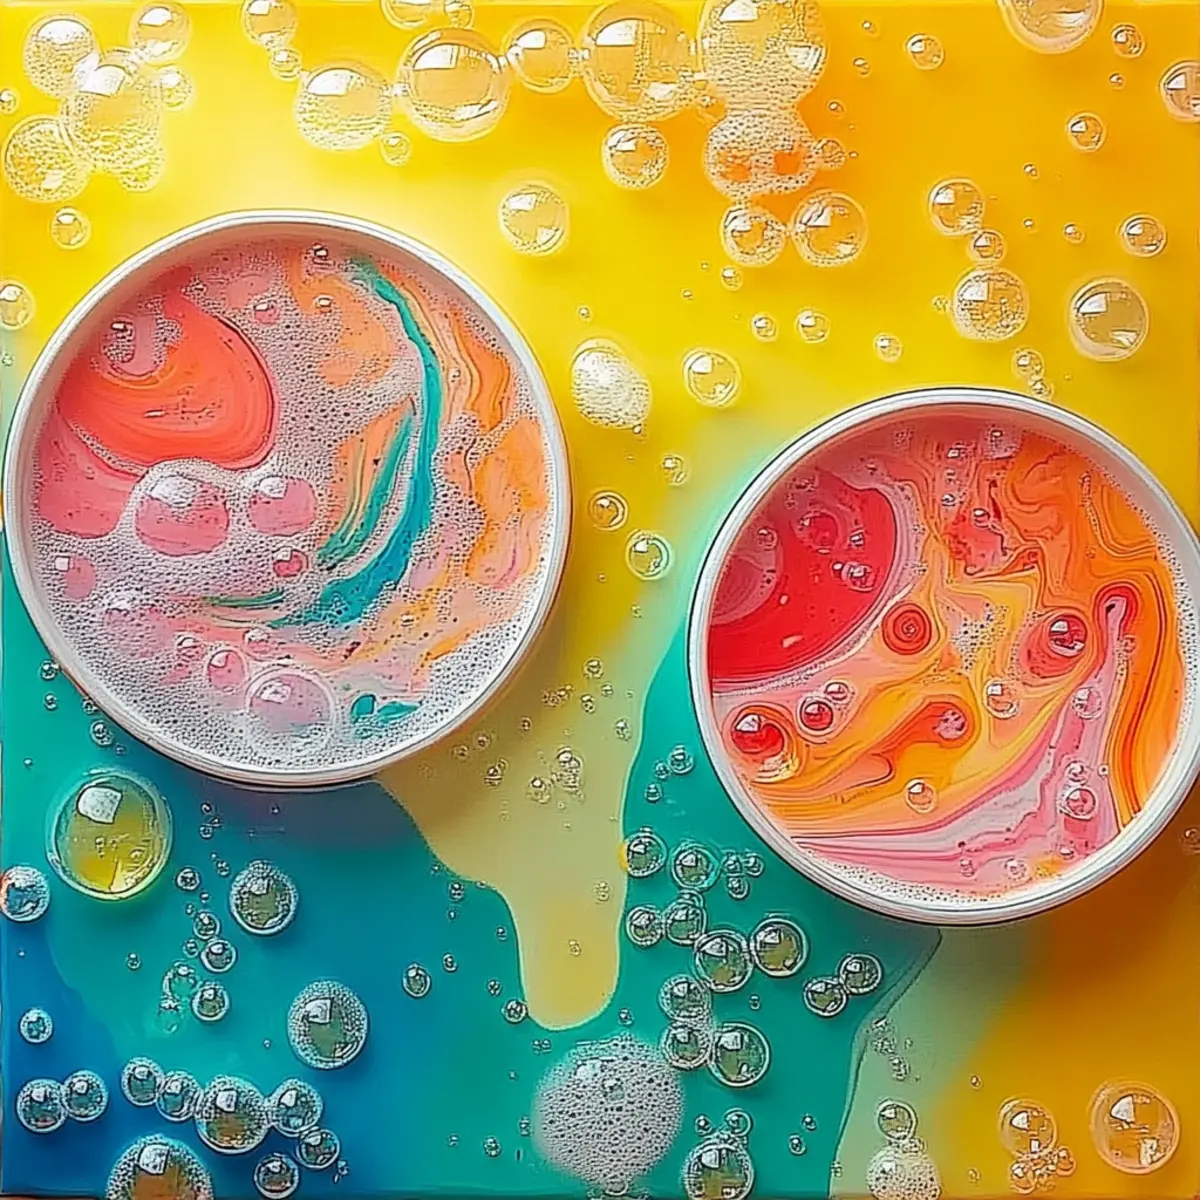
Bubble Painting Adventure - Ready to Create?
Magic awaits! This DIY activity is a perfect blend of fun, creativity, and color. Quick prep means you can get started in just 10 minutes! Endless possibilities arise as kids can customize their bouncy balls with vibrant hues and playful designs. Family bonding happens as everyone can join in, making memories while crafting together. Plus, it's a great screen-free option that keeps them engaged and imaginative. So, gather those supplies and dive into this colorful adventure today!
Bouncy Ball Ingredients
• Ready to create your colorful bouncy balls? Here's what you'll need:
For the Mixture
- Small Cups or Bowls - Perfect for mixing your chosen colors; use one for each color.
- Liquid Watercolors or Food Coloring - Adds the vibrant hues; any safe coloring agent works as a substitute.
- Dish Soap - ½ cup helps with texture and formation of the balls; you can adjust for different textures.
- Water - ¼ cup acts as a binding agent; ensure it's at room temperature for easier mixing.
For Crafting
- Straws - Great for adding air to the mixture, enhancing the bouncy texture.
- White Cardstock or Watercolor Paper - Provides a sturdy surface for shaping and drying your creations.
- Tray or Table Covering - Keeps your workspace clean and mess-free during the fun.
Extras for Sparkle & Personalization
- Glitter or Shimmer Watercolor - Optional for adding extra sparkle, making your bouncy balls truly shine.
- Washable Markers - Perfect for outlining and personalizing your bouncy balls after they dry.
- Masking Tape - Use it to create fun designs or sections during the crafting process.
- Stencils or Cutouts - Ideal for achieving bubble layering patterns, adding even more creativity to your balls.
Dive into this Bubble Painting Adventure and let the fun begin! 🌈✨
How to Make Homemade Rainbow Glow Bouncy Balls
-
Gather Materials: Start by collecting all your ingredients and supplies on a covered tray or table. This organized setup will make the process so much smoother and more enjoyable for everyone!
-
Measure Water: Pour ¼ cup of warm water into each small cup. This will help in mixing the ingredients quickly, ensuring a fun and efficient experience.
-
Add Dish Soap: Squirt ½ cup of dish soap into the water in each cup. This will aid in forming the perfect texture for your bouncy balls, so pour with care!
-
Mix Colors: Now, mix in your chosen liquid watercolors or food coloring, one color per cup. Get creative and have fun with different color combinations!
-
Agitate Mixture: Use a straw to gently stir and agitate the mixture until it foams and creates bubbles. This process adds air, which is essential for that delightful bouncy texture.
-
Form Balls: Once mixed, carefully shape the mixture into small balls and place them on the white cardstock or watercolor paper to dry. Make sure they're shaped well for maximum bounce!
-
Dry Time: Allow your bouncy balls to dry for at least 1 hour. This waiting period is crucial for achieving the right consistency, so grab a book while you wait!
-
Personalize: After drying, unleash your creativity by using washable markers to outline your designs and bring them to life. Enjoy this step as it adds a personal touch to your colorful creations!
Optional: Add a sprinkle of glitter on top for an extra touch of sparkle!
Exact quantities are listed in the recipe card below.
Expert Tips for Bouncy Balls
-
Blend Well: Ensure mixtures are well-blended to avoid color separation. This will lead to vivid, uniform shades in your bouncy balls.
-
Control Vibrancy: For a more vibrant outcome, consider using less water with darker colors. This adjustment can really make your bubble painting adventure pop!
-
Watch Drying Time: Monitor the drying time carefully. If left too long, the balls can become too hard and lose that delightful bounce you desire.
-
Contrast Colors: Use dark or black paper as a backdrop when creating designs. This contrast helps the bright colors to stand out, enhancing the visual appeal.
-
Experiment Safely: If adding scents with essential oils, ensure they are child-safe. This provides a fun sensory experience without compromising safety.
Storage Tips for Homemade Rainbow Glow Bouncy Balls
Room Temperature: Store completed bouncy balls in a cool, dry place away from direct sunlight to maintain their vibrant colors and bouncy texture.
Fridge: If you want to prolong their lifespan, place the bouncy balls in an airtight container in the fridge for up to 1 week. Ensure they are fully dry before storing.
Reheating: If the bouncy balls lose their bounce after storage, you can let them warm to room temperature; a little gentle squeezing can also help restore their elasticity.
Avoid Moisture: Keep them in a dry environment, as excess moisture can affect the texture and performance of the balls. Enjoy your bubble painting adventure!
What to Serve with Homemade Rainbow Glow Bouncy Balls?
Crafting isn't just about the project; it's about the joy it brings to your afternoon. Why not pair this colorful activity with some delightful snacks that keep the sparkle alive?
- Fruit Skewers: Bright and fruity, these are easy to create alongside your bouncy balls. Kids can help assemble colorful combinations for a tasty treat!
- Rainbow Veggie Platter: Chop veggies into vibrant colors and serve with a delicious dip. This crunchy snack is not only healthy but visually enticing.
- Colorful Smoothies: Whip up some refreshing smoothies in various hues. Use fruits like berries, bananas, and spinach, making a nutritious drink to fuel the fun!
- Homemade Edible Paints: Keep the creativity flowing by preparing some edible paint with yogurt and food coloring. Kids can create art on rice cakes or toast before diving into the bouncy ball crafting!
- Popcorn with Sprinkles: A sweet and salty snack that's always a hit. Drizzle melted white chocolate over popcorn, then add colorful sprinkles to match your bouncy ball creations!
- Fun Drinks: Serve up sparkling water with slices of fruit or a splash of juice for a festive, fizzy beverage that complements the vibrant crafting atmosphere.
Pair these delightful bites with the bubbly fun of your Bubble Painting Adventure-it's sure to create a happily memorable crafting session!
Bouncy Ball Variations
Feel free to add your personal touch to these delightful creations with a dash of creativity and fun!
-
Natural Dyes: Swap food coloring for natural options like beet juice or turmeric for eco-friendly bouncy balls. This twist not only colors your crafts but also introduces kids to the wonders of natural ingredients.
-
Texture Fun: Try using different surfactants like shampoo to experiment with the texture of your bouncy balls. The unique feel can add an exciting twist to the crafting experience.
-
Fragrant Touch: Incorporate a few drops of kid-safe essential oils for a delightful scent. Imagine how fun it will be for kids to have fragrant bouncy creations!
-
Glitter Boost: Add some glitter or shimmer watercolor into your mixture for an extra touch of sparkle. These magical bouncy balls will dazzle in sunlight and make playtime even more enchanting!
-
Layered Colors: Create beautiful, multicolored, layered bouncy balls by blending two or more colors in each ball. Kids will love the surprise as they see their vibrant creations bounce!
-
Unique Shaping: Use cookie cutters to shape the mixture into fun forms before drying. Shapes like hearts, stars, or animals can transform simple bouncy balls into adorable playthings.
-
Foam Bubbles: Whip the mixture more vigorously to create larger bubbles. These can make for an interesting texture and a super fun sensory experience!
-
Glow-in-the-Dark: Mix in glow-in-the-dark powder to give your bouncy balls an enchanting nighttime surprise. Kids will love watching them shine as they play in the dark!
Make Ahead Options
These DIY Rainbow Glow Bouncy Balls are perfect for busy home cooks looking to save time and enjoy creative fun! You can measure out all liquid ingredients (¼ cup of water and ½ cup of dish soap) and mix them in small cups up to 24 hours in advance, keeping them covered in the refrigerator to maintain quality. Additionally, pre-mixing your desired liquid watercolors or food coloring in separate cups can streamline the crafting process. Just before you're ready to craft, retrieve the prepared ingredients, agitate the mixture with a straw, and follow the standard instructions to shape and dry the balls. With this prep, you'll have more time to enjoy the activity with your loved ones!
DIY Rainbow Glow Bouncy Balls Recipe FAQs
What should I look for when selecting liquid watercolors or food coloring?
Absolutely! When choosing liquid watercolors or food coloring, look for vibrant hues that are safe for kids. Ensure they're non-toxic and easily mixable, which will help achieve those stunning colors that really pop in your bouncy balls. Brands that offer washable options make cleanup a breeze as well!
How should I store my completed bouncy balls?
To store your homemade rainbow glow bouncy balls, place them in a cool, dry place, away from sunlight. You can also keep them in an airtight container in the fridge for up to one week to preserve their bouncy texture. Just make sure the balls are completely dry before storing to avoid any moisture that could affect their bounce!
Can I freeze the bouncy balls?
Yes, you can freeze bouncy balls to extend their life! Wrap them individually in plastic wrap or place them in a freezer-safe container. They'll stay fresh for up to 3 months. To use them after freezing, allow the bouncy balls to thaw at room temperature before enjoying them again!
What should I do if my bouncy balls are too hard after drying?
If your bouncy balls turn out too hard, don't worry! You can quickly fix this. Submerge them in warm water for a few minutes to soften them. Afterward, gently squeeze and reshape them. The heat and moisture will help restore some of their original bounciness!
Are these bouncy balls safe for pets and kids?
While these DIY bouncy balls are made from non-toxic materials, they are not edible and should be kept away from pets and very young children who might be inclined to chew on them. Always supervise playtime to ensure safety and prevent any accidental swallowing.
What if I want to customize the colors of the bouncy balls?
Very! You can absolutely customize your bouncy balls by mixing different liquid watercolors or trying natural dyes like beet juice or turmeric for a fun and eco-friendly twist. Just take care to blend the colors thoroughly for the best results, and let your creativity shine through!
Bubble Painting Adventure: A Colorful Creative Fun for All!
Equipment
- small cups or bowls
- Straws
- white cardstock or watercolor paper
- tray or table covering
Ingredients
Bouncy Ball Mixture
- ½ cup Dish Soap Adjust for different textures
- ¼ cup Water At room temperature
- Liquid Watercolors or Food Coloring Any safe coloring agent works
For Crafting
- Straws Great for adding air
- White Cardstock or Watercolor Paper For shaping and drying
- Tray or Table Covering To keep workspace clean
Extras for Sparkle & Personalization
- Glitter or Shimmer Watercolor Optional for sparkle
- Washable Markers For outlining after drying
- Masking Tape For designs during crafting
- Stencils or Cutouts For bubble layering patterns
Instructions
Directions
- Gather Materials: Collect all ingredients and supplies on a covered tray or table.
- Measure Water: Pour ¼ cup of warm water into each small cup.
- Add Dish Soap: Squirt ½ cup of dish soap into the water in each cup.
- Mix Colors: Mix in your chosen liquid watercolors or food coloring, one color per cup.
- Agitate Mixture: Use a straw to gently stir the mixture until it foams and creates bubbles.
- Form Balls: Shape the mixture into small balls and place them on cardstock or watercolor paper.
- Dry Time: Allow the bouncy balls to dry for at least 1 hour.
- Personalize: Use washable markers to outline designs after drying.


Leave a Reply