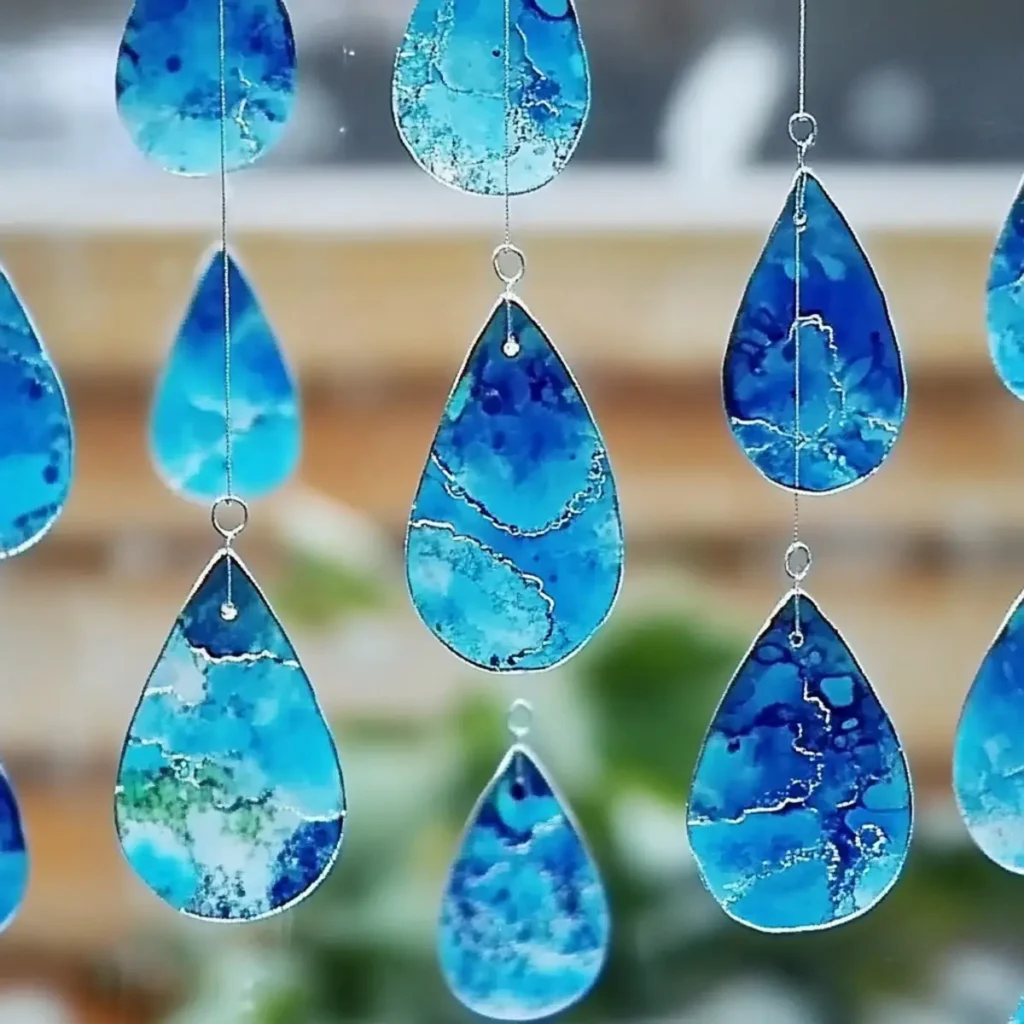
On those gloomy, rainy days when the clouds seem to blanket the sky, there's something so uplifting about bringing a splash of color into your home. I discovered a delightful craft project that not only brightens the dreariest of days but also fills the room with whimsical charm-introducing the Blue Crayon Raindrop Suncatchers! ☔💙 This simple DIY project is perfect for both kids and adults, allowing creativity to flow while providing a beautiful way to capture light.
In just 20 minutes or so, you can create stunning raindrop shapes from vibrant blue crayon shavings, which come to life when hung in a sunny spot. Watching the sunlight dance through the colorful pieces is nothing short of magical! Not only is this craft an excellent remedy for boredom, but it also serves as a fantastic way to bond with little ones while engaging their senses. So, gather your materials and let's infuse some joy into our spaces with these delightful suncatchers!

Why You'll Love These Blue Crayon Raindrop Suncatchers?
Brighten your space: These suncatchers transform dreary days into vibrant displays of color!
Simple and quick: With just 20 minutes of your time, you'll see a lovely result that's as easy as it is fun.
Kid-friendly fun: This project is not just for adults; kids can unleash their creativity, making it a perfect family activity.
Endless variations: Feel free to mix colors and shapes for a personalized touch that reflects your style.
Sensory delight: Watching sunlight filter through these creations adds a whimsical charm to any room!
Blue Crayon Raindrop Suncatcher Ingredients
• Get ready to brighten up your rainy days with all the essentials you need for this enjoyable craft!
For the Suncatcher Base
- Blue Crayons - The star of your project, providing vibrant colors that create a beautiful ocean effect. Choose various shades of blue for added depth.
- Waxed Paper - The sturdy canvas for your crayon shavings; it won't stick when melted. Using two sheets allows for layering, enhancing the suncatcher's durability.
For Crafting Tools
- Iron - The key tool needed to melt crayon shavings into a stunning suncatcher. Adult supervision is a must to ensure safety during use.
- Scissors - Essential for cutting your melted suncatcher into fun raindrop shapes or sea creatures. Aim for precise cuts for a neat final look.
- Hole Punch - Used for making holes for hanging your creation. Though optional, it simplifies the process of displaying your suncatcher beautifully.
For Hanging
- Embroidery Floss or String - This sturdy string will hang your suncatcher in a sunny window. Any strong string or floss works beautifully for this purpose.
- Marker - Handy for tracing shapes before cutting. A washable marker is ideal, as it easily wipes off if you need adjustments.
Extras
- Old Towel or Parchment Paper - Protects your ironing board from crayon residue during melting. This step is essential to keep your workspace clean and mess-free!
Now that you have everything lined up, let's get crafting those beautiful Blue Crayon Raindrop Suncatchers to brighten any rainy day! ☔💙
How to Make Blue Crayon Raindrop Suncatchers
-
Prep Ingredients: Start by gathering all your materials-crayons, waxed paper, and crafting tools. Having everything ready at hand makes the crafting process seamless and fun!
-
Grate Crayons: Carefully use a pencil sharpener or a knife to shave the blue crayons into small pieces. Aim for a variety of blues to create depth, ensuring you have a colorful spectrum for your suncatcher.
-
Layer Crayon Shavings: Place a generous mound of your crayon shavings between two sheets of waxed paper. Press them down gently to spread out the shavings evenly and create a beautiful explosion of color!
-
Iron the Shavings: With adult supervision, cover the waxed paper with an old towel or parchment paper. Set your iron to a low heat and glide it over the covered waxed paper until the shavings melt into a colorful, cohesive design.
-
Cut Shapes: Once the melted sheets have cooled, carefully cut them into your desired raindrop shapes using scissors. This is where your creativity can truly shine!
-
Create Hanging Holes: Use a hole punch to create a hole near the top of each shape for hanging. This step is optional but makes displaying your vibrant suncatcher a breeze.
-
Display: Thread the hole with embroidery floss or string and hang your suncatcher in a sunny spot. Enjoy the magic as sunlight refracts through your beautiful creation!
Optional: For added sparkle, sprinkle a little glitter into the crayon shavings before melting.
Exact quantities are listed in the recipe card below.
Make Ahead Options
These Blue Crayon Raindrop Suncatchers are perfect for busy families looking to save time! You can prep the crayon shavings up to 3 days in advance-just grate and store them in an airtight container to keep the colors vibrant. The waxed paper layers can also be assembled ahead of time; simply place your crayon shavings between the sheets and refrigerate until you're ready to iron them. When you're set to create, heat the iron and melt the shavings. This method ensures that your suncatchers come out just as beautiful and colorful, with minimal effort when you reach for them on a rainy day. Enjoy crafting without the time crunch!
What to Serve with Blue Crayon Raindrop Suncatchers?
Bring the sunny spirit of your crafted suncatchers into a full-day experience of creativity and joy!
-
Bright Fruit Salad: Combine colorful fruits like strawberries, blueberries, and oranges to create a refreshing, vibrant dish that inspires happiness.
-
DIY Hot Chocolate Station: A whimsical touch to any crafting day! Set out toppings like whipped cream, sprinkles, and marshmallows for cozy warm drinks.
-
Colorful Veggie Platter: Serve a rainbow of fresh veggies with hummus or ranch dip, promoting healthy munching while you craft.
-
Scented Candles: Create a relaxing environment with colorful, scented candles that evoke a sense of warmth and welcome.
-
Cheery Playlist: Curate a playlist filled with uplifting tunes to keep the energy high while you enjoy your creative antics.
-
Sparkling Lemonade: Serve bubbly lemonade infused with fruit slices for a refreshing drink that sparkles as bright as your creations.
This delightful selection will elevate your crafting day, making it even more special for both kids and adults alike!
Storage Tips for Blue Crayon Raindrop Suncatchers
- Room Temperature: Keep your suncatchers in a cool, dry space away from direct sunlight to prevent warping or melting, maintaining their vibrant look for up to 3 months.
- Flat Storage: Always store your Blue Crayon Raindrop Suncatchers flat between sheets of wax paper to avoid sticking and scratches, ensuring they remain beautiful until displayed.
- Reheating: If the suncatchers lose shape slightly, you can reheat them briefly with low-heat settings on the iron under an old towel for about 10 seconds to restore their form.
- Gift-Friendly: These suncatchers make colorful gifts! Package them in a flat box with a note on their care to keep your thoughtful presents bright and shining.
Expert Tips for Blue Crayon Raindrop Suncatchers
- Safety First: Always supervise children when using the iron to prevent burns. An adult should handle the ironing step for safety.
- Color Variations: Combine different shades of blue or even other colors to mimic various weather effects, making your suncatcher unique and vibrant.
- Smooth Melting: Ensure the iron is set to low heat. This helps prevent the waxed paper from burning and allows even melting of crayon shavings.
- Shape Ideas: Explore creative shapes! Use cookie cutters to create fun designs like fish or stars for a whimsical touch in your suncatchers.
- Storage Solutions: When finished, store your creations flat between sheets of wax paper to avoid sticking together, preserving their beauty.
Blue Crayon Raindrop Suncatcher Variations
Feel free to stir your creativity with these delightful twists that elevate your raindrop suncatchers!
-
Colorful Rainbows:
Mix in various crayon colors to design eye-catching rainbow suncatchers that brighten any room, adding even more joy to a rainy day.
Imagine the warmth on an overcast afternoon as vibrant hues dance together, creating a spectrum that draws smiles from everyone. -
Glittery Touch:
Sprinkle a bit of glitter among the crayon shavings before ironing to add some sparkle. This little touch elevates the charm, giving your creations an enchanting glimmer.
Every shard of sunlight will flip and sparkle against these shimmering elements, spreading joy like little fairy whispers! -
Shape Variety:
Use cookie cutters to craft unique shapes such as stars, hearts, or sea creatures. Not only does this add fun, but it also caters to varied interests among kids and adults alike.
With diverse designs hanging, your space transforms into an art gallery showcasing creative flair! -
Heat Level:
Create a thicker melting layer by layering three sheets of waxed paper-which results in a sturdier suncatcher that can withstand curious little hands!
This allows you to hang the suncatchers in different areas without worries, maintaining their enchanting beauty wherever you choose to display them. -
Opaque Papers:
Replace some of the waxed paper with colorful, opaque plastic sheets for a different texture and a more unique play of light.
The variety in materials will make your suncatchers stand out even more, sparkling uniquely with each sunbeam. -
Seasonal Themes:
Adapt your suncatchers to reflect different seasons by swapping colors for autumn oranges, spring greens, or winter whites, letting your creativity blossom year-round!
Change them as the seasons do, making a festive decoration while celebrating nature's transformation! -
Natural Elements:
Incorporate dried flowers or leaves along with crayon shavings for nature-inspired suncatchers that infuse a calming, earthy vibe.
Picture the lovely blends of color and organic shapes framing your window, inviting the essence of nature right into your home. -
Mixed Mediums:
Combine crayon shavings with pieces of colored tissue paper for an eclectic, textured look, mixing softness with that classic waxy shine.
This delightful mix amplifies creativity, ensuring each creation captures the imagination with its playful, layered appearance.
Blue Crayon Raindrop Suncatchers Recipe FAQs
How do I choose the right blue crayons?
Absolutely! For the best results, use a variety of blue crayons-more vibrant colors will make the ocean effect pop! Look for shades like sky blue, navy, and even a hint of turquoise. This mix creates depth and dimension that makes your suncatcher sparkle beautifully!
What's the best way to store my suncatchers?
To keep your Blue Crayon Raindrop Suncatchers looking fresh, store them flat between sheets of wax paper in a cool, dry place. This will protect them from sticking together or getting scratched. They can stay in great condition for up to 3 months, so don't rush to hang them all at once!
Can I freeze my suncatchers?
It's not recommended to freeze suncatchers since the cold can cause the wax to become brittle. Instead, keep them at room temperature. If you need to store them long-term, just ensure they're well-protected between wax paper sheets, and they'll be just fine until you're ready to hang them!
What safety precautions should I take with kids?
Very important! When using the iron, always supervise children closely. Have the adult handle the ironing part since it poses a burn risk. Ensure that kids keep a safe distance and are aware of the hot surfaces. You can even turn this into a learning moment about art and safety!
What if my melted crayon shavings don't spread evenly?
If your crayon shavings don't fully melt or leave patches, don't worry! Simply reapply low heat with the iron for an additional 10 seconds, gently moving it around to help the wax flow. If need be, re-layer your shavings and iron again until you achieve a smooth and cohesive look.
Can pets be around while I'm crafting?
While crafting, it's best to keep pets at a safe distance. The fumes from melting crayon wax can be bothersome to animals. Create a separate crafting zone to ensure they're comfortable, and you can enjoy your project without worries!
Brighten Any Rainy Day with Blue Crayon Raindrop Suncatchers
Equipment
- Iron
- scissors
- Hole punch
Ingredients
For the Suncatcher Base
- 4 pieces Blue Crayons Choose various shades of blue for added depth.
- 2 sheets Waxed Paper Using two sheets allows for layering.
For Crafting Tools
- 1 unit Iron Adult supervision is a must.
- 1 unit Scissors Aim for precise cuts.
- 1 unit Hole Punch Optional, makes hanging easier.
For Hanging
- 1 length Embroidery Floss or String Any strong string works well.
- 1 unit Marker A washable marker is ideal.
Extras
- 1 unit Old Towel or Parchment Paper Protects your workspace.
Instructions
How to Make Blue Crayon Raindrop Suncatchers
- Start by gathering all your materials—crayons, waxed paper, and crafting tools.
- Carefully use a pencil sharpener or a knife to shave the blue crayons into small pieces.
- Place a mound of your crayon shavings between two sheets of waxed paper.
- Cover with an old towel or parchment paper and glide a low-heat iron over the covered waxed paper.
- Once cooled, cut the melted sheets into raindrop shapes using scissors.
- Use a hole punch to create a hole near the top of each shape for hanging.
- Thread the hole with embroidery floss or string and hang your suncatcher.


Leave a Reply