
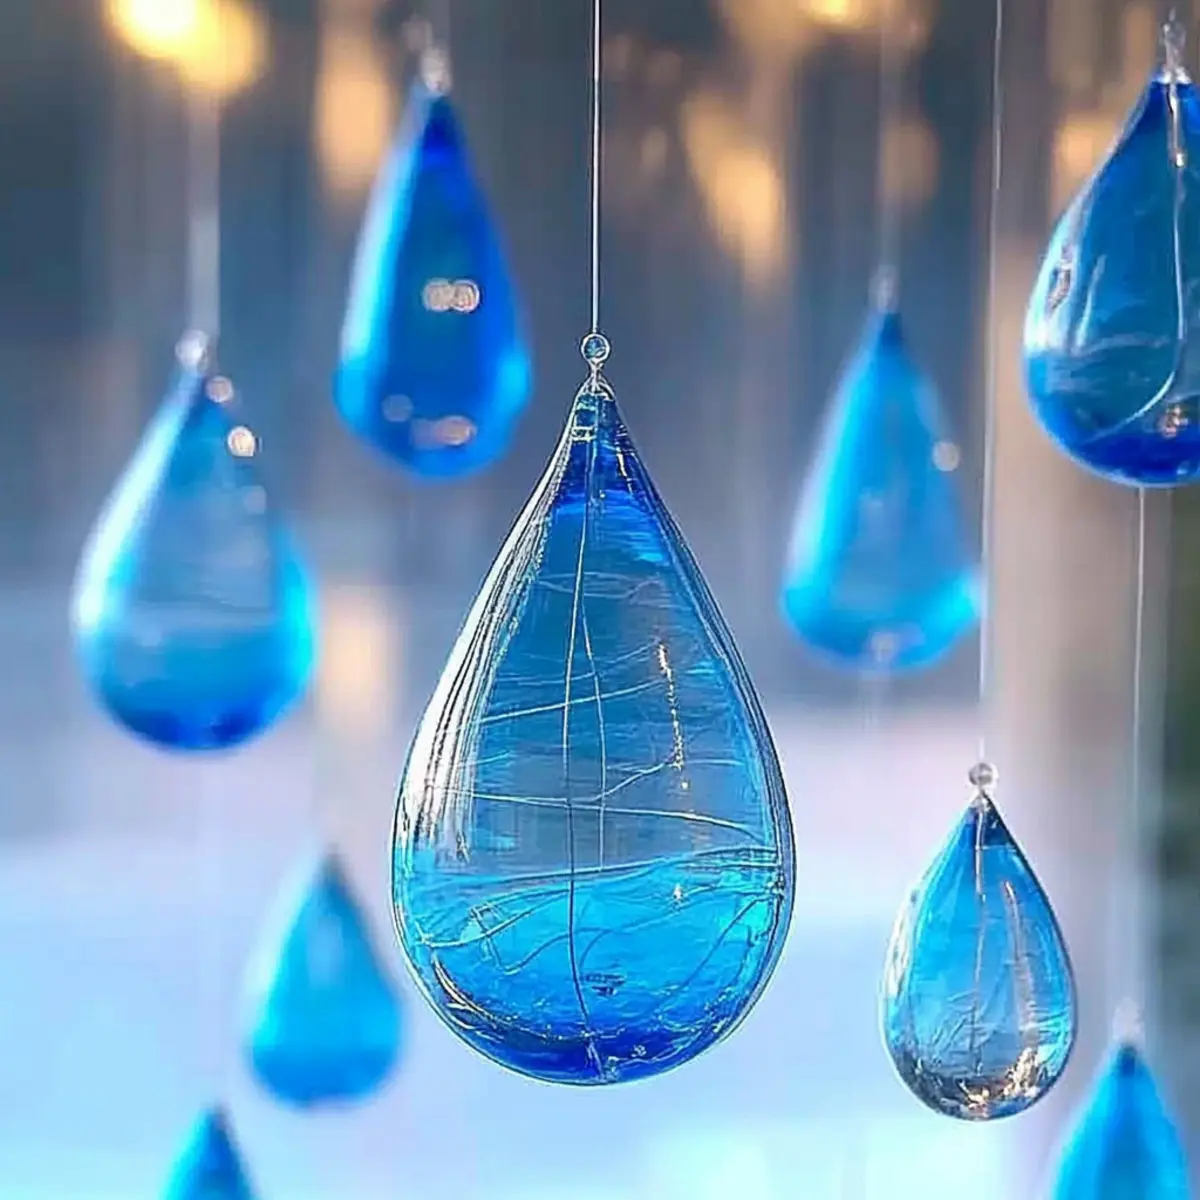
Rainy days don't have to be gloomy-especially when you can transform them into bursts of color with just a few simple materials! I recently found myself staring out the window, wishing for a touch of brightness on a dreary afternoon. That's when the idea for these Blue Crayon Raindrop Suncatchers struck me. In just 10 minutes, you can create these vibrant decorations that not only recycle old crayons but also add an artistic flair to your home.
Perfect for kids and adults alike, this DIY project invites creativity and brings a joyful splash of color whenever the sun shines through. Imagine how beautiful your windows will look as sunlight filters through these lovely suncatchers, reminiscent of stained glass. Let's dive into this fun crafting adventure, and celebrate the rain with a dash of creativity! 🌧💙
Why are Blue Crayon Raindrop Suncatchers so appealing?
Quick and Easy: In just 10 minutes, you can craft vibrant suncatchers that brighten any rainy day.
Creativity Unleashed: Perfect for both kids and adults, this DIY project is a fun way to engage with art and explore color mixing.
Eco-Friendly Crafting: Turn old crayons into something beautiful, promoting recycling while enjoying quality time.
Eye-Catching Decor: With sunlight streaming through, these suncatchers create stunning displays that enhance your home's aesthetic.
Versatile Themes: Swap out colors for different seasons or events, allowing you to customize your decor throughout the year.
Make your crafting experience even more enjoyable by checking out these additional tips for working with crayons!
Blue Crayon Raindrop Suncatcher Ingredients
Get ready to unleash your inner artist with these vibrant and fun ingredients!
For the Suncatcher
- Blue crayons - The main material for colorful designs; feel free to mix various shades for an exciting rainbow effect.
- Waxed paper - This serves as the melting surface, creating the structure; remember to use waxed paper for best results.
- Embroidery floss or string - Essential for hanging your suncatcher; any sturdy thin string will do just fine.
For Optional Enhancements
- Glitter - Sprinkle some in with the crayon shavings for an extra sparkle; this can add a touch of whimsy to your suncatcher.
- Additional colored crayons - Mix in other colors for seasonal designs or special occasions, expanding the creativity of your blue crayon raindrop suncatchers!
How to Make Blue Crayon Raindrop Suncatchers
-
Choose Crayons: Select your favorite shades of blue crayons and carefully remove their wrappers to prepare for some colorful fun!
-
Create Shavings: Use a pencil sharpener to make small shavings from the crayons, then spread them evenly on a sheet of waxed paper, creating a vibrant base.
-
Prepare for Melting: Gently place a second sheet of waxed paper over the crayon shavings to contain the colorful mess while melting.
-
Melt Crayons: Set your iron to the lowest setting and carefully press it over the top waxed paper for about 10-20 seconds until the shavings beautifully melt together.
-
Cool Down: Allow the melted wax to cool completely on a flat surface. Take a moment to admire your colorful creation as it begins to set!
-
Cut Shapes: Once cooled, draw raindrop shapes on the melted wax and carefully cut them out, transforming them into charming decor pieces.
-
Add Hanging Element: Punch a small hole at the top of each raindrop and thread through some string or embroidery floss to prepare them for display.
-
Display: Hang your suncatchers in a sunny window, and watch as they catch the light, adding a cheerful splash of color to your day!
Optional: Add glitter to the crayon shavings for an extra twinkle in your suncatchers!
Exact quantities are listed in the recipe card below.
Expert Tips for Blue Crayon Raindrop Suncatchers
-
Supervise Young Crafters: Keep a close watch on children during the ironing process, as the iron can become very hot and may lead to burns.
-
Use the Right Sharpener: To make crayon shaving easier, opt for a sharpened pencil sharpener that is designed for finer shavings, ensuring smoother melting.
-
Embrace Color Mixing: Don't be afraid to mix different colored crayons to create stunning gradients within your suncatchers, enhancing the visual appeal of your blue crayon raindrop designs.
-
Layer with Glitter: For added sparkle, incorporate glitter into your crayon shavings before melting, giving your suncatchers a whimsical touch that catches the light beautifully.
-
Choose the Right Paper: Always use waxed paper rather than regular paper to prevent sticking and achieve optimal melting results for your colorful creations.
Make Ahead Options
These Blue Crayon Raindrop Suncatchers are a fantastic option for busy home cooks looking to spark creativity without the last-minute rush. You can prepare the crayon shavings up to 24 hours in advance; simply make the shavings and store them in an airtight container at room temperature to preserve their vibrant colors. Additionally, you can cut out the raindrop shapes ahead of time and keep them in the refrigerator, ensuring they stay fresh for family crafting sessions. When you're ready to finish your suncatchers, just follow the melting and assembly steps as usual, and you'll have beautiful decorations ready to hang in no time! This makes it easy to enjoy quality family craft time without feeling overwhelmed.
How to Store and Freeze Blue Crayon Raindrop Suncatchers
Room Temperature: Keep your suncatchers in a cool, dry place away from direct sunlight to maintain their vibrant colors for up to 1 month.
Display: These charming suncatchers are designed for immediate use and should be hung in sunny windows to showcase their colorful beauty right after crafting.
Reconditioning: If any suncatchers become misshapen over time, gently reheating them with an iron on low for a few seconds can help restore their original form.
No Freezing Required: As this craft project is best enjoyed fresh and displayed prominently, freezing is not applicable.
Blue Crayon Raindrop Suncatcher Variations
Feel free to unleash your creativity and customize these suncatchers with these fun ideas!
-
Color Mix: Blend different crayon colors like green or yellow with blue for a unique, seasonal effect.
Imagine the bright hues swirling together, celebrating the sunny days ahead! -
Sparkle Up: Add glitter to your crayon shavings before melting for a dazzling finish.
The twinkles dancing in the sunlight will make your suncatchers truly enchanting! -
Shape Shift: Instead of raindrops, cut out fun shapes like stars or hearts for a whimsical twist.
These alternative designs can brighten your room all year round! -
Double Layer: Place a second layer of clear wax paper on top of the melted shavings for a glossy finish.
This adds depth and more durability to your creations while enhancing their beauty! -
Seasonal Shades: Use pastel crayons for a spring vibe or warm tones like reds and oranges for fall.
Celebrate the changing seasons with suncatchers that reflect the colors all around you! -
Texture Play: Experiment with varying grater sizes for different textures in your melted design.
A mix of smooth and rough patterns will make your suncatchers even more visually appealing! -
Nature-Inspired: Embed small leaves or flower petals within the melted crayon for a touch of nature.
This natural element creates an organic feel, perfect for outdoor displays. -
Layered Designs: Melt crayon shavings between layers of wax paper for multi-colored suncatchers that pop.
The layers will catch the light beautifully, showcasing a delightful depth of color!
What to Serve with Blue Crayon Raindrop Suncatchers?
Transform your crafting day into a delightful experience with these colorful touches that amplify your suncatchers' charm.
- Sunny Snacks: Bright fruit skewers made with vibrant berries and melons perfectly complement the cheerful energy of your creations.
- Colorful Smoothies: Refreshing smoothies packed with fruits and veggies are fun to make and sip while showcasing your suncatchers.
- Rainbow Cupcakes: These sweet treats not only mirror the colorful theme but provide a fun, festive snack for your crafting crew.
- Crafty Mocktails: Whip up fruity drinks combining juices and sparkly soda for a bubbly refreshment that matches the theme delightfully.
- Colorful Charcuterie: Create a vibrant spread with assorted cheeses, fruits, and nuts to fuel your creativity as you design.
- Cheesy Quesadillas: Quick and easy to make, these tasty bites can keep the energy up during your crafting session.
Crafting is always more enjoyable with vibrant bites and sips to keep the inspiration flowing!
Blue Crayon Raindrop Suncatchers Recipe FAQs
How do I choose the right crayons for my suncatchers?
Absolutely! While blue crayons are the star of the show, you can mix in any colors you love. Look for crayons that are free from dark spots and blemishes to ensure vibrant melting. Feel free to experiment with various shades for a rainbow effect!
How should I store my melted crayon suncatchers?
To keep your suncatchers looking fresh, store them in a cool, dry place away from direct sunlight. This will help maintain their vibrant colors for up to 1 month. Make sure to hang them in sunny windows to truly enjoy their beauty.
Can I freeze my suncatchers for later use?
No need for freezing! These suncatchers are crafted for immediate enjoyment, and freezing isn't applicable for this craft. However, if your suncatchers become misshapen over time, you can gently iron them on low heat for a few seconds to restore their original shape.
What should I do if my crayons don't melt properly?
Very! If you find that your crayon shavings aren't melting well, make sure your iron is set to the lowest temperature and that you're applying even pressure across the waxed paper. You can also try spreading the crayon shavings more evenly or checking the sharpness of your pencil sharpener for finer shavings.
Are melted crayon suncatchers safe around pets and children?
Great question! While the materials are non-toxic, supervision is key, especially with young crafters and pets around. Be cautious with the iron and educate kids not to touch any melted materials until fully cooled. Always ensure they know this is a crafting activity under adult supervision.
Can I add other elements to my suncatchers?
Yes, you can! Adding glitter to your crayon shavings before melting can create a lovely sparkly effect. Additionally, consider experimenting with layered colors or different shapes-your creativity knows no bounds!
Catch the Light: Easy Blue Crayon Raindrop Suncatchers 🌧💙
Equipment
- Iron
- Pencil Sharpener
Ingredients
For the Suncatcher
- 4 pieces Blue crayons Feel free to mix various shades for a rainbow effect.
- 2 sheets Waxed paper Use for best results.
- 1 piece Embroidery floss or string For hanging.
For Optional Enhancements
- 1 tablespoon Glitter Optional for added sparkle.
- 2 pieces Additional colored crayons To mix in for seasonal designs.
Instructions
How to Make Blue Crayon Raindrop Suncatchers
- Choose your favorite shades of blue crayons and carefully remove their wrappers.
- Use a pencil sharpener to make small shavings from the crayons, then spread them evenly on a sheet of waxed paper.
- Place a second sheet of waxed paper over the crayon shavings.
- Set your iron to the lowest setting and carefully press it over the top waxed paper for about 10-20 seconds.
- Allow the melted wax to cool completely on a flat surface.
- Once cooled, draw raindrop shapes on the melted wax and carefully cut them out.
- Punch a small hole at the top of each raindrop and thread through string or embroidery floss.
- Hang your suncatchers in a sunny window to showcase their colorful beauty.


Leave a Reply