
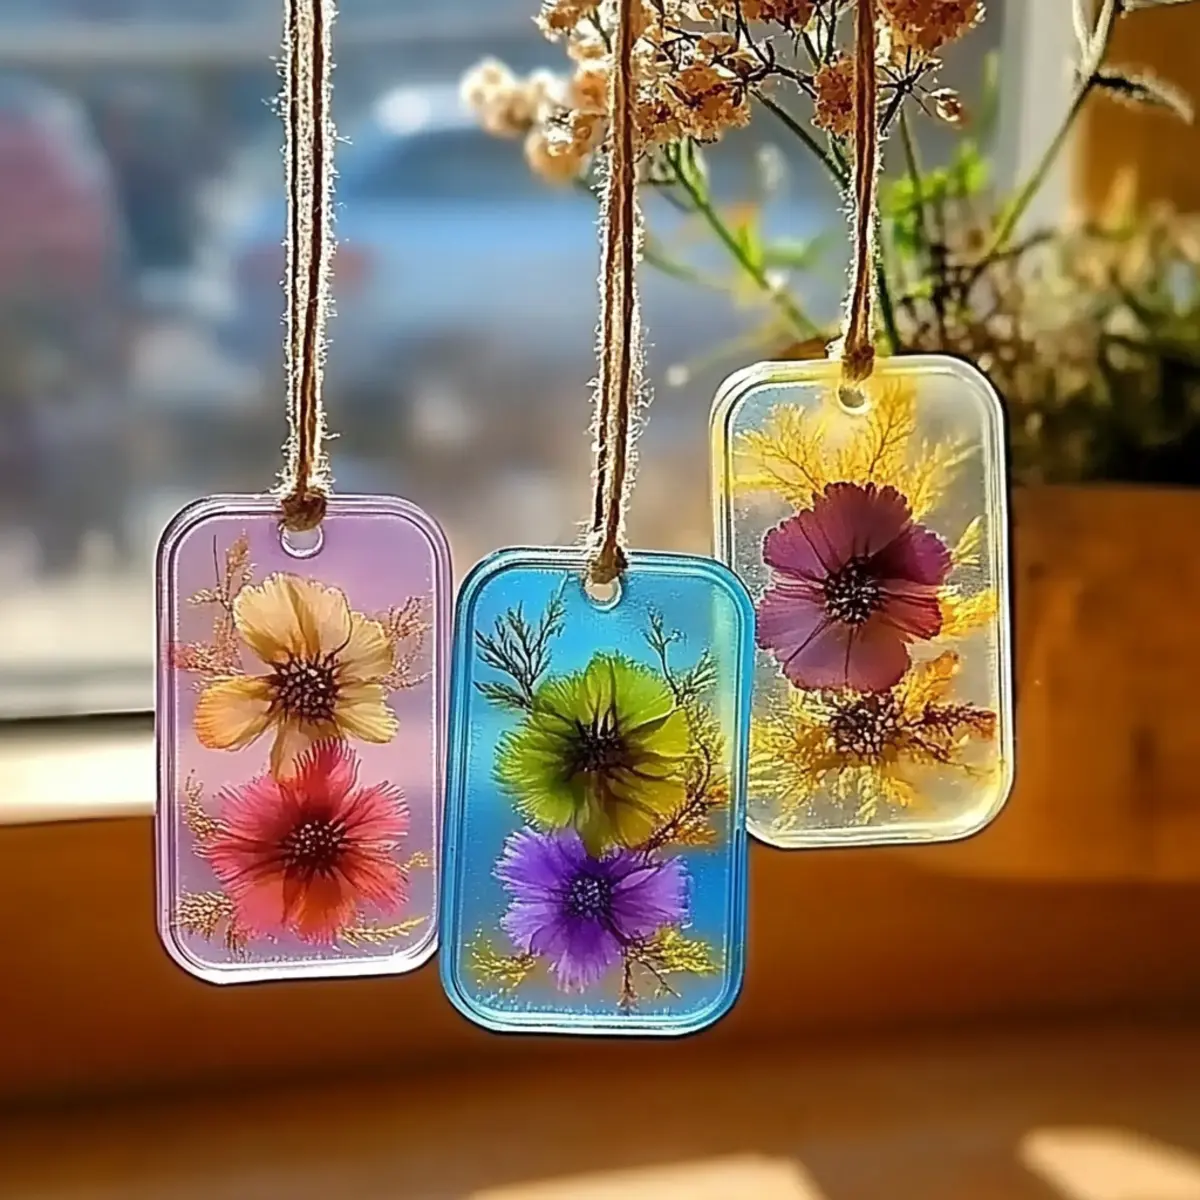
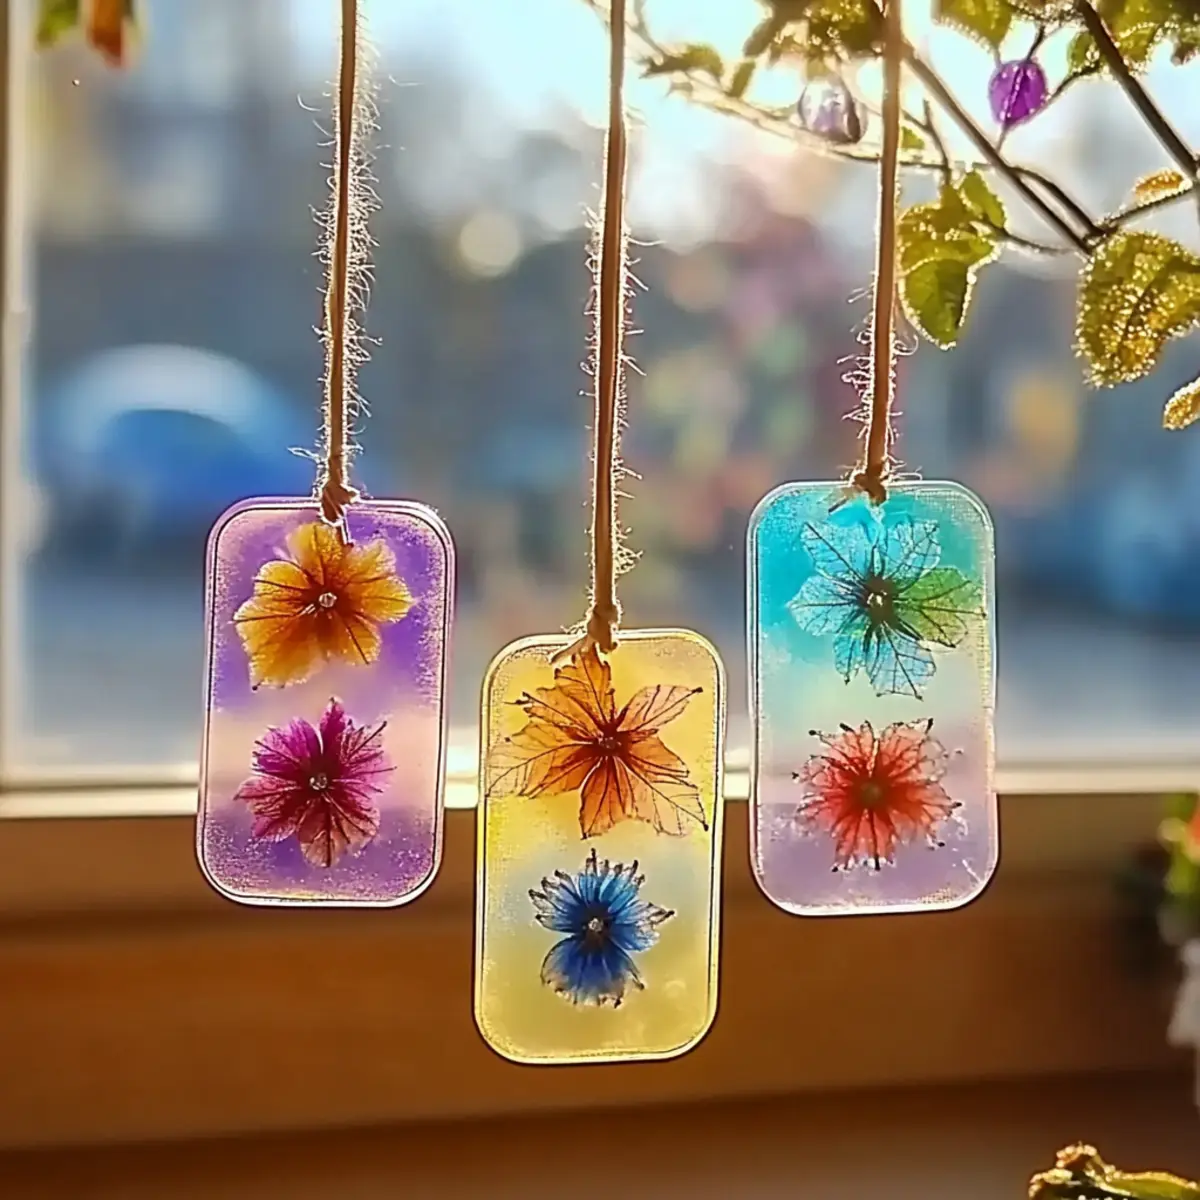
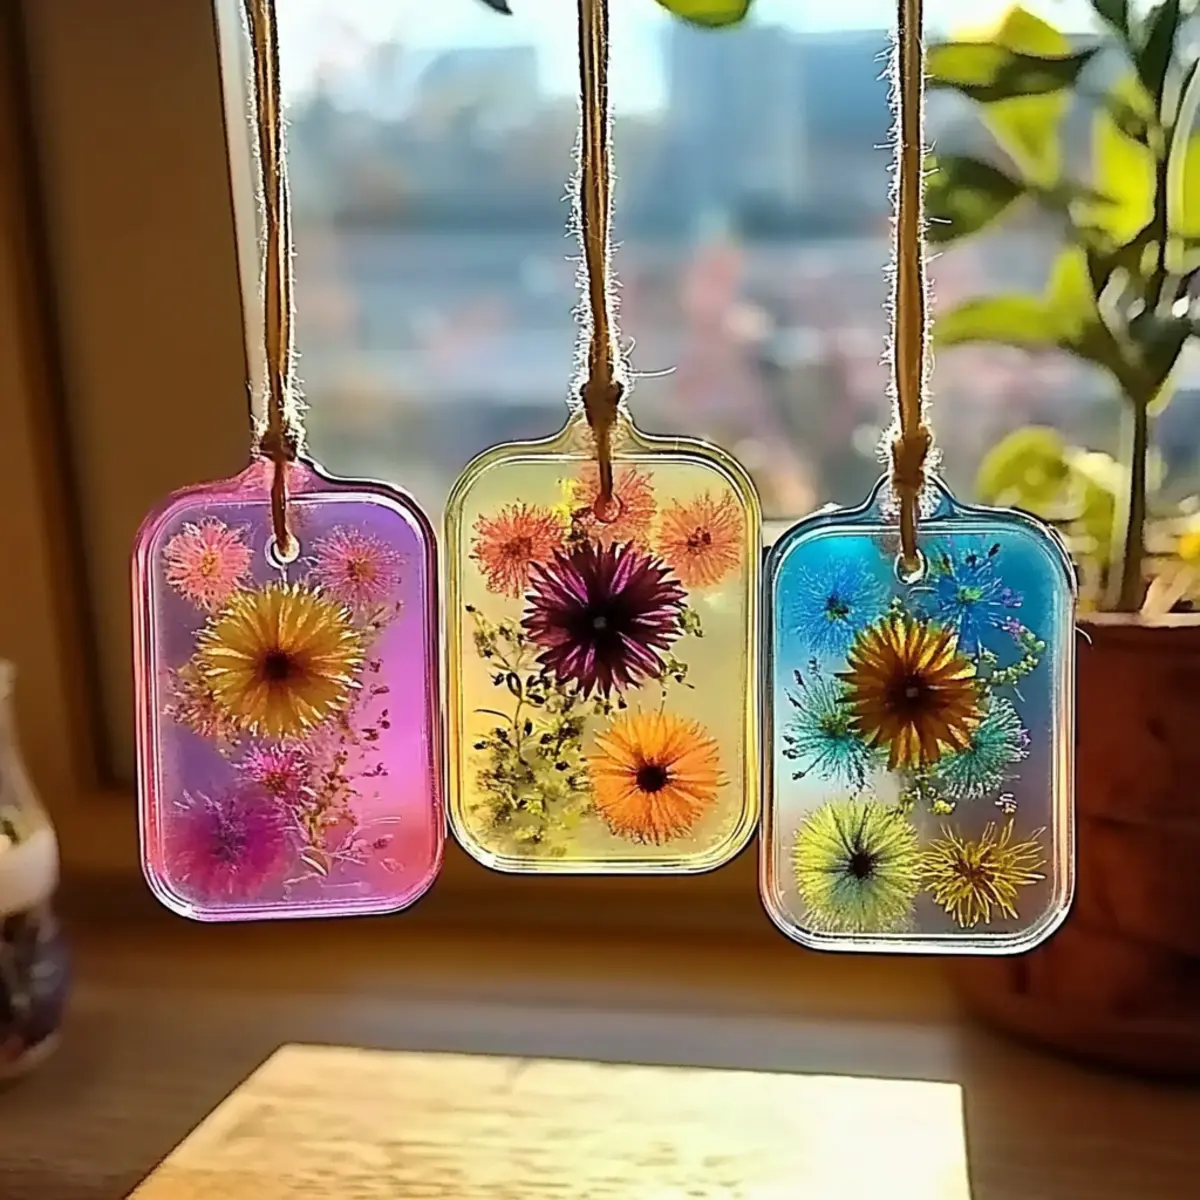
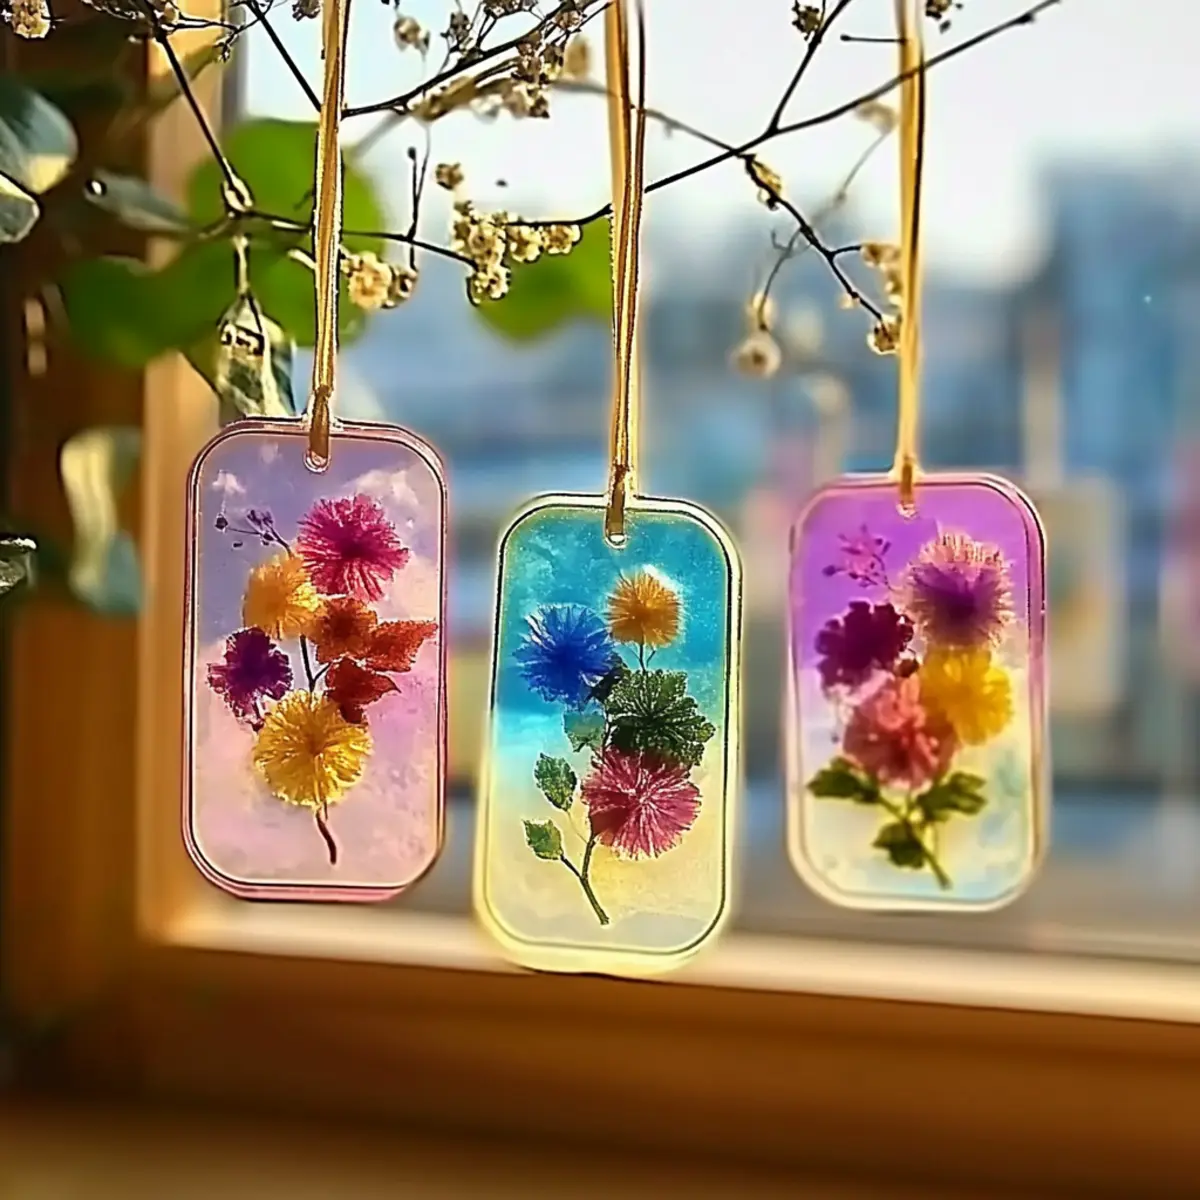
As I sat sipping my morning coffee, the sun shone through the window, casting beautiful glimmers across the room. It struck me how small but delightful changes can brighten up any space-even on a gloomy day. That's when I decided to embark on a creative adventure with my kids: making DIY bioplastic suncatchers!
These eco-friendly treasures are more than just a fun afternoon activity; they're a celebration of nature and color that you can create from the comfort of your kitchen. In under 30 minutes, you'll turn simple ingredients into dazzling decorations that dance in the sunlight, filling your home with vibrant hues and whimsical charm. What's more, they're completely safe for kids and the environment-a win-win situation!
So gather your little ones, roll up your sleeves, and let's get started on this colorful crafting journey that not only enhances your home but also promotes creativity and sustainability. Get ready to infuse your windows with joyful suncatchers!
Why will you love DIY Bioplastic Suncatchers?
Colorful Creativity: Transform simple ingredients into vibrant suncatchers that add life to any window!
Eco-Friendly Fun: Made with non-toxic materials, they're safe for kids and the environment alike.
Quick Craft: In just under 30 minutes, you can create beautiful decor without any fuss.
Endless Variations: Experiment with different natural colors and textures for a seasonal touch.
Family Bonding: Share a wonderful crafting experience that sparks creativity and joy among family members.
Dive into the world of crafting with these stunning suncatchers and discover how simple it is to brighten your home with natural beauty!
DIY Bioplastic Suncatchers Ingredients
• Get ready to create vibrant, eco-friendly decorations!
For the Mixture
- Water - Essential base liquid for your suncatcher; feel free to use herbal infusions for a pleasant aroma.
- Cornstarch - This thickening agent gives the suncatchers their lovely shape and structure; if you're in a pinch, tapioca starch is a suitable substitute.
- White Vinegar - Provides stability and clarity to the finished suncatchers; lemon juice can work as a zesty alternative.
- Unflavored Gelatin - It delivers that delightful gel-like texture; vegetarians can use agar-agar as a replacement.
For Coloring and Decoration
- Natural or Food-Safe Coloring - Brightens your suncatchers; consider options like beet juice or turmeric, or experiment with vibrant food coloring.
- Glitter - Adds a whimsical sparkle; opt for eco-glitter if you want to keep it extra green, or leave it out for a simpler design.
- Flower Petals - Offers a lovely decorative touch; you can substitute them with confetti or pressed leaves for variety.
- Tissue Paper - Introduces delightful texture; swap it with thin paper or foil to diversify your creations.
Dive into crafting your DIY bioplastic suncatchers using these simple and environmentally friendly ingredients!
How to Make DIY Bioplastic Suncatchers
-
Combine Ingredients: In a medium saucepan, mix together ½ cup of water, 2 tablespoons of cornstarch, 1 tablespoon of white vinegar, and 1 tablespoon of unflavored gelatin. Stir gently to combine the ingredients well.
-
Heat Mixture: Place the saucepan over medium heat, stirring continuously. Cook until the mixture thickens and turns translucent, which should take about 5 minutes. Watch for a smooth consistency to ensure the best results.
-
Add Color and Texture: Once thickened, remove the saucepan from the heat. Fold in your chosen natural coloring, glitter, flower petals, and tissue paper gently to keep the colors vibrant and the textures visible.
-
Pour Into Molds: Carefully pour the colorful mixture into molds or shapes laid out on a flat surface lined with parchment paper. Make sure to distribute evenly for balanced suncatchers.
-
Let Cool and Solidify: Allow the mixture to cool for about 15 minutes, until it has solidified and is no longer sticky to the touch. This is when the magic happens!
-
Peel and Store: Once dried, gently peel off the suncatchers from their molds. Store them flat in a cool, dry place wrapped in wax paper to keep them in perfect condition for hanging later.
Optional: Hang them in windows to create stunning displays of color!
Exact quantities are listed in the recipe card below.
What to Serve with DIY Bioplastic Suncatchers?
Crafting these joyful suncatchers can stir up fun, creativity, and the perfect serene atmosphere for an afternoon together.
- Bright Snack Platter: A mix of seasonal fruits adds a refreshing touch, complementing the vibrant colors of your suncatchers.
- Herbal Iced Tea: Quench your thirst with a lightly sweetened herbal iced tea, its soothing qualities keeping your crafting spirit high.
- Nut Butter Treats: Serve small rice cakes topped with nut butter for a satisfying crunch and irresistible creamy flavor that resonates with the joy of crafting.
- Colorful Veggie Sticks: Crunchy carrot and cucumber sticks paired with a light dip bring fresh and vibrant colors to your snack table, mirroring the fun of crafting!
- Homemade Lemonade: Serve up some homemade lemonade; its zesty flavor is as invigorating as the colors in your suncatchers.
- Chocolate-Dipped Fruit: Indulge with strawberries or bananas dipped in dark chocolate, adding a touch of sweetness that everyone will adore.
Embrace this delightful process of creativity while keeping the snacks as colorful and cheerful as your DIY bioplastic suncatchers!
Variations & Substitutions for DIY Bioplastic Suncatchers
Feel free to enhance and personalize your suncatchers with these creative twists and substitutions!
- Herbal Infusions: Substitute plain water with your favorite herbal tea to infuse delightful scents into your suncatchers. Imagine the warm aromas wafting through your home as they catch the light!
- Tapioca Starch: If you're out of cornstarch, swap in tapioca starch for a slightly different texture while keeping the structure intact. Your suncatchers will still turn out beautifully!
- Lemon Juice: For a zesty alternative to white vinegar, use fresh lemon juice to add a cheerful fragrance-perfect for a sunny craft session.
- Agar-Agar: Vegans can replace unflavored gelatin with agar-agar for a plant-based option that still helps your suncatchers solidify nicely.
- Seasonal Colors: Elevate your decorations with seasonal colors! Use bright orange or deep reds for fall, or soft pastels for spring; let nature inspire your palette.
- Eco-Friendly Glitter: If you're aiming for a more sustainable option, consider using biodegradable glitter to add sparkle that doesn't harm the planet.
- Pressed Leaves: Get creative! Instead of flower petals, use pressed leaves for a more earthy, natural aesthetic in your suncatchers. They'll capture a sophisticated charm!
- Foil Alternatives: Instead of tissue paper, try using colorful foil for added shine and a more textured look that twinkles beautifully in the light.
These variations allow you to explore your artistic side while creating cherished memories with your loved ones!
Make Ahead Options
These DIY Bioplastic Suncatchers are perfect for savvy home cooks who want to enjoy a creative afternoon without the last-minute rush! You can prepare the mixture up to 24 hours in advance. Simply follow the initial steps (combine ingredients and heat) and then pour the cooled mixture into molds. Before serving, allow them to sit out for 15 minutes to solidify properly. For optimal quality, store the molds in an airtight container in the refrigerator to prevent any unwanted drying. When it's time to reveal your colorful creations, simply peel them from the molds, and watch as they shimmer in the sunlight-just as delightful as if made fresh!
How to Store and Freeze DIY Bioplastic Suncatchers
Flat Storage: Keep your suncatchers flat in a cool, dry place to prevent bending or curling, ensuring they stay vibrant for up to 3 months.
Wax Paper Wrapping: Wrap each suncatcher in wax paper to protect them from dust and damage, allowing for safe long-term storage.
Avoid Humidity: Store away from moisture, as high humidity can soften the gelatin and affect the texture of your DIY bioplastic suncatchers.
Rehanging Tips: To refresh their shine, gently wipe with a soft, damp cloth before hanging them again to dance in the sunlight.
Expert Tips for DIY Bioplastic Suncatchers
- Smooth Consistency: Stir continuously while heating to avoid lumps; this ensures your DIY bioplastic suncatchers turn out perfectly smooth.
- Color Care: Allow the mixture to cool slightly before adding your colors to prevent them from fading or becoming dull in the heat.
- Mold Choices: Use silicone molds for easy removal. If using hard molds, line them with parchment paper for the best release.
- Natural Alternatives: Consider using eco-friendly glitter or omitting it entirely for a more natural look in your suncatchers.
- Storage Tips: Store your finished suncatchers flat in wax paper to prevent curling and keep their vibrant colors intact for longer enjoyment.
DIY Bioplastic Suncatchers Recipe FAQs
What kind of water should I use for the mixture?
Absolutely! You can use regular tap water, but if you want to add a lovely fragrance, consider using herbal infusions like chamomile or mint. This adds an aromatic touch to your suncatchers!
How should I store my DIY bioplastic suncatchers?
Very! To keep your suncatchers vibrant, store them flat in a cool, dry place. Wrapping them individually in wax paper prevents them from dust or bending, helping them last for up to 3 months.
Can I freeze my DIY bioplastic suncatchers?
Yes! If you want to preserve them longer, you can freeze your suncatchers. Just wrap each piece in wax paper and place them in an airtight container. They should remain in good condition for up to 3 months; just allow them to thaw at room temperature before hanging.
What should I do if my mixture has lumps after heating?
Not to worry! If you encounter lumps, try transferring the mixture to a blender while it's still warm to blend it until smooth. Alternatively, you can strain it through a fine-mesh sieve to achieve a lump-free consistency.
Are the ingredients safe for pets and children?
Absolutely! All the ingredients used should be safe for kids and non-toxic for pets. However, always supervise young children during the crafting process and avoid using any glitter that might pose a choking hazard.
Gorgeous DIY Bioplastic Suncatchers You’ll Adore Creating!
Equipment
- medium saucepan
- Molds
- Parchment Paper
- mixing spoon
Ingredients
For the Mixture
- 0.5 cups Water You can use herbal infusions for aroma.
- 2 tablespoons Cornstarch Tapioca starch is a substitute.
- 1 tablespoon White Vinegar Lemon juice can be used as an alternative.
- 1 tablespoon Unflavored Gelatin Vegetarians can use agar-agar.
For Coloring and Decoration
- Natural or Food-Safe Coloring Consider beet juice or turmeric.
- Glitter Use eco-glitter for sustainable crafting.
- Flower Petals Confetti or pressed leaves can be substitutes.
- Tissue Paper Thin paper or foil can be used as alternatives.
Instructions
How to Make DIY Bioplastic Suncatchers
- Combine Ingredients: In a medium saucepan, mix together ½ cup of water, 2 tablespoons of cornstarch, 1 tablespoon of white vinegar, and 1 tablespoon of unflavored gelatin. Stir gently to combine the ingredients well.
- Heat Mixture: Place the saucepan over medium heat, stirring continuously. Cook until the mixture thickens and turns translucent, which should take about 5 minutes.
- Add Color and Texture: Once thickened, remove the saucepan from the heat. Fold in your chosen natural coloring, glitter, flower petals, and tissue paper gently.
- Pour Into Molds: Carefully pour the colorful mixture into molds or shapes laid out on a flat surface lined with parchment paper.
- Let Cool and Solidify: Allow the mixture to cool for about 15 minutes until it has solidified.
- Peel and Store: Once dried, gently peel off the suncatchers from their molds and store them flat in a cool, dry place wrapped in wax paper.


Leave a Reply