
As the vibrant colors dance and shimmer in the sunlight, I can't help but feel a wave of nostalgia wash over me. The idea of creating something magical out of simple ingredients is always a thrill, especially when it involves learning and fun for kids. Last weekend, while searching for ways to engage my little ones outside of screens, I stumbled upon a project that combines science and creativity: DIY fizzing hatching dino eggs!
This eco-friendly craft is not just a feast for the eyes; it provides a wonderful opportunity for kids to explore chemical reactions in a playful way. With just a handful of supplies, you can whip up these delightful bioplastic suncatchers in about 25 minutes-perfect for a rainy afternoon or a creative birthday party activity. The joy on their faces as they watch these colorful eggs fizz into life is nothing short of priceless. Let's dive into this colorful adventure, where fun meets education, and create together!
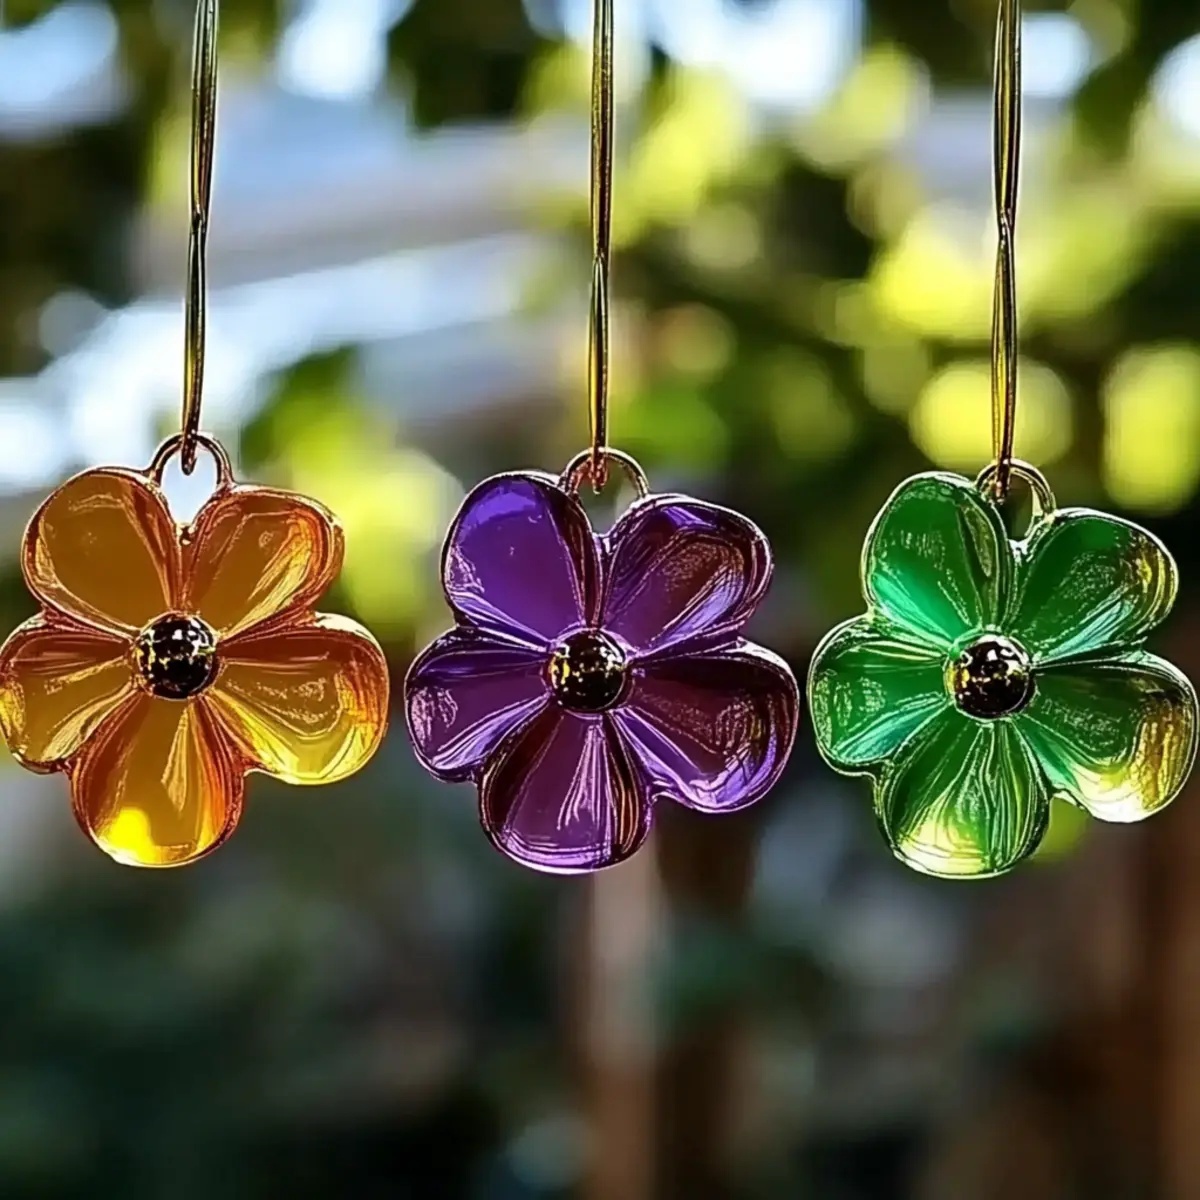
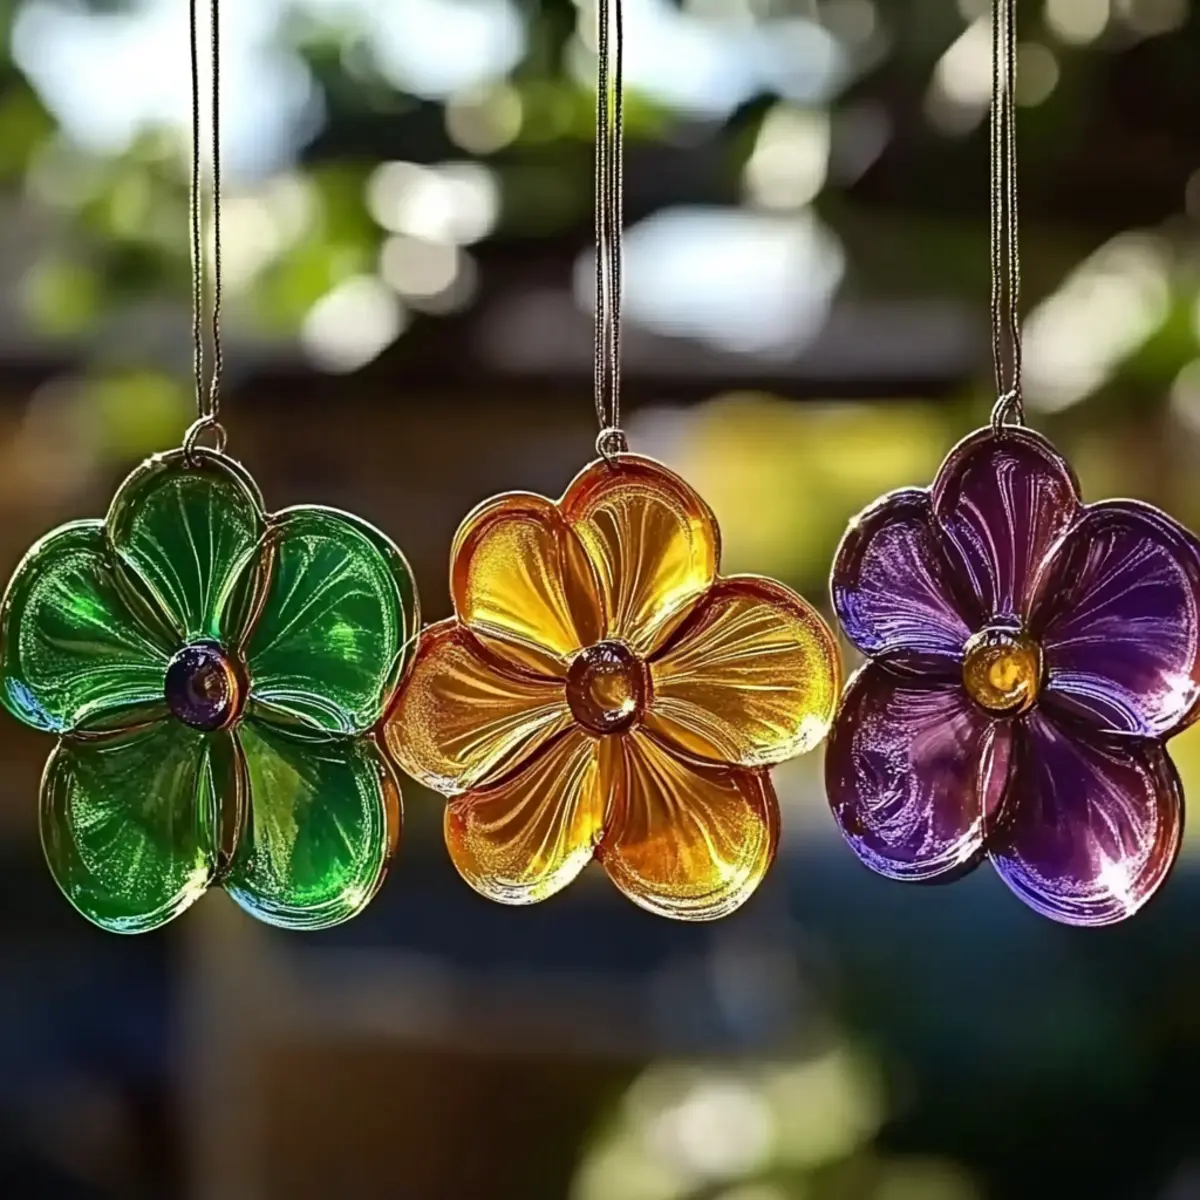
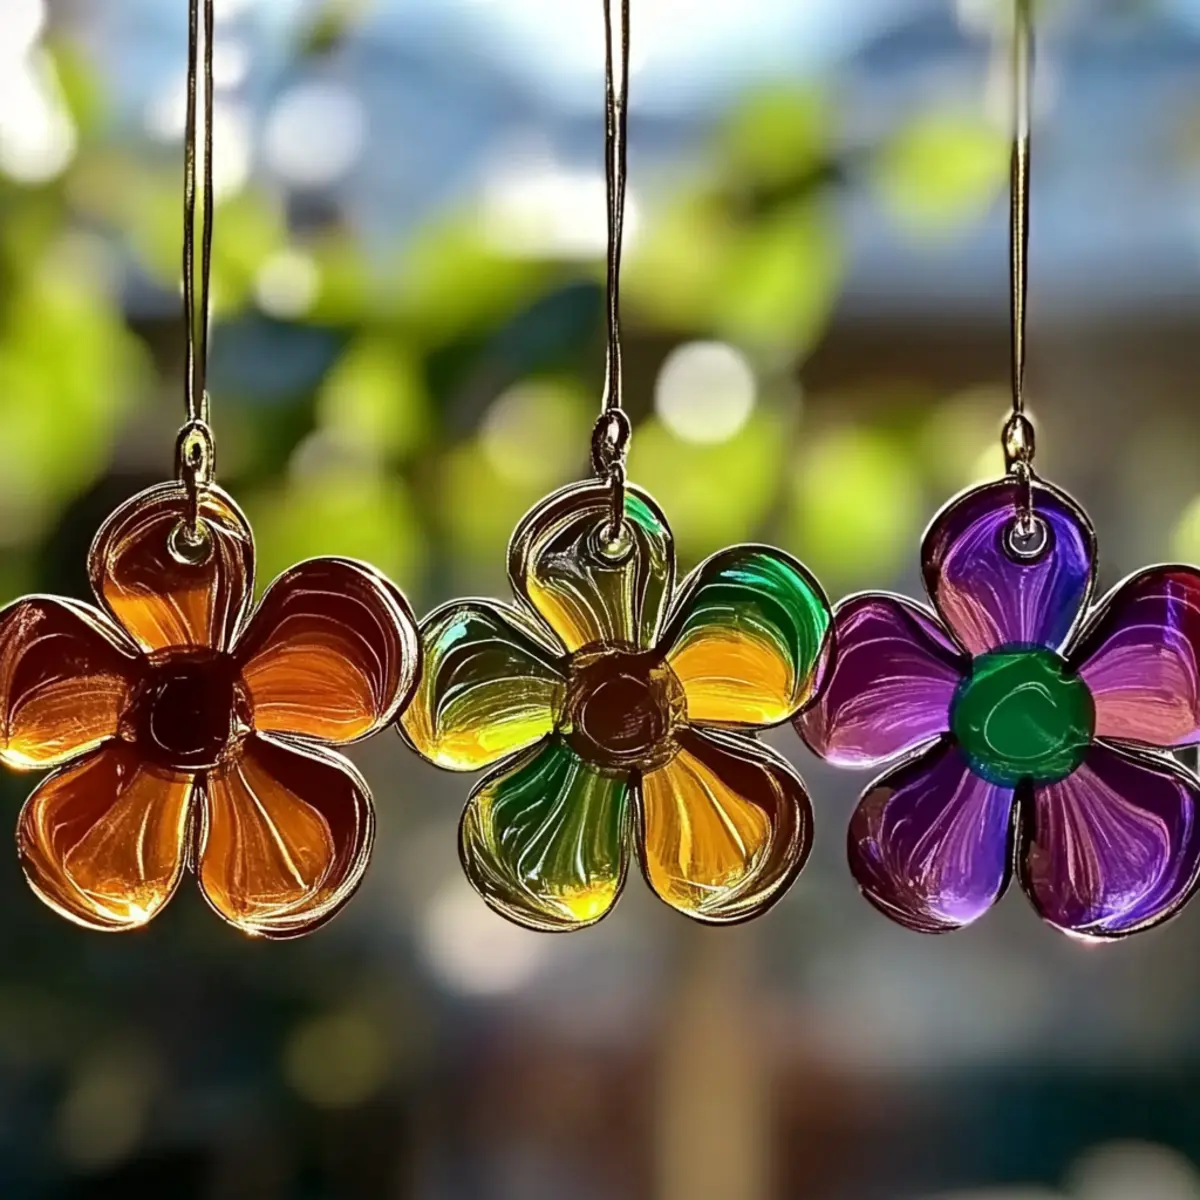
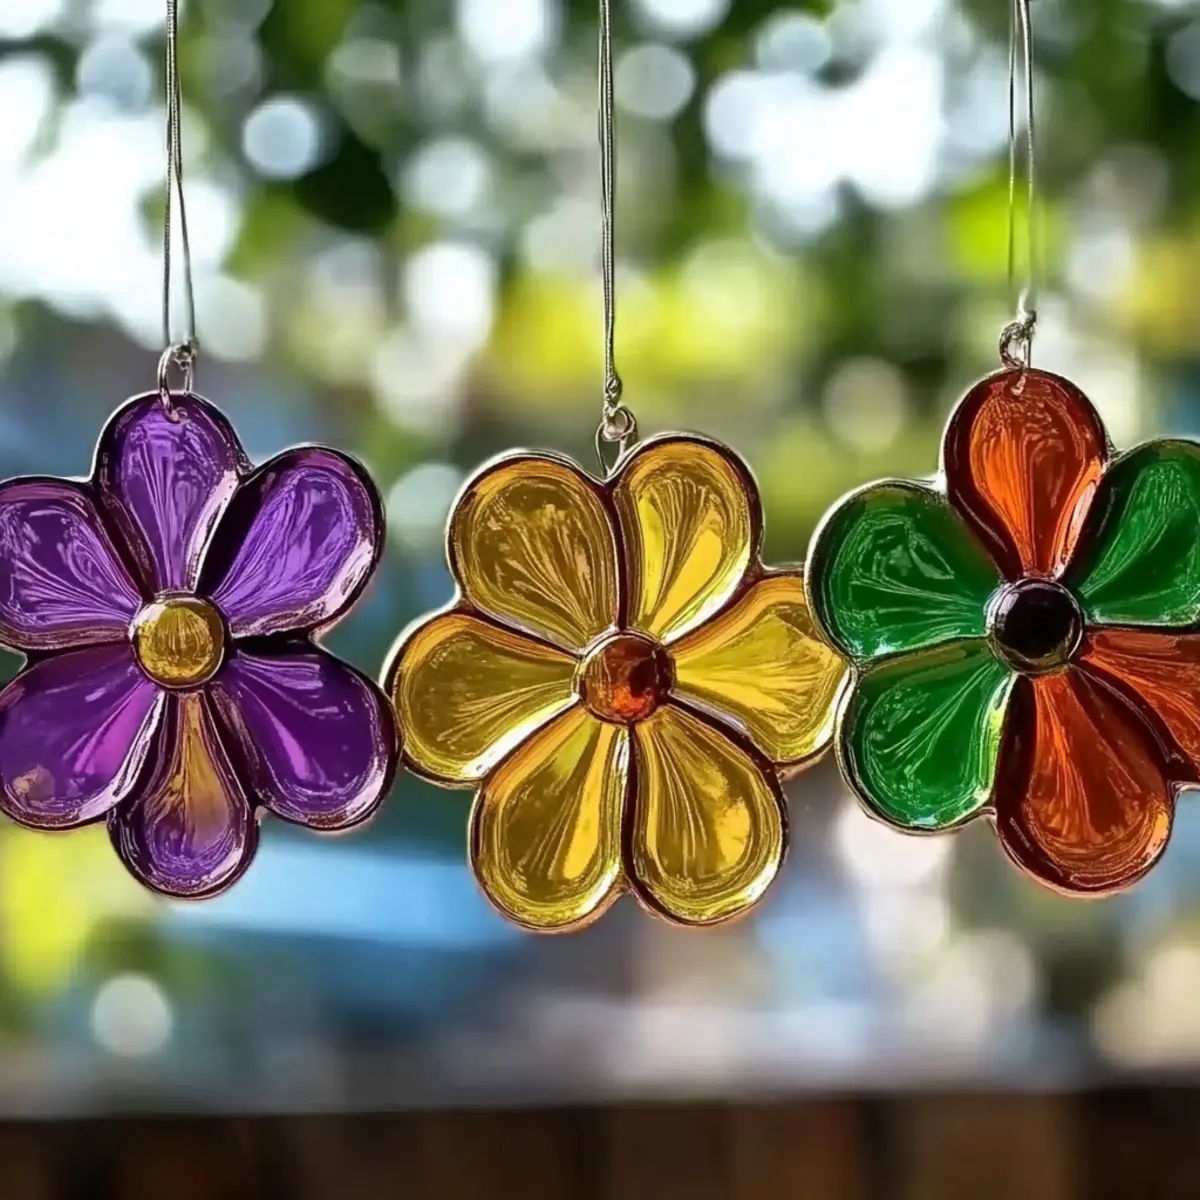
Why Love DIY Bioplastic Suncatchers?
Crafting with your kids has never been this fun!
Eco-friendly materials make this a guilt-free project everyone can enjoy.
Educational value shines through as little ones explore fun chemical reactions.
Quick preparation allows for instant gratification - just 25 minutes!
Creative freedom lets your kids express themselves with colors and shapes.
Endless appeal means these suncatchers can adorn your home or be gifted for smiles all around!
DIY Fizzing Hatching Dino Eggs Ingredients
Get ready to make some magical creations!
For the Dino Egg Base
- Cornstarch - Provides structure to the eggs; can substitute with arrowroot powder for a similar effect.
- Water - Serves as the main solvent for mixing; use distilled water for better clarity.
- White Vinegar - Activates the fizzing reaction; apple cider vinegar can be used for a milder scent.
- Glycerin (optional) - Enhances the flexibility of the finished product; omit if not available.
For Decoration and Shaping
- Food Coloring (optional) - Adds vibrant colors; natural food dyes are a great substitute for healthier options.
- Wax Paper or Parchment Paper - Used for laying the bioplastic to prevent sticking.
- Spoon or Craft Stick - Perfect for mixing and shaping the mixture.
- Pipettes, Cookie Cutters, or Straws (optional) - Helps in shaping and adding details to the eggs.
- String or Ribbon - Ideal for hanging the finished eggs as decorative pieces.
Let's gather these ingredients and unleash our creativity while crafting these fabulous DIY fizzing hatching dino eggs!
How to Make DIY Fizzing Hatching Dino Eggs
-
Prep Materials: Start by gathering all your ingredients, including cornstarch, white vinegar, and any optional decorative tools. Have your wax paper ready for a smooth crafting experience.
-
Mix Ingredients: In a mixing bowl, combine 1 cup of cornstarch with ½ cup of water. Stir until fully blended, then add ¼ cup of white vinegar and glycerin if using. Mix well to ensure a smooth consistency.
-
Add Color: Now, it's time to bring your dino eggs to life! Stir in a few drops of food coloring to achieve your desired shades. Feel free to experiment with color combinations for a truly vibrant creation!
-
Shape Eggs: Spoon or mold your colorful mixture into cookie cutters placed on the wax paper. If you're feeling artistic, use pipettes or straws to add fun details to your eggs.
-
Drying: Let your eggs dry for 24-48 hours, depending on the humidity and thickness. You want them to be firm to the touch, so patience is key here!
-
Final Touch: Once fully dry, gently remove the eggs from the molds. This is your chance to add extra decorations like glitter or additional colors if desired. Make them one-of-a-kind!
Optional: For added sparkle, mix in glitter before the mixture sets in the molds.
Exact quantities are listed in the recipe card below.
How to Store and Freeze Fizzing Hatching Dino Eggs
Cool, Dry Storage: Keep your finished dino eggs in a cool, dry place away from direct sunlight to preserve their vibrant colors and delicate structure for up to 1 month.
Avoid Humidity: Storing in a low-humidity environment helps maintain the eggs' firmness and prevents them from becoming too soft.
Reheating the Fun: If you want to fizz the eggs again for a fun activity, simply rehydrate them with a splash of water to activate the bubbling reaction once more!
Make Ahead: You can prepare these DIY bioplastic suncatchers in advance for parties or playdates, ensuring they're stored properly to keep the excitement alive!
What to Serve with DIY Fizzing Hatching Dino Eggs?
Creating a colorful crafting experience is even more delightful when it sparks the imagination and joy of learning.
- Sparkling Water: The fizzy bubbles mimic the excitement of your dino eggs and refresh both kids and parents alike.
- Fruit Skewers: Brightly colored, sweet treats make for easy snacking that's as fun as crafting. Kids will love assembling their own!
- Dino-Themed Cupcakes: These playful desserts can add a whimsical touch to your activity, making it a memorable experience for everyone.
- Veggie Sticks with Dip: Crunchy, healthy bites keep energy levels high during the crafting session while encouraging healthy snacking.
- Dinosaur Books: Reading time with fun dino stories can extend the activity and fuel curiosity, creating a wholesome educational experience.
- DIY Crafting Stations: Set up a variety of crafting supplies to let kids express their creativity even further; think beads, papers, and more!
With this creative adventure, enhance the joy of crafting by surrounding your little ones with delightful, inspiring treats and activities!
DIY Fizzing Hatching Dino Eggs Variations
Feel free to explore these fun twists to make the crafting experience even more unique!
-
Glittery Surprise: Mix in some glitter before drying for a sparkling effect that adds a magical touch to your eggs. They'll shine and shimmer beautifully!
-
Natural Colors: Use natural food colorings or herbal powders for a healthier alternative to synthetic dyes. This adds an earthy appeal while being fun!
-
Themed Shapes: Experiment with seasonal cookie cutters like stars or hearts to create themed eggs for parties or holidays. Little ones will adore the variety!
-
Scented Fun: Add a few drops of essential oils, like lavender or citrus, to the mixture for a delightful scent when the eggs fizz. It adds an extra sensory experience.
-
Textured Delight: Incorporate small confetti or dried flower petals into the mixture for added texture. When they fizz, tiny surprises will emerge!
-
Color Layering: Layer different colors in the molds for a stunning rainbow effect. Each egg can be a unique piece of art, just waiting to come to life!
-
Mini Sized: Instead of regular-sized eggs, use mini cookie cutters for smaller, bite-sized creations. They're perfect for little hands and even more fun to display!
-
Glow-in-the-Dark: Consider adding glow-in-the-dark paint to the mixture for a magical nighttime surprise! When the sun sets, watch as your creations glow!
Expert Tips
• Color Layering: For stunning effects, layer colors in your molds before the mixture sets. This creates vibrant, eye-catching designs!
• Drying Duration: Ensure you allow ample drying time, as humidity may extend it. Firm eggs are crucial for durability and play.
• Mix Consistency: Avoid making the mixture too watery; a proper balance ensures the integrity of your DIY bioplastic suncatchers.
• Surrounding Prep: Clear a designated crafting space to avoid spills and mess. A tidy workspace makes creative fun even better!
• Crafting Tools: Have extra spoons or craft sticks on hand for mixing. Kids may want to experiment with multiple colors at once!
Make Ahead Options
These DIY fizzing hatching dino eggs are perfect for busy home cooks looking to simplify their crafting plans! You can mix the bioplastic base (cornstarch, water, vinegar) up to 24 hours in advance, storing it in an airtight container to maintain its freshness. The colored mixture can be shaped into molds, allowing you to prepare the eggs ahead of time for fun educational activities. When you're ready to finish them, just let them dry for 24-48 hours, depending on your environment, before decorating. This way, you can enjoy quality time with your kids without the last-minute rush-crafting just got a whole lot easier!
DIY Fizzing Hatching Dino Eggs Recipe FAQs
What type of cornstarch should I use?
For this craft, regular cornstarch works perfectly! You can also substitute with arrowroot powder if you're looking for an alternative. Both options will give you a sturdy base for your dino eggs, so it's entirely up to your preference!
How should I store my finished dino eggs?
To keep the vibrant colors and shape, store your dino eggs in a cool, dry place away from direct sunlight. They should last for up to a month this way. If you notice them becoming too soft, it's best to keep them in a less humid environment to maintain their firmness.
Can I freeze the dino eggs for later use?
Freezing is not recommended for these dino eggs, as the delicate structure may break down when thawed. However, if you'd like to prolong the fun, you can make them in advance and store them properly in a cool, dry place. When you're ready to fizz, simply splash some water on them!
What should I do if my mixture is too watery?
If you find your mixture is too watery, it can compromise the structure of the eggs. I recommend adding a bit more cornstarch, a tablespoon at a time, until you reach the desired consistency. The mixture should be thick enough to hold its shape in the molds. This will ensure that the final eggs are sturdy and fun for your kids!
Are these dino eggs safe for my children?
Absolutely! While the ingredients are non-toxic and safe for crafts, it's important to note that these eggs are not edible. Always supervise younger children during the activity to ensure they do not put any materials in their mouths. If allergies are a concern, double-check the ingredient labels for any potential allergens.
What can I do if the eggs don't fizz as expected?
If your fizzing dino eggs aren't fizzing well, it could be due to several factors. Ensure that you used enough vinegar since this ingredient is crucial for the reaction. Also, check if the eggs were stored properly. If they've become too soft or wet from humidity, this might affect their fizzing ability too! You can always try adding a little water to reactivate them for another fun experience.
Make sure to enjoy this fun and educational craft project with your little ones!
DIY Bioplastic Suncatchers: Easy, Colorful Crafting Fun!
Equipment
- Mixing Bowl
- spoon
- Cookie cutters
- Pipettes
- craft sticks
- wax paper
Ingredients
For the Dino Egg Base
- 1 cup cornstarch Can substitute with arrowroot powder for a similar effect.
- ½ cup water Use distilled water for better clarity.
- ¼ cup white vinegar Apple cider vinegar can be used for a milder scent.
- 1 tablespoon glycerin Optional; enhances flexibility of finished product.
For Decoration and Shaping
- to taste food coloring Optional; natural food dyes are a great substitute.
- 1 sheet wax paper Used for laying the bioplastic.
- 1 spoon or craft stick For mixing and shaping.
- optional pipettes, cookie cutters, or straws For shaping and adding details.
- to taste string or ribbon For hanging as decorative pieces.
Instructions
How to Make DIY Fizzing Hatching Dino Eggs
- Start by gathering all your ingredients, including cornstarch, white vinegar, and any optional decorative tools. Have your wax paper ready for a smooth crafting experience.
- In a mixing bowl, combine 1 cup of cornstarch with ½ cup of water. Stir until fully blended, then add ¼ cup of white vinegar and glycerin if using. Mix well to ensure a smooth consistency.
- Stir in a few drops of food coloring to achieve your desired shades. Feel free to experiment with color combinations for a truly vibrant creation!
- Spoon or mold your colorful mixture into cookie cutters placed on the wax paper. Use pipettes or straws to add fun details.
- Let your eggs dry for 24-48 hours, depending on humidity and thickness. Patience is key!
- Once fully dry, gently remove the eggs from the molds and add extra decorations like glitter if desired.


Leave a Reply