
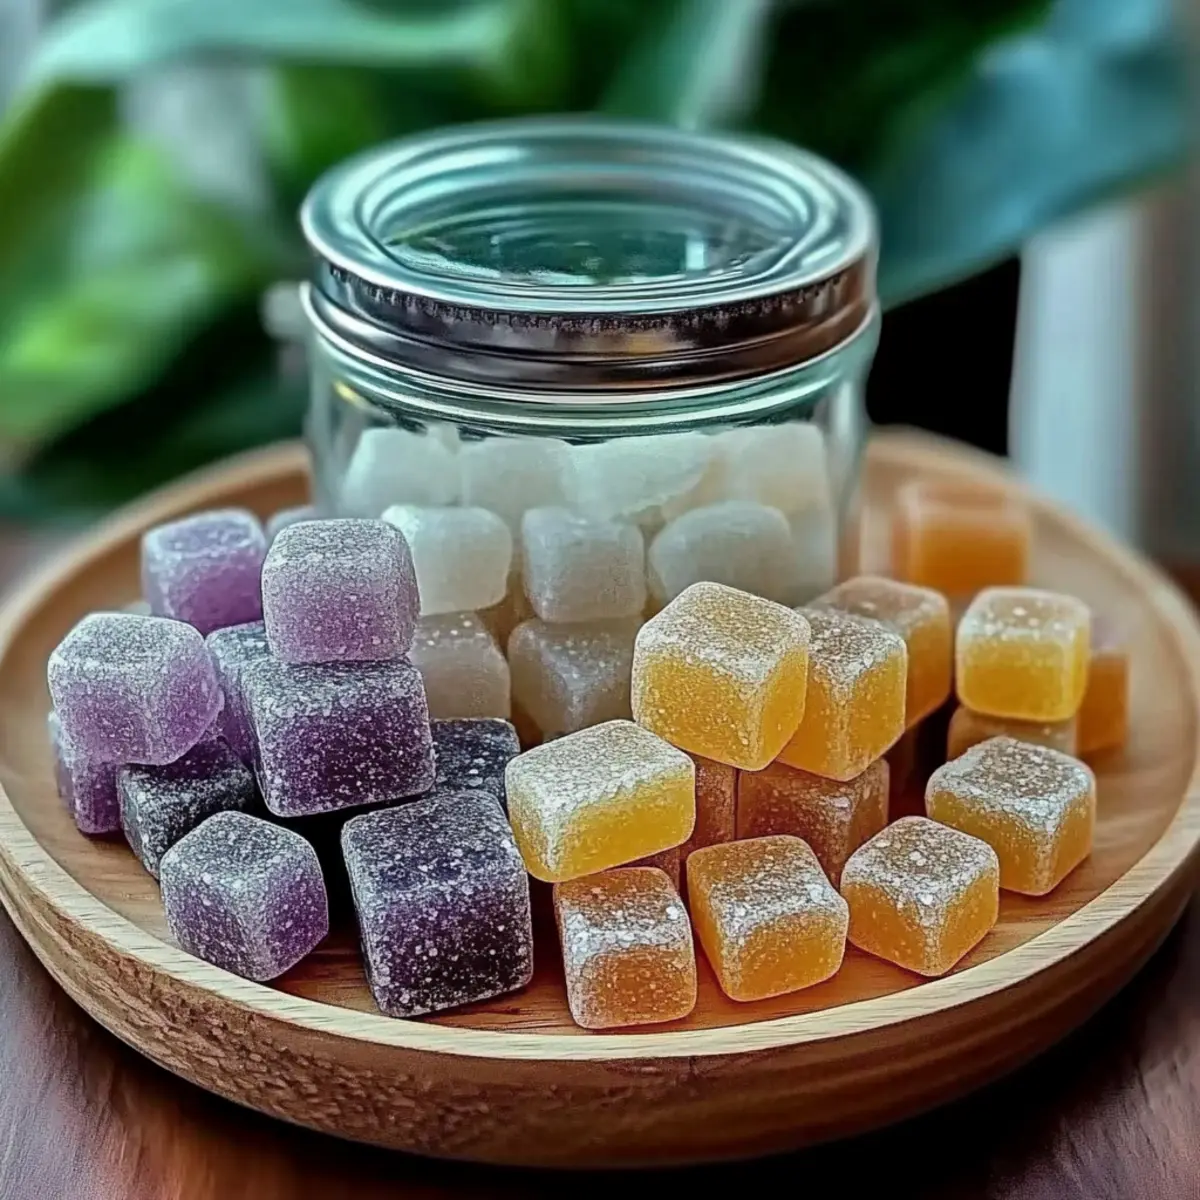
There's something undeniably comforting about walking into a home that smells divine. The gentle scent of lavender wafting through the air or a hint of citrus can instantly lift your spirits. One day, while experimenting with different household scents, I stumbled upon a simple and creative solution to bring those lovely fragrances indoors: DIY aroma stones.
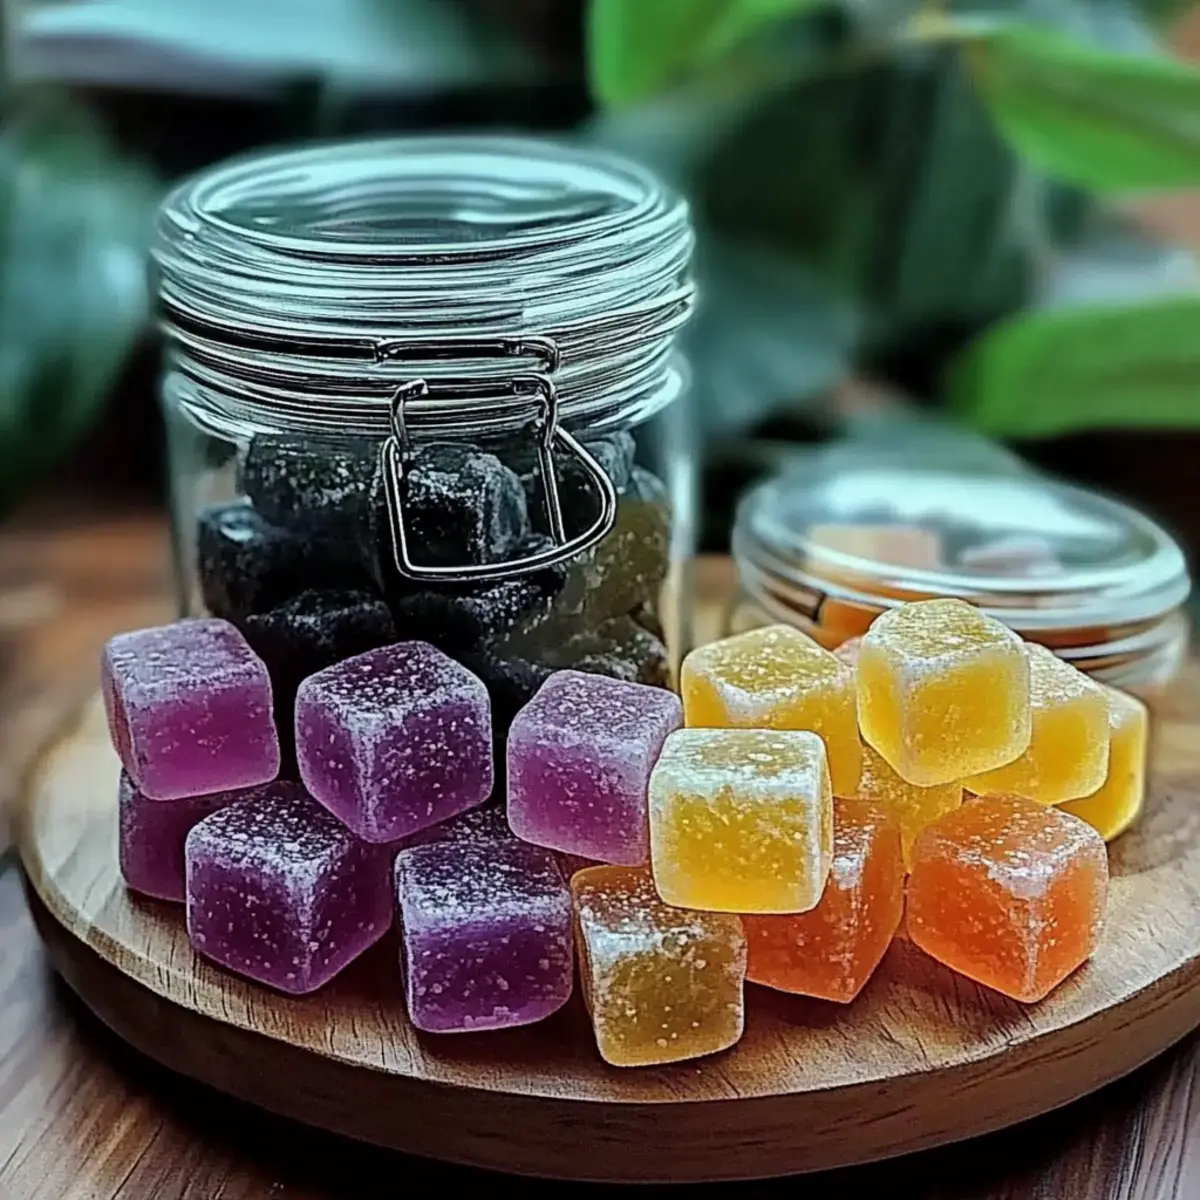
These adorable, handcrafted stones not only look beautiful displayed around your home but also release a soft, continuous scent that is far more enduring than store-bought air fresheners. Best of all, they are surprisingly quick to make-taking just about 10 minutes to prepare! You can customize them with your favorite essential oils, ensuring that they perfectly reflect your unique style and mood.
Join me in crafting these delightful aroma stones, and transform your living space into a fragrant sanctuary that soothes the soul and delights the senses. Let's dive into this fun and rewarding project that embraces the essence of natural living!

Why Love DIY Aroma Stones?
Unique and Beautiful: These handmade aroma stones not only provide a continuous scent but also add an artistic touch to your decor.
Customizable: Tailor them to your personal style with different essential oils and colors for endless combinations.
Eco-Friendly: Made from natural ingredients, these stones are a wonderful alternative to synthetic air fresheners.
Quick to Prepare: Create your own delightful fragrances in just 10 minutes, making them an ideal weekend project.
Versatile: Perfect for any space-display them in drawers, bowls, or sachets, and enjoy the subtle aroma wherever you go.
DIY Aroma Stones Ingredients
For the Stones
- Baking Soda - Provides structure and absorbs odors, ensuring your DIY aroma stones stay solid.
- Cornstarch - Acts as a binder, holding everything together; arrowroot powder can be a great substitute if needed.
- Water - Activates the mixture, creating the perfect wet sand-like texture; no substitutions work as well here.
For the Fragrance
- Essential Oils - Infuse your stones with your favorite scent, and feel free to blend oils for unique fragrance combinations.
- Food Coloring - Enhances the visual appeal of your stones; consider mica powder for a shimmery twist instead.
Consider making DIY aroma stones a staple in your home to enjoy a lasting, beautiful fragrance!
How to Make DIY Aroma Stones
-
Combine Ingredients: In a large bowl, add 2 cups of baking soda and 1 cup of cornstarch. Whisk them together until the mixture is smooth and uniform, resembling a fine powder.
-
Add Water: Gradually pour in 1¼ cups of water while stirring continuously. Keep mixing until the texture resembles wet sand-this is the ideal consistency for shaping your stones.
-
Color the Mixture: If you wish to create colorful aroma stones, divide the mixture into separate bowls. Add your desired food coloring, mixing thoroughly to achieve the shades you like.
-
Infuse with Essential Oils: Incorporate 10-15 drops of your chosen essential oil into each bowl, stirring well to distribute the fragrance evenly throughout the mixture.
-
Shape Your Stones: You can either shape the mixture into small stones by hand or press it into silicone molds to create defined shapes. Get creative with the designs!
-
Dry the Stones: Place your formed stones on wax paper or a drying rack, ensuring they are spaced apart. Allow them to dry for 24-48 hours, or until they are completely hardened.
-
Enjoy the Scent: Once dried, place your aroma stones around your home. For an extra boost of fragrance, refresh them every few weeks with additional essential oil.
Optional: Consider adding dried lavender or rose petals to the mixture for a delightful decorative touch!
Exact quantities are listed in the recipe card below.

Variations & Substitutions for DIY Aroma Stones
Feel free to explore these delightful variations to make your aroma stones uniquely yours-your creativity is the limit!
-
Essential Oil Blends: Combine multiple essential oils for a custom scent experience that suits your mood perfectly. Think lavender and citrus for a calming energizer!
-
Colorful Combinations: Use different food coloring hues in each stone for a vibrant and playful look. Little ones will love helping with this artistic touch!
-
Scent Strength: Adjust the number of essential oil drops to control the fragrance intensity, creating soft or bold scents based on your preference.
-
Textured Additions: Incorporate ingredients like dried herbs or flower petals into the mixture for added texture and natural beauty. A sprinkle of dried lavender can transform the aesthetic!
-
Seasonal Shapes: Use themed silicone molds for holidays or seasons-hearts for Valentine's Day or snowflakes for winter, bringing joy with each scent.
-
Herbal Infusion: Try adding a bit of ground cinnamon or vanilla extract to create a warm, inviting aroma. The nostalgic touch will remind everyone of baked goodies!
-
Eco-Friendly Colors: For a more natural option, consider using spices like turmeric or beet powder as colorants. They offer a lovely hue and have subtle fragrance benefits too!
Let your imagination run wild and customize these aroma stones to reflect your personal style and seasonal vibes!
What to Serve with DIY Aroma Stones?
Transform your home into a fragrant sanctuary with delightful additions to complement your DIY aroma stones.
- Dried Flowers: Use lavender, chamomile, or rose petals for an aromatic touch that enhances your stones' scent and beauty.
- Essential Oil Sachets: Create small sachets filled with herbs and essential oils to display alongside your aroma stones, enriching the atmosphere.
- Decorative Bowls: Place stones in pretty bowls around your home; choose vibrant colors that beautifully contrast with your decor.
- Eco-friendly Candles: Natural soy or beeswax candles can provide a warm ambiance while echoing the soothing scents of your aroma stones.
- Fresh Herbs: Include potted herbs like mint or rosemary throughout your space for an added sensory experience and a hint of earthiness.
- Ambient Music: Create a calming atmosphere by pairing your scent experience with soothing melodies, which enhances the overall ambiance.
- Scented Gifts: Share the love! Package additional aroma stones as thoughtful gifts, accompanied by a tag detailing their handmade charm.
How to Store and Freeze DIY Aroma Stones
Airtight Container: Store any unused DIY aroma stones in an airtight container to maintain their scent and prevent moisture from affecting their quality. They can last for several months this way.
Fridge: If you want to extend their fragrance, place the stones in the refrigerator for a short time. They'll release a refreshing scent upon returning to room temperature.
Refreshing Scents: To keep the aroma stones smelling delightful, periodically refresh them with a few drops of essential oil. This is especially effective for stones that have been stored for a while.
Make Ahead Options
These DIY aroma stones are not only a pleasure to make but also perfect for busy home chefs who love to plan ahead! You can prepare the mixture up to 24 hours in advance. Simply combine the baking soda, cornstarch, and water, then cover it with plastic wrap and refrigerate to keep it fresh. You can also pre-mix the essential oils and food coloring separately and store them in small containers overnight. When you're ready to shape the stones, simply stir in the oil mixture, form them into shapes, and let them dry for 24-48 hours. By taking these steps ahead of time, you'll save on prep work later and still enjoy the delightful, long-lasting aromas of your homemade creations!
Helpful Tricks for DIY Aroma Stones
-
Choose Quality Oils: Select high-quality essential oils for the best fragrance experience; cheaper oils may lack potency and depth.
-
Avoid Over-Watering: Adding too much water will affect the stone's texture; aim for a wet sand consistency for sturdy aroma stones.
-
Airflow for Drying: Ensure proper airflow around the stones while they dry; too much humidity can prevent them from hardening effectively.
-
Decorative Touches: Enhance beauty by adding dried flowers or herbs to the mixture; they'll not only look pretty but also add to the scent.
-
Storage Tips: Store any unused DIY aroma stones in an airtight container to keep them fresh and fragrant until you're ready to use them.
DIY Aroma Stones Recipe FAQs
How do I choose the right essential oils for my aroma stones?
Absolutely! When selecting essential oils, consider your personal scent preferences. For a calming atmosphere, lavender or chamomile work beautifully. For a refreshing vibe, citrus oils like lemon or orange can uplift your space. You can experiment with blending different oils to create a signature scent that reflects your individuality.
How should I store my DIY aroma stones?
To maintain their wonderful scent, store any unused DIY aroma stones in an airtight container and keep them in a cool, dry place. They can last for several months this way. If you notice the fragrance fading, don't worry! Just add a few drops of essential oil to refresh them periodically.
Can I freeze my aroma stones to extend their shelf life?
Of course! If you want to extend their longevity, you can freeze your DIY aroma stones. Just wrap them individually in plastic wrap or place them in a freezer-safe bag. They can be frozen for up to three months. When you're ready to use them, simply take them out and let them come to room temperature before placing them around your home.
What if my aroma stones aren't drying properly?
Very good question! If your aroma stones are not drying as expected, it's often due to humidity in the air. To ensure they harden correctly, place them in a well-ventilated area. You may also want to turn on a fan or dehumidifier nearby to help speed up the drying process. Allow them to dry for 24 to 48 hours until they feel completely solid.
Are there any dietary considerations when using essential oils?
Yes! While essential oils can beautifully enhance the aroma of your stones, it's important to be mindful of allergies, particularly if you have pets at home. Some oils, like tea tree or eucalyptus, may be harmful to animals. Always check the safety of the essential oils before using them in areas your pets access.
Can I use different molds for shaping my aroma stones?
Absolutely! You can get creative with various molds, such as silicone ice cube trays, cookie cutters, or even homemade shapes using cardboard. This customization allows you to create seasonal themes or unique designs that match your decor. Just ensure that whatever mold you use is suitable for easy removal once the stones have dried.
These tips will set you on the right path to creating beautiful and fragrant DIY aroma stones!
DIY Aroma Stones: Naturally Scented and Effortlessly Beautiful
Equipment
- large bowl
- whisk
- silicone molds
- wax paper
Ingredients
For the Stones
- 2 cups baking soda Provides structure and absorbs odors
- 1 cup cornstarch Acts as a binder; arrowroot can be a substitute
- 1.25 cups water Activates the mixture
For the Fragrance
- 10-15 drops essential oils Use your favorite scents
- food coloring Enhances visual appeal
Instructions
How to Make DIY Aroma Stones
- In a large bowl, add 2 cups of baking soda and 1 cup of cornstarch. Whisk them together until smooth.
- Gradually pour in 1¼ cups of water while stirring continuously until the texture resembles wet sand.
- Divide the mixture into separate bowls and mix in your desired food coloring.
- Incorporate 10-15 drops of essential oil into each bowl, stirring well.
- Shape the mixture into small stones by hand or press it into silicone molds.
- Place formed stones on wax paper and let dry for 24-48 hours.
- Once dried, place your aroma stones around your home and refresh with additional essential oil as desired.


Leave a Reply