
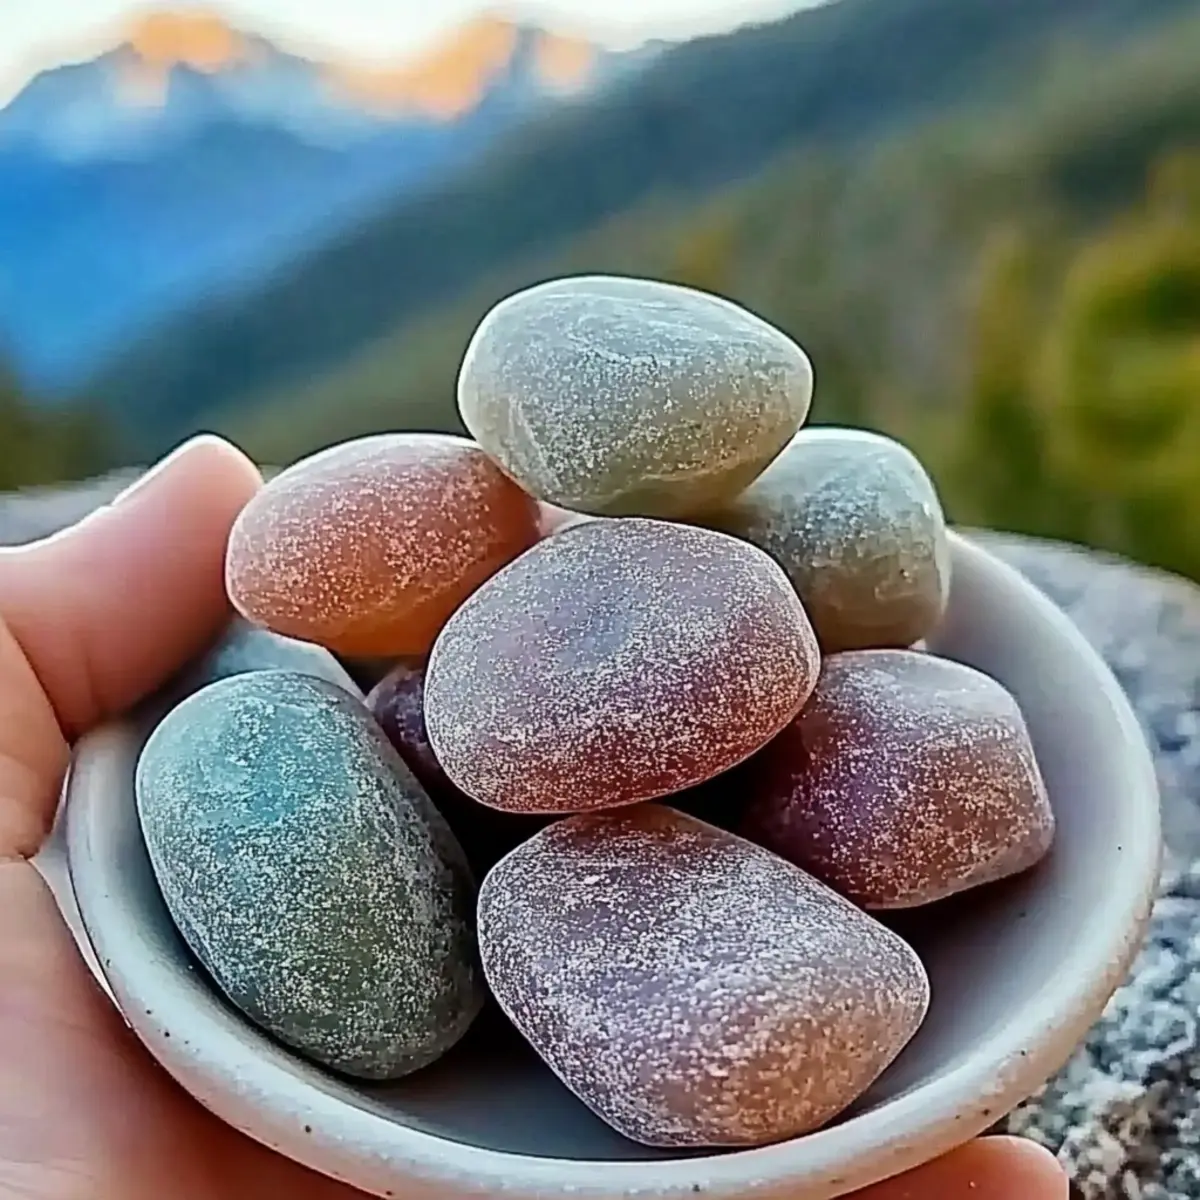
There's something truly enchanting about transforming ordinary materials into magical creations, and that's exactly what we're diving into today! When the desire for a unique home accent met my daughter's quest for a fun craft, we stumbled upon the idea of DIY glow-in-the-dark aroma stones. Picture this: handcrafted stones that not only radiate a soft, ambient glow at night but also release delightful fragrances that fill your home with warmth and charm.
This delightful project marries creativity and practicality, making it perfect for kids and adults alike. With just a few simple ingredients, you can unleash your imagination while making durable, scented stones that are sure to liven up any space. Whether you're looking for a fun weekend project or a thoughtful homemade gift, these glow-in-the-dark stones will quickly become a favorite. So roll up your sleeves, and let's get crafting the perfect aromatic touch for your cozy abode!

Why will you love DIY Aroma Stones?
Enchanting Glow: Transform your home with glow-in-the-dark stones that create a magical atmosphere at night.
Scented Charm: Infuse your space with delightful essential oils that not only look beautiful but also smell lovely.
Kid-Friendly Fun: This project is perfect for kids, offering a hands-on crafting experience that will spark their creativity.
Simple Ingredients: With basic pantry items, you can create durable stones that are easy to make and customize, capturing your unique style.
Versatile Decor: Use these stones as decorative accents in any room or as unique gifts for friends and family!
DIY Aroma Stones Ingredients
For the Dough
- White All-Purpose Flour - Provides the necessary structure to hold your stones together; absolutely essential for durability.
- Salt - Acts as a hardening agent during the drying process, ensuring your stones remain strong.
- Cornstarch - Adds a smooth texture; if unavailable, arrowroot starch can be a suitable substitute.
- Cooled Boiled Water - Activates the dough-remember to let it cool to avoid any sticky mess!
For the Aroma
- Essential Oils - Choose your favorite scents to personalize your creations; feel free to replace with fragrance oils for a different flair.
- Mica Powder or Food Coloring - Brightens up your stones with color; natural dyes can be used for a more organic look if preferred.
These ingredients come together beautifully in your DIY project, resulting in delightful glow-in-the-dark aroma stones that bring both light and scent to your home!
How to Make DIY Aroma Stones
-
Mix Dry Ingredients: In a large bowl, combine the white all-purpose flour, salt, and cornstarch. This creates a firm base for your stones, ensuring they are sturdy and durable once dried.
-
Add Water Gradually: Slowly pour in the cooled boiled water while stirring the mixture with a spoon. Keep mixing until a dough forms-this should take just a few minutes of gentle stirring!
-
Knead the Dough: Transfer the dough onto a clean surface and knead it until smooth and pliable, about 5-7 minutes. This step is crucial for achieving the right texture, so get your hands in there!
-
Incorporate Fragrance and Color: Add your chosen essential oils and mica powder or food coloring. Mix well until both are evenly distributed through the dough to ensure every stone has a burst of color and scent.
-
Shape the Stones: Take pieces of the dough and gently shape them into stones or your desired figures. Place your creations on a drying rack, allowing some space between each stone for air circulation.
-
Dry Your Creations: Let the stones dry for at least 12 hours or until they are completely hardened. They should feel firm to the touch and ready to illuminate your home with their enchanting glow!
Optional: Use cookie cutters for fun shapes like hearts or stars!
Exact quantities are listed in the recipe card below.
DIY Aroma Stones Variations
Unlock your creativity with these fun twists to personalize your aroma stones!
-
Natural Dyes: Experiment with beet juice or turmeric for vibrant, natural colors that are safe and organic.
-
Personalized Scents: Mix essential oils like eucalyptus for relaxation or peppermint for an invigorating touch. Customize your aromas for every room!
-
Seasonal Shapes: Use cookie cutters to create holiday-themed stones-stars for Christmas, or pumpkins for Halloween. Make each season special and memorable!
-
Texture Add-Ins: Incorporate dried flowers or herbs into the dough for added texture and fragrance. Imagine the beauty of lavender or rose petals in your stones!
-
Layered Colors: Create ombre stones by layering different colors of dough. This visual element enhances your decorative pieces and adds depth.
-
Glow Enhancements: Add phosphorescent powder alongside mica for an extra-bright glow in the dark. Watch them shine even brighter at night!
-
Gift-Worthy Bundles: Package groups of aroma stones in decorative boxes as heartfelt gifts. Friends and family will appreciate your thoughtful, handmade touches.
-
Layered Scents: Try creating scents that change over time; start with a bold aroma like cinnamon, and let it fade to a subtle vanilla. A surprise in every sniff!
What to Serve with DIY Glow-in-the-Dark Aroma Stones?
Create a delightful atmosphere filled with warmth and charm while crafting these enchanting stones that brighten up any space!
-
Whimsical Flower Pots: Add a splash of color and life to your garden or home by using vibrant flowers in charming pots. The natural beauty contrasts beautifully with your glowing stones.
-
Cozy Candle Arrangements: Soft, flickering candlelight enhances the ambient glow from your stones, creating a serene evening vibe. Pair them on your mantel or dining table for a magical experience.
-
Colorful Fairy Lights: Surround your stones with fairy lights to emphasize their glow and bring a touch of whimsy to any room. This pairing can instantly elevate the ambiance during gatherings or quiet nights.
-
Artistic Wall Hangings: Dress your walls with artwork or crafts that complement the colors of your stones. This visual harmony enhances your overall decor and ties your space together.
-
Scented Sachets: Create fragrant sachets using similar essential oils as in your stones. This connection through scent will amplify the inviting atmosphere throughout your home.
-
Personalized Gift Boxes: Package these glow-in-the-dark stones in beautiful boxes with candles and scented sachets, making a thoughtful gift for friends or family who appreciate unique home decor.
-
Charming Terrariums: Incorporate your glow-in-the-dark stones into a cute terrarium design. This delightful pairing adds whimsy while showcasing nature and your crafty creations.
-
Relaxing Herbal Teas: Serve cups of calming herbal tea during your crafting session. The soothing aromas enhance the sensory experience associated with creating and enjoying your homemade decor.
Make Ahead Options
These DIY Glow-in-the-Dark Aroma Stones are fantastic for busy home cooks looking to save time while crafting! You can prepare the dough and shape your stones up to 24 hours in advance. To do this, simply mix the dry ingredients as instructed, then gradually add the cooled boiled water and knead the dough. After shaping the stones, let them rest on a drying rack but cover them loosely with a clean cloth to prevent dust from settling. This makes for an easier crafting session later! When you're ready to complete the project, just allow the stones to dry according to the original instructions. They'll turn out just as vibrant and aromatic as if you'd made them all in one go, ensuring a delightful evening of crafting with your loved ones!
How to Store and Freeze DIY Aroma Stones
Room Temperature: Keep your dried stones in a cool, dry place to maintain their glow and scent; this will ensure they last indefinitely as decorative pieces.
Fridge: If you're in a humid climate, consider storing the stones in the fridge to prevent moisture damage; they should remain fresh for up to several months.
Freezer: For long-term preservation, you can freeze your stones, but ensure they're wrapped tightly to avoid moisture; use within 6 months for best quality.
Reheating: If the scent fades over time, simply place the stones under light for a few hours to reactivate their glow and refresh their fragrances!
Helpful Tricks for DIY Aroma Stones
-
Water Temperature Matters: Always ensure the boiled water is cooled before use. Hot water can make the dough sticky and hard to handle.
-
Knead Thoroughly: Spend at least 5-7 minutes kneading the dough. Insufficient kneading can result in cracks in your glow-in-the-dark stones.
-
Control Color Intensity: When using food coloring, start with a small amount; excess coloring can affect the drying time and the final glow.
-
Storage Solution: Place your finished stones in a cool, dry area to preserve their glow properties. Avoid damp environments that may diminish their effect.
-
Get Creative: Don't hesitate to experiment with various essential oil blends or mica powder colors to make your DIY aroma stones uniquely yours!
DIY Glow-in-the-Dark Stone Craft for Kids Recipe FAQs
How do I select the best ingredients for my glow-in-the-dark stones?
Absolutely! When choosing your ingredients, go for fresh, unexpired white all-purpose flour, as it's key for the dough's structure. Ensure your salt and cornstarch are fine and dry; this will give your stones a smooth texture. Check essential oils for quality; the more aromatic, the better! If you're picking mica powder or food coloring, ensure they are vibrant and suitable for crafting-some natural dyes can work wonders too!
How should I store my finished aroma stones?
Very good question! Dried stones should be kept in a cool, dry place, free from moisture to maintain their glow. A storage box, or simply wrapped in a soft cloth, will help protect them from chips or damage. They'll last indefinitely if stored correctly, so you can take your time enjoying their beauty!
Can I freeze my glow-in-the-dark stones for later use?
Absolutely, you can! To freeze your stones, first ensure they're dry and completely hardened. Wrap each stone tightly in plastic wrap or store them in an airtight container to prevent moisture from ruining their charm. They can last up to 6 months in the freezer. When you're ready to use them, just let them thaw at room temperature, and watch them glow!
What are some common troubleshooting tips if my stones don't turn out well?
If you notice cracks in your stones, it may be due to insufficient kneading or drying time. Make sure to knead for a full 5-7 minutes to achieve the proper texture. Additionally, ensure the water added is cooled, as hot water can make the dough sticky and challenging to shape. If your glow isn't bright enough, try exposing the stones to light longer before use!
Are there any dietary considerations for using DIY aroma stones?
While these stones are kid-friendly and certainly safe for use around your home, they should not be ingested, so keep them away from pets and young children who might put them in their mouths. If you're using essential oils, ensure they are safe for sensitive individuals; some oils can cause allergies or skin irritation. Always do a patch test if you're uncertain!
Can I enhance my stones with additional scents or colors after they've dried?
Definitely! If you feel your stones need a scent boost, consider placing them in direct sunlight for a few hours; this can help activate any remaining essential oil. You can also gently rub a drop of your favorite oil on them for an immediate scent enhancement. For colors, while you can't change the baked stones, you can create new batches with varying hues for every season!
DIY Aroma Stones: The Best Scented Craft for Your Home
Equipment
- large bowl
- spoon
- clean surface
- drying rack
Ingredients
For the Dough
- 2 cups White All-Purpose Flour Provides necessary structure
- 1 cup Salt Acts as a hardening agent
- 1 cup Cornstarch Adds a smooth texture
- 1 cup Cooled Boiled Water Must be cooled before use
For the Aroma
- 10 drops Essential Oils Choose your favorite scents
- 1 tablespoon Mica Powder or Food Coloring Brightens up your stones
Instructions
How to Make DIY Aroma Stones
- In a large bowl, combine the white all-purpose flour, salt, and cornstarch.
- Slowly pour in the cooled boiled water while stirring the mixture with a spoon.
- Transfer the dough onto a clean surface and knead it until smooth and pliable, about 5-7 minutes.
- Add your chosen essential oils and mica powder or food coloring and mix well.
- Gently shape the dough into stones or desired figures and place on a drying rack.
- Let the stones dry for at least 12 hours or until completely hardened.


Leave a Reply