
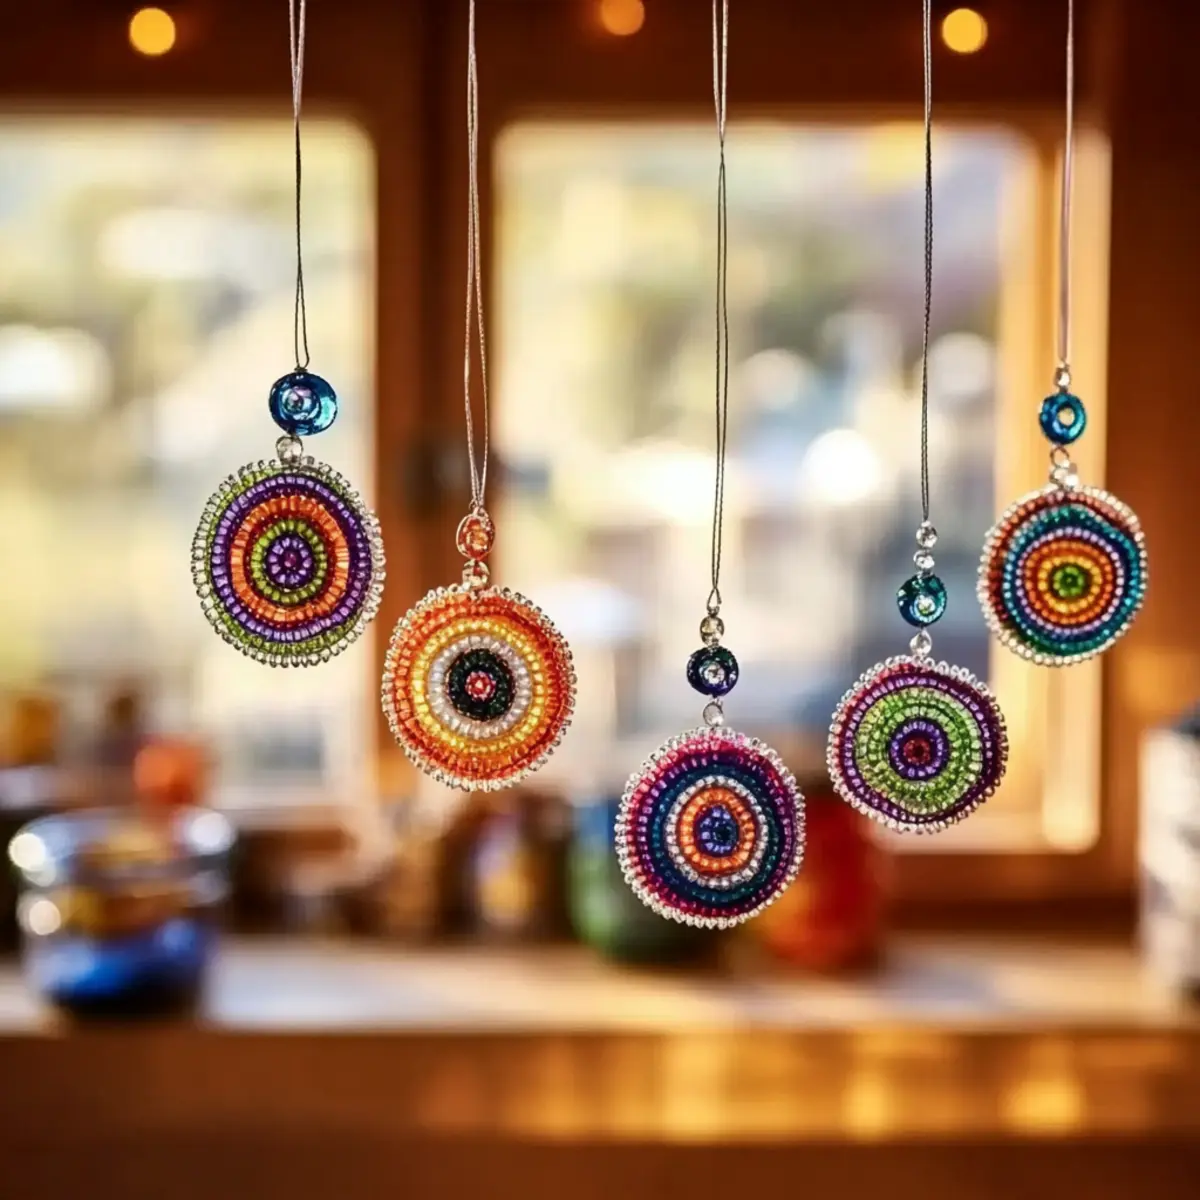
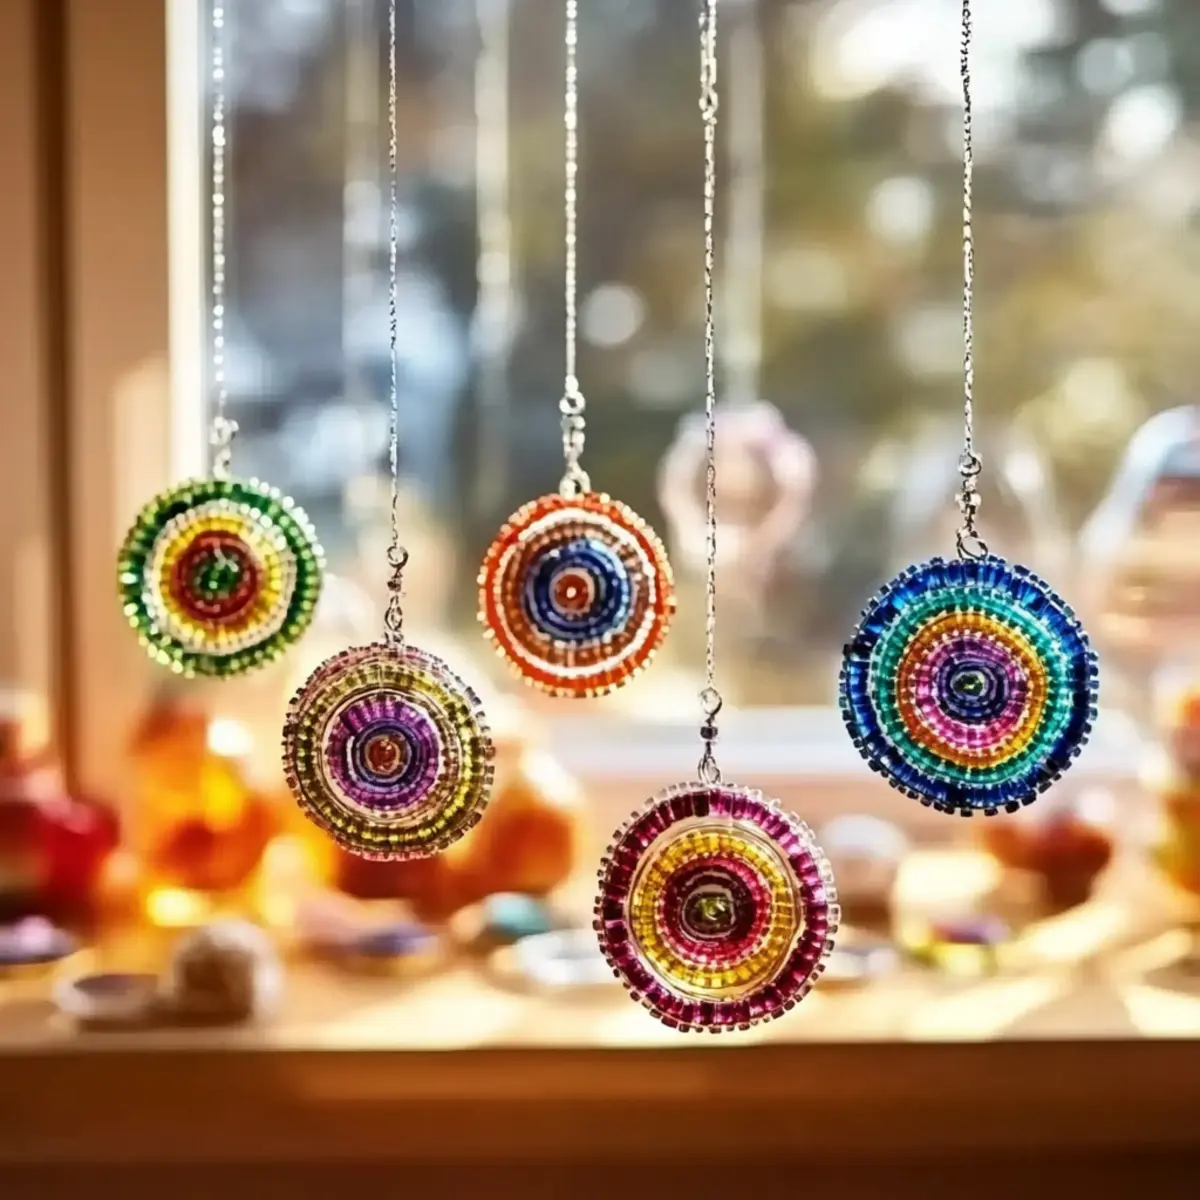
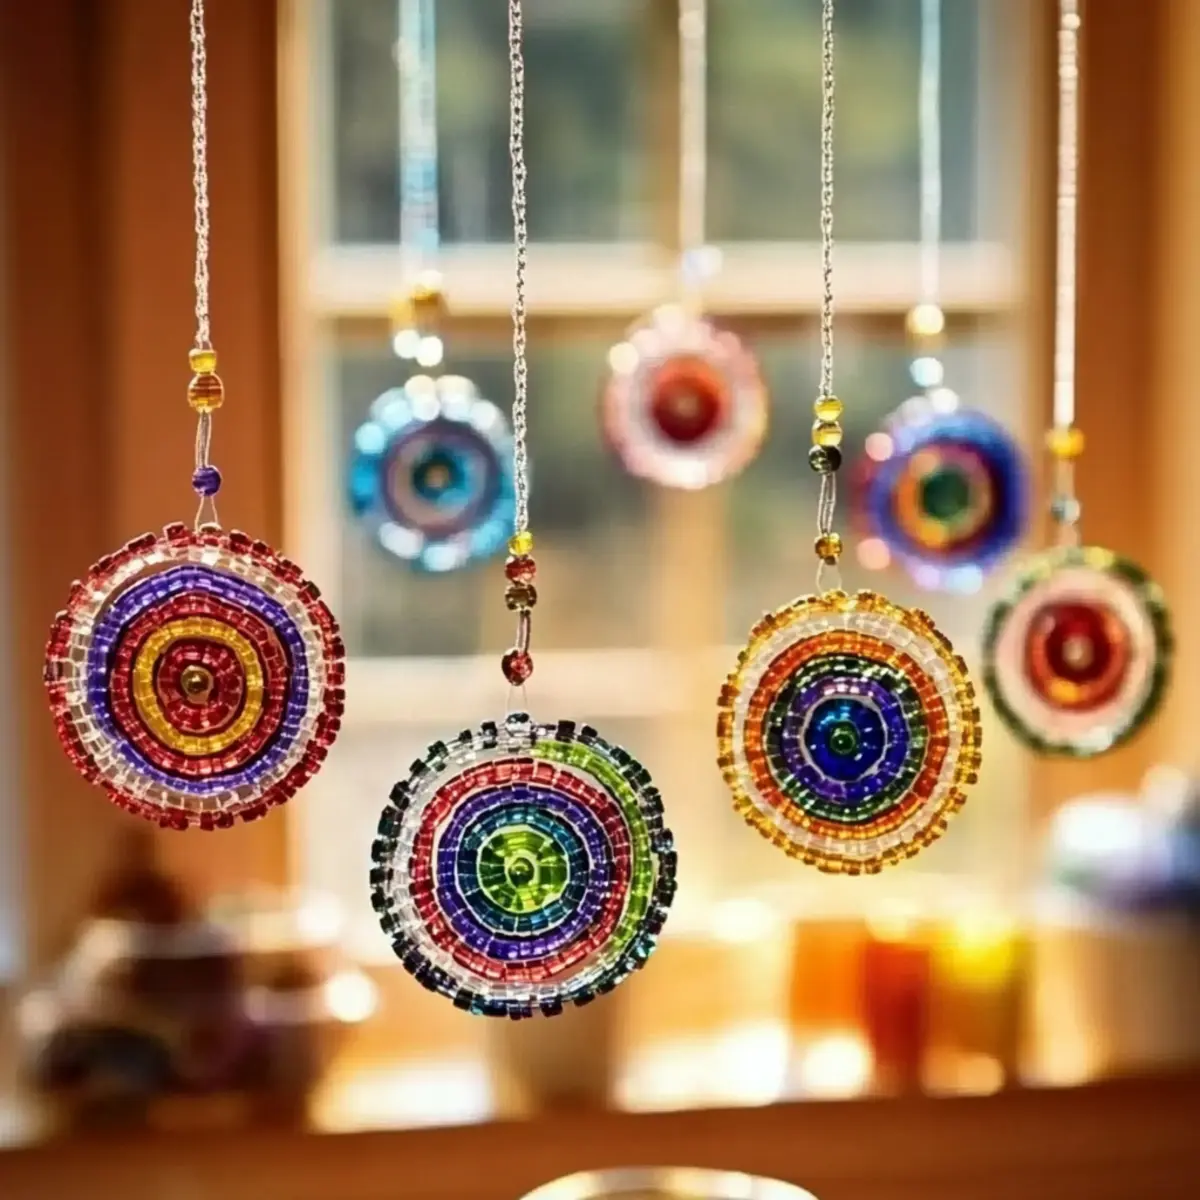
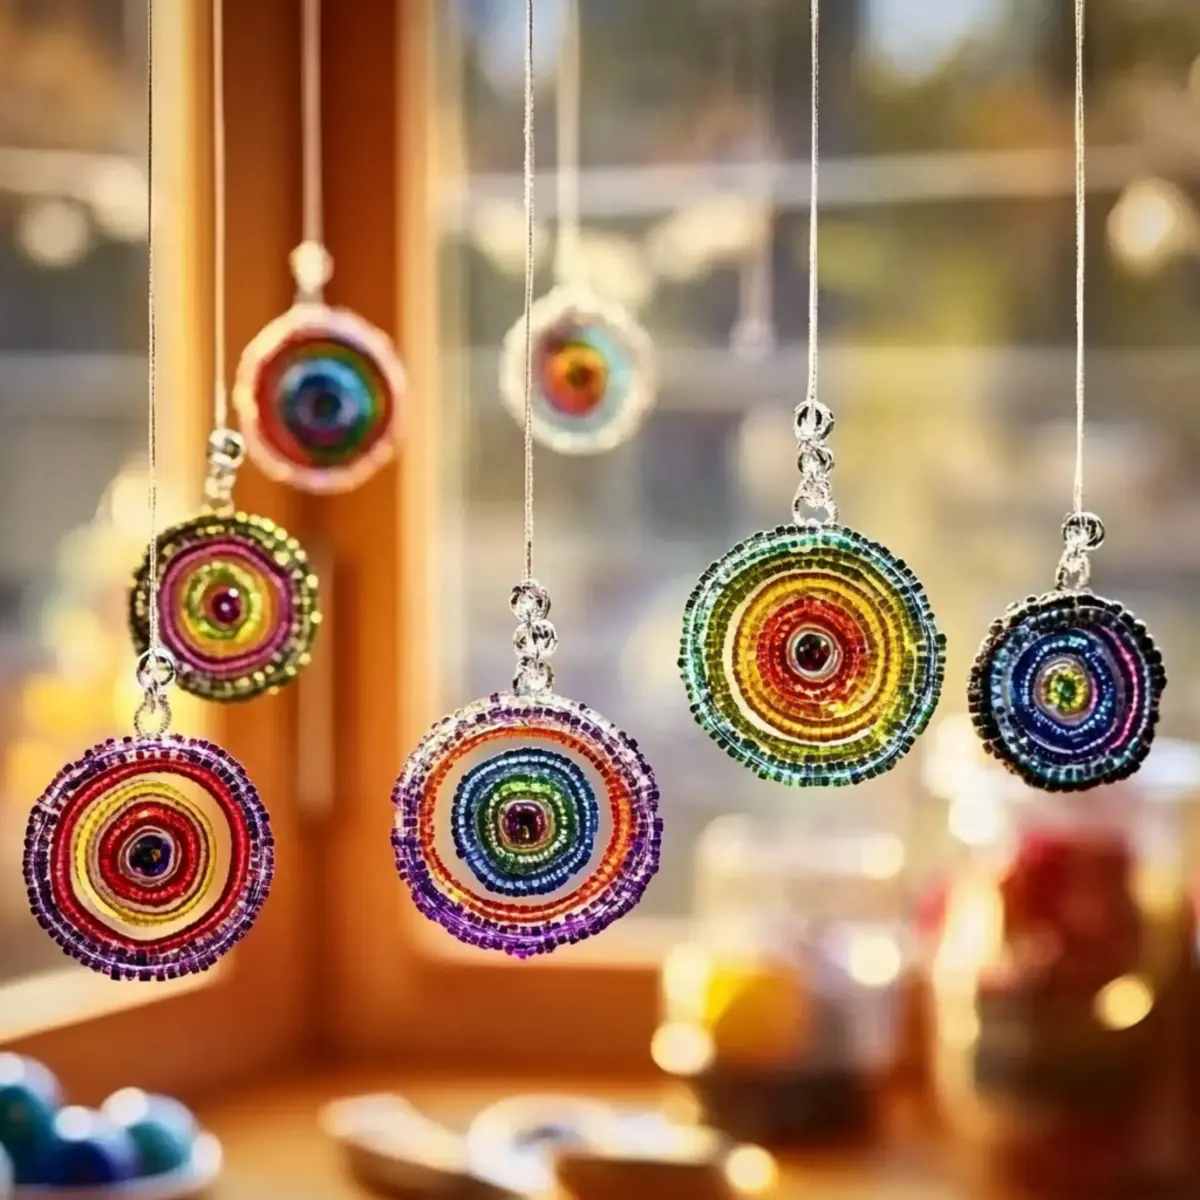
As the sun breaks through a cloudy sky, I can't help but smile at the colorful glow of shimmering suncatchers brightening my garden. This whimsical craft invites families to unleash their creativity and make enchanting decor using simple materials you may already have at home. Creating these delightful translucent plastic pony bead suncatchers not only sparks joy but also brings an artistic flair to any space, turning ordinary windows and outdoor areas into vibrant displays of color. It's the perfect way for kids and adults alike to bond over a hands-on project that transforms plain beads into stunning works of art. Let's dive into this exciting DIY adventure and bring some cheerful sunshine into your life!
Why are Cool Beads Suncatchers so special?
Creative Expression: Kids will love designing their own suncatchers, choosing from a rainbow of translucent beads to create vibrant patterns.
Easy and Fun: This craft is perfect for all skill levels, making it an enjoyable activity for the whole family to do together.
Magical Glow: Incorporating glow-in-the-dark beads adds an enchanting touch that mesmerizes at night, allowing creativity to shine even after sunset.
Brighten Spaces: These stunning suncatchers catch the sunlight beautifully, enhancing the aesthetic of your home or garden.
Quick to Make: With a short baking time, you won't have to wait long to admire your colorful creations. It's a perfect way to spend a creative afternoon!
Cool Beads Suncatchers Ingredients
- For the Suncatchers
• Translucent plastic pony beads (assorted colors) - These are the star ingredient; only use translucent ones to ensure your suncatchers shimmer beautifully in the sunlight.
• Foil-lined baking sheet - Essential for easy cleanup and prevents sticking, ensuring your suncatchers come out flawlessly.
• Metal baking molds (muffin tins, cookie cutters, mason jar lids) - These shapes allow for creative designs; feel free to mix and match styles!
• Nonstick spray (optional) - A light spray can help with removing suncatchers from molds easily, especially helpful if you're using intricate designs.
• String, fishing line, or ribbon - Perfect for hanging your finished masterpiece; choose colors to complement your suncatcher.
• Glitter beads - These optional beads add a delightful sparkle, enhancing the magic in your suncatchers!
• Glow-in-the-dark pony beads - Include these for a whimsical nighttime effect that adds an extra layer of enchantment.
Embrace the joy of creating these Cool Beads Suncatchers with loved ones and brighten your home with a touch of handmade charm!
How to Make Cool Beads Suncatchers
-
Preheat the Oven: Start by setting your oven to 400°F, ensuring it's well-ventilated. This way, you'll have the perfect backdrop for melting those dazzling beads to create your suncatchers.
-
Prepare Baking Sheet and Molds: Next, line a foil-lined baking sheet with your chosen metal molds or cookie cutters. This step is key for easy release and maintaining lovely shapes.
-
Layer Beads: Now comes the fun part! Layer the translucent pony beads in different colors within the molds. Encourage creativity; kids will relish creating their unique designs!
-
Add Glitter Beads (Optional): If you want to sprinkle a bit of extra magic, add some glitter beads to your design. They'll catch the sunshine beautifully, lending a sparkling touch.
-
Bake: Carefully place the baking sheet in the oven and bake for about 25 minutes. Keep an eye out for a shiny, melted finish; this means your suncatchers are ready!
-
Cool and Remove: Once out of the oven, let the suncatchers cool completely. This is crucial-patience is vital, as they need to firm up before you pop them out of the molds.
-
Finish and Hang: Finally, take some string, fishing line, or ribbon and attach it to your suncatchers for hanging. Find a sunny spot in your garden or window, and watch the magic unfold!
Optional: Add a heartfelt note with your suncatcher to make it a lovely gift.
Exact quantities are listed in the recipe card below.
What to Serve with Cool Beads Suncatchers?
Creating these vibrant suncatchers is a delightful craft that can brighten up any sunny day.
- Outdoor Picnic: A cheerful outdoor setup complements the sunny vibes, making your suncatchers pop even more amidst nature!
- Fresh Lemonade: This refreshing drink adds a sweet and tangy splash to your crafting day, perfect for quenching thirsts while you create.
- Colorful Fruit Skewers: Brightly colored fruits make a lively snack; they echo the cheerful hues of your suncatchers and encourage healthy eating.
- DIY Craft Party: Gather friends and family for a crafting day filled with creative energy; it's a wonderful way to bond and enjoy each other's company!
- Sunshine Music Playlist: Set the mood with upbeat tunes that inspire creativity and joy as you craft together, making every moment light and fun!
- Homemade Cookies: Sweet treats shared after crafting enhance the joy of your day, giving a warm, homey feel to your creative adventure.
Cool Beads Suncatcher Variations
Let your imagination run wild as you explore fun twists on this enchanting craft that will delight both children and adults alike.
- Shape Swap: Use different baking molds like hearts, stars, or animals for seasonal themes; let the creativity flow all year round!
- Metallic Glow: Replace standard pony beads with metallic versions to give your suncatchers a shiny, eye-catching finish that dazzles in sunlight.
- Incorporate Nature: Try adding dried flowers or leaves between the beads for a beautiful, natural touch; it's a perfect way to showcase the beauty of the outdoors.
- Themed Colors: Choose beads in specific color palettes for holidays or celebrations, like red and green for Christmas or pastels for Easter, to elevate your decor game.
- Textured Layers: Mix in some glass or wooden beads to add unique texture; the contrast will make each suncatcher even more captivating.
- Seasonal Sensation: Craft suncatchers inspired by the seasons-think warm hues for autumn or cool blues for winter-perfect for rotating decor throughout the year.
- Personalized Messages: Secure small charms or personalized notes within the design to create meaningful gifts for family or friends; it's a heartfelt way to brighten someone's day.
- Enhance with Lights: Consider placing small LED lights behind your suncatchers for a magical glow effect at night; this creates an enchanting scene that is sure to impress!
With these variations, you can turn a simple craft into a delightful creativity adventure, making each suncatcher unique and personal!
Expert Tips for Cool Beads Suncatchers
- Choose Translucent Beads: Using only translucent pony beads is essential for capturing and reflecting light beautifully, so avoid opaque options.
- Don't Overcrowd Molds: Leave enough space between beads as they expand while melting; overcrowding can lead to uneven shapes.
- Watch the Baking Time: Ovens can vary significantly-keep an eye on your suncatchers; they should have a glossy finish when done, ideally after 25 minutes.
- Cool Completely: Patience is key! Let them cool completely in the molds, as rushing can result in broken pieces.
- Get Creative with Shapes: Experiment with various mold shapes like hearts or stars to make suncatchers suitable for any occasion or decor!
Storage Tips for Cool Beads Suncatchers
Room Temperature: Keep your suncatchers in a cool, dry place away from direct sunlight to preserve their vibrancy. They're best enjoyed when fresh and colorful.
Fridge: If you're in a warmer climate, storing them in the refrigerator can prevent warping, though it's not usually necessary. Just ensure they're in a safe, dry spot.
Freezer: For long-term storage, you can place suncatchers in a sealed plastic bag in the freezer; they can last up to 6 months while remaining intact. When ready to use, let them thaw at room temperature.
Hanging: Always use string, fishing line, or ribbon to hang your suncatchers. This ensures they look stunning and catch the light beautifully without risk of damage.
Make Ahead Options
These Colorful Translucent Plastic Suncatchers are perfect for busy home cooks and families looking to save time! You can prep the layers of pony beads in advance and store them in airtight containers for up to 3 days before baking. Simply create your desired designs in the metal molds, cover them, and refrigerate until you're ready to bake. This keeps the beads fresh and prevents any unwanted drying out. When you're ready to enjoy your delightful craft, preheat the oven, bake the suncatchers as instructed, and allow them to cool before removing them from the molds. You'll have beautiful, ready-made decor with minimal effort, perfect for enhancing your home!
Cool Beads Suncatchers Recipe FAQs
What type of pony beads should I use?
Absolutely! It's essential to use only translucent plastic pony beads for your suncatchers. These beads allow light to pass through beautifully, creating that shimmering effect reminiscent of stained glass. Opaque beads won't provide the same eye-catching glow, so stick to the translucent ones for stunning results.
How should I store my finished suncatchers?
Great question! Store your suncatchers at room temperature in a cool, dry place away from direct sunlight to maintain their vibrancy. If you live in a warmer climate, consider placing them in the refrigerator to prevent any warping. They can also be sealed in a plastic bag and frozen for up to 6 months for long-term storage. Just remember to let them thaw at room temperature before hanging!
Can I freeze my suncatchers?
Yes, indeed! Freezing your suncatchers is a smart way to preserve them long-term. Just place them in a sealed plastic bag and store them in the freezer. They should be good for up to 6 months. When you're ready to use them, remove them from the freezer and let them thaw at room temperature for a few hours before hanging or displaying them.
What should I do if my suncatchers don't come out of the molds?
Very! If your suncatchers are stuck in the molds, don't worry! First, ensure you've used enough nonstick spray or a proper foil-lined baking sheet to ease removal. If they're still stuck, you may need to place the molds in warm water for a few minutes to help loosen the suncatchers. Be patient, and gently work to pull them out; rushing can break them.
Can these suncatchers be used outdoors?
Absolutely! These Cool Beads Suncatchers are perfect for indoor and outdoor use! Just make sure they are hung securely, as wind can cause them to swing and potentially fall. It's a fantastic way to add color and cheer to your garden or window spaces. Enjoy the shimmering effect as they catch the sunlight!
Are there any allergies I should be aware of?
Very important! If you're crafting with children or sharing with friends, it's wise to check for allergies related to crafting materials. While pony beads are generally safe, be sure to watch for any sensitivity to certain plastics or glitter. For a special touch, consider using non-toxic glitter options to stay on the safe side with sensitive skin.
Brighten Your Day with Cool Beads Suncatchers: Fun for All Ages
Equipment
- Oven
- Foil-lined baking sheet
- Metal baking molds
Ingredients
For the Suncatchers
- assorted colors Translucent plastic pony beads Only use translucent ones to ensure your suncatchers shimmer beautifully in sunlight.
- 1 Foil-lined baking sheet Essential for easy cleanup and prevents sticking.
- as needed Metal baking molds (muffin tins, cookie cutters, mason jar lids) Shapes allow for creative designs.
- as needed Nonstick spray (optional) Helps with removing suncatchers from molds.
- as needed String, fishing line, or ribbon Perfect for hanging your finished masterpiece.
- as needed Glitter beads Add a delightful sparkle to your suncatchers.
- as needed Glow-in-the-dark pony beads Include for a whimsical nighttime effect.
Instructions
How to Make Cool Beads Suncatchers
- Preheat the oven to 400°F, ensuring it’s well-ventilated.
- Line a foil-lined baking sheet with your chosen metal molds or cookie cutters.
- Layer the translucent pony beads in different colors within the molds.
- If desired, sprinkle some glitter beads on your design.
- Bake the suncatchers in the oven for about 25 minutes.
- Once out of the oven, let the suncatchers cool completely.
- Attach string, fishing line, or ribbon to your suncatchers for hanging.


Leave a Reply