
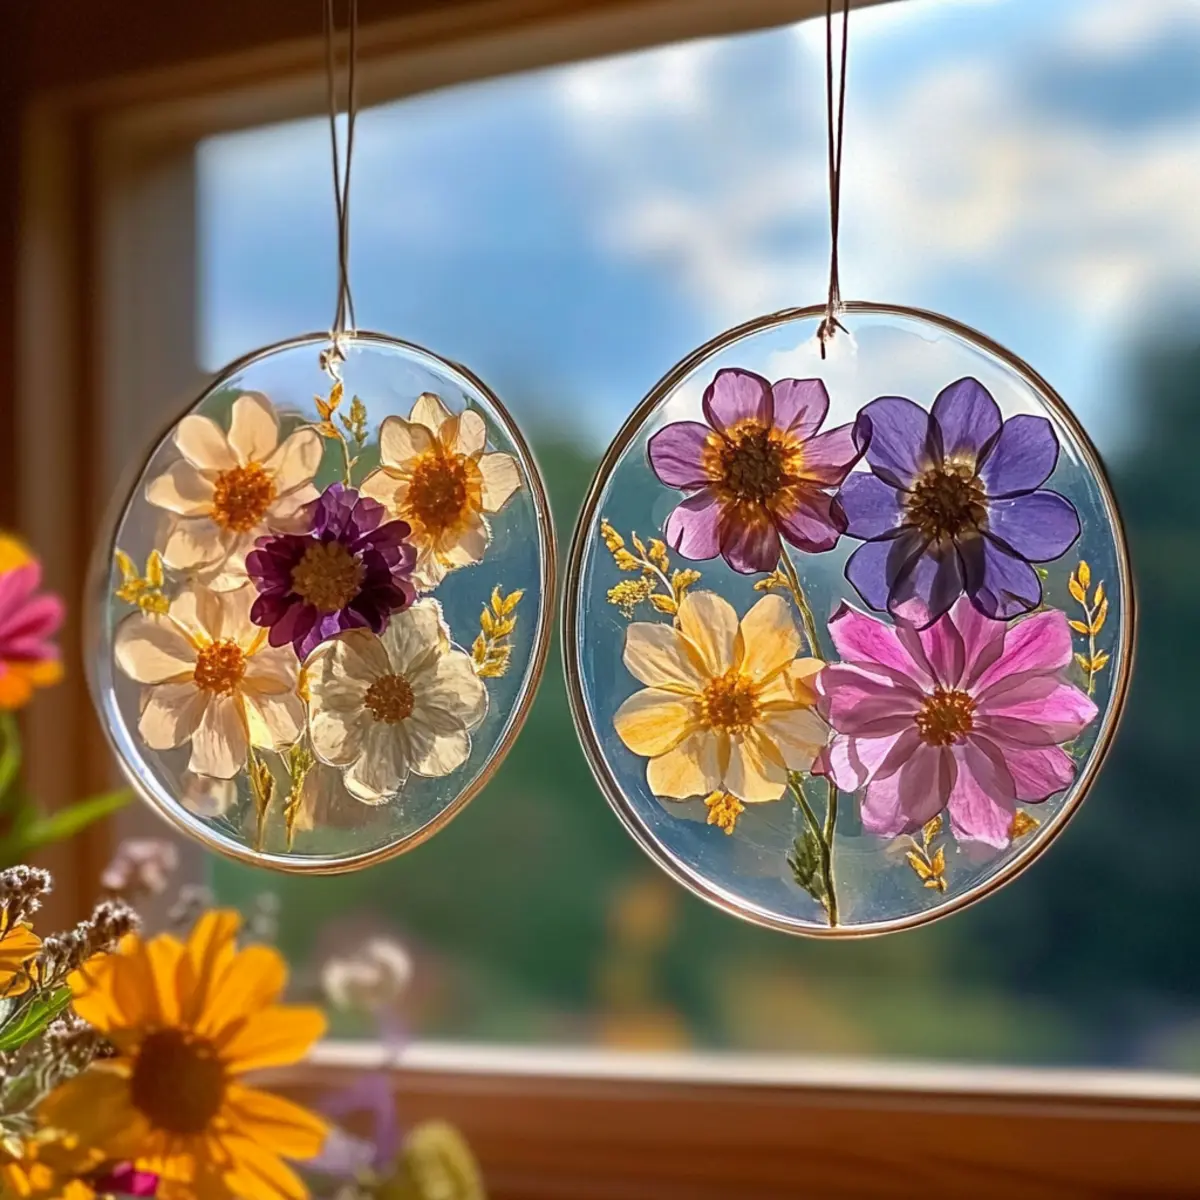
There's something delightfully enchanting about watching sunlight dance through vibrant colors and intricate shapes. When I first tried making Clear Glue Flower Suncatchers, I was amazed at how a simple blend of nature's beauty and crafty creativity could transform an ordinary afternoon into a gallery of light and art. With just a few basic supplies like clear glue and pressed flowers, I crafted a stunning piece that now livens up my living room window.
This DIY project isn't just for seasoned crafters-it's perfect for all ages and skill levels, making it an ideal activity to share with family. Whether you're looking for a fun weekend project or a way to add a personal touch to your home decor, these suncatchers are your ticket to a world of vibrant hues and shining reflections. Embrace your inner artist and let your windows sparkle with personality! Ready to create some sunshine in your space? Let's dive into this colorful crafting adventure!
Clear Glue Flower Suncatchers: Why You'll Adore This Craft!
Creativity Unleashed: Dive into a world of colors and textures with this fun, hands-on project!
Kid-Friendly: Perfect for crafters of all ages, making it a delightful family activity.
Quick Results: Enjoy the instant satisfaction of seeing your unique artistic creations come to life.
Natural Beauty: Use pressed flowers or tissue paper to personalize each suncatcher to match your decor.
Eye-Catching Decor: Transform your windows into vibrant art pieces that catch and reflect sunlight beautifully.
Sustainable & Safe: This non-toxic craft is a great way to introduce eco-friendly practices while having fun.
Get started on your own vibrant masterpiece today, and embrace your crafty side!
Clear Glue Flower Suncatcher Ingredients
For the Base
• Clear school glue - This glossy adhesive serves as the foundation for your stunning suncatcher; use Elmer's for best results.
• Plastic lid or clear acetate sheet - Acts as a flat mold to hold your design; choose one that is smooth for the best finish.
For Decoration
• Pressed flowers - Beautifully enhance your suncatcher with nature's colorful elements; mix various types for visual interest.
• Tissue paper scraps - Optional for a vibrant mosaic effect; pick bold colors to really make your art pop!
• Glitter, sequins, dried leaves - Add these for extra sparkle and texture; they help your suncatcher shine in the sunlight!
For Hanging
• String/ribbon or suction cup hook - Choose something durable to ensure your masterpiece hangs safely and beautifully.
Tools Needed
• Scissors - Use sharp scissors for neat trimming of your materials; clean edges elevate the overall look of the suncatcher.
• Wax paper or parchment - Protect your workspace and prevent any sticky mess while crafting.
• Hole punch - Create a hole for the string or suction cup; it should be compatible to hold your suncatcher securely.
• Optional black marker - For outlining edges and mimicking stained glass, adding an extra touch of elegance to your design.
How to Make Clear Glue Flower Suncatchers
-
Prepare workspace: Lay down wax paper to protect your surfaces from any glue spills or messes while you craft. This ensures a clean and easy cleanup later on!
-
Mix glue and decoration: In a bowl, combine the clear school glue with your pressed flowers and any optional decorations, like glitter or tissue paper. Mix well until everything is evenly coated and vibrant.
-
Pour mixture: Carefully pour the decorated glue onto the plastic lid or acetate sheet. Spread it evenly using a spatula or the back of a spoon, ensuring a smooth and flat surface.
-
Set to dry: Allow the mixture to dry for at least 24 hours. Look for a solidified, glossy finish before handling your suncatcher again.
-
Finish up: Once dry, use scissors to trim any excess edges carefully. Punch a hole for hanging, making sure it's big enough for the string or suction cup.
-
Hang and admire: Use your chosen string or suction cup hook to display your beautiful suncatcher in a sunny window. Enjoy the way it dances with sunlight!
Optional: Add a sprinkle of glitter on top of the dying glue for extra sparkle!
Exact quantities are listed in the recipe card below.
Make Ahead Options
These Clear Glue Flower Suncatchers are perfect for busy crafters looking to save time on projects! You can prepare the glue-and-flower mixture up to 24 hours in advance. Simply combine the clear glue with your pressed flowers and any optional decorations, mixing thoroughly for even distribution. Store the mixture in an airtight container in the refrigerator to keep it fresh. When you're ready to craft, pour the mixture onto a plastic lid or acetate sheet, spread it evenly, and let it dry in a well-ventilated area for at least 24 hours. This way, you can create beautiful suncatchers with minimal fuss, ensuring you enjoy this delightful activity without the last-minute stress!
What to Serve with Clear Glue Flower Suncatchers?
Create a delightful crafting atmosphere that can spark conversations and joy in your home!
-
Bright Fruit Salad: A refreshing mix of vibrant fruits complements the colorful artwork, adding a burst of freshness to your crafting session.
-
Herbal Lemonade: This zesty, herbal drink is both refreshing and aromatic, providing a bright flavor that mirrors the sunny vibes of your suncatchers.
-
Mini Cheese and Veggie Platter: An assortment of creamy cheeses paired with fresh veggies creates a savory contrast to the sweet craft of floral suncatchers, perfect for snacking as you create.
-
Chocolate Dipped Pretzels: Salty and sweet, these treats are a delightful reward after a crafty afternoon, adding a crunchy texture that pairs beautifully with the glossy suncatchers.
Imagine working on your colorful creations while savoring treats that inspire even more creativity around you!
How to Store and Freeze Clear Glue Flower Suncatchers
Room Temperature: Keep your suncatchers in a dry, cool place, away from direct sunlight, to maintain their vibrant colors and structural integrity for up to a year.
Fridge: If you need to store your suncatchers temporarily, wrap them loosely in wax paper and place in a cool, dry area of the fridge for up to a week.
Freezer: It's not advisable to freeze clear glue flower suncatchers, as the extreme cold can damage the integrity of the glue and decorations.
Reheating: Since these aren't food items, there's no need for reheating; simply hang them back up and enjoy the beautiful sunlight reflections!
Clear Glue Flower Suncatcher Variations
Feel free to get creative and personalize your suncatchers for a unique touch!
-
Tissue Paper Swaps: Replace pressed flowers with colorful tissue paper for a bright, mosaic effect that's playful and vibrant.
-
Dried Leaves: Opt for dried leaves instead of flowers to create an autumn-themed suncatcher that captures the essence of fall.
-
Glitter Boost: Add a generous sprinkle of glitter to your glue mixture for extra sparkle! This elevates the visual interest and makes your craft shine.
-
Layering Technique: Create multiple layers with different decorative elements, like alternating between tissue paper and sequins for depth and texture.
-
Seasonal Themes: Adjust your motifs according to the seasons-think pastel flowers for spring or snowflakes for winter, making each suncatcher relevant year-round.
-
Stained Glass Effect: Use a black marker around the edges after drying to mimic stained glass windows, enhancing the elegance of your design.
-
Personal Touch: Include special items like photos or handwritten notes under the glue for a sentimental twist that celebrates family memories.
-
Heat Adjustment: For an extra challenge, use heat-safe materials that can withstand sunlight, ensuring your creations last longer.
Let your imagination soar and use these variations to craft suncatchers that reflect your style and joy!
Tips for the Best Clear Glue Flower Suncatchers
-
Use Non-Toxic Glue: Always opt for non-toxic clear school glue, especially when crafting with children to ensure a safe and enjoyable experience.
-
Dry Flowers Well: Ensure that your pressed flowers are thoroughly dried to prevent any moisture that could compromise your suncatcher's design.
-
Avoid Air Bubbles: When pouring the glue mixture, take your time to avoid air bubbles, ensuring a smooth, flawless finish on your suncatcher.
-
Make it Personal: Don't hesitate to mix and match different decorations like tissue paper, dried leaves, or glitter for unique Clear Glue Flower Suncatchers that reflect your style.
-
Allow Enough Drying Time: Be patient and let your suncatcher dry for a full 24 hours; this guarantees the best final product without any tackiness.
-
Secure Hanging Method: Choose a durable string or suction cup hook for hanging; this prevents your artwork from falling and keeps it safe for all to admire.
Clear Glue Flower Suncatcher Recipe FAQs
What type of glue should I use for the suncatchers?
Absolutely! I recommend using non-toxic clear school glue, like Elmer's. This type is safe for kids and gives a beautiful glossy finish to your suncatchers, ensuring they shine brightly in the sunlight.
How should I store my suncatchers once they are made?
To keep your Clear Glue Flower Suncatchers looking vibrant, store them in a cool, dry place, away from direct sunlight. They can last for up to a year if kept properly-just ensure they are also kept away from moisture which can affect their structural integrity.
Can I freeze my Clear Glue Flower Suncatchers?
No, it's not advisable to freeze them, as extreme cold can compromise the glue and decorations. Instead, simply store them in a cool area if you need to set them aside. They are best enjoyed fresh and bright!
What should I do if my suncatcher doesn't fully dry?
If you find that your suncatcher is still tacky after 24 hours, it might need more time to dry in a well-ventilated area. Avoiding direct sunlight while it dries is key. If you're in a hurry, try placing it in a dry, warm room; just give it a few extra hours for a perfect finish.
Are the materials pet-friendly?
While the craft uses non-toxic glue, it's always best to supervise pets around crafting materials. Some elements like glitter and sequins can pose choking hazards, so keep them out of reach during your creative process.
Can I use real flowers instead of pressed ones?
Yes, you can use real flowers, but they need to be dried thoroughly first. Wilting flowers may release moisture, compromising the glue's effectiveness and final appearance. If you're short on time, pressed flowers offer a beautifully preserved alternative that looks stunning in the finished product.
Brighten Your Home: Easy Clear Glue Flower Suncatchers!
Equipment
- bowl
- spatula
- scissors
- Hole punch
Ingredients
For the Base
- 1 bottle Clear school glue Use Elmer’s for best results.
- 1 piece Plastic lid or clear acetate sheet Choose a smooth surface for best finish.
For Decoration
- Variety Pressed flowers Mix various types for visual interest.
- Optional Tissue paper scraps Pick bold colors for a mosaic effect.
- Optional Glitter, sequins, dried leaves Add these for extra sparkle.
For Hanging
- 1 String or ribbon or suction cup hook Choose something durable for hanging.
Tools Needed
- 1 pair Scissors For neat trimming.
- 1 piece Wax paper or parchment Protects workspace.
- 1 Hole punch For hanging the suncatcher.
- Optional Black marker For outlining edges.
Instructions
Instructions
- Prepare workspace: Lay down wax paper to protect your surfaces from any glue spills or messes while you craft.
- Mix glue and decoration: In a bowl, combine the clear school glue with your pressed flowers and any optional decorations, like glitter or tissue paper. Mix well until everything is evenly coated.
- Pour mixture: Carefully pour the decorated glue onto the plastic lid or acetate sheet. Spread it evenly with a spatula.
- Set to dry: Allow the mixture to dry for at least 24 hours until it has a solidified, glossy finish.
- Finish up: Once dry, use scissors to trim any excess edges. Punch a hole for hanging.
- Hang and admire: Use your chosen string or suction cup hook to display your beautiful suncatcher.


Leave a Reply