The joy of watching creativity blossom in children is a magical experience. I first discovered the art of bubble painting during a rainy afternoon when my little ones were begging for something fun to do. The sound of laughter mixed with the colorful bursts of bubbles was infectious! With just a few simple ingredients from the pantry, we found ourselves immersed in a world of vibrant patterns and textures, transforming a dull day into an unforgettable adventure.
This DIY Bubble Painting project is not only easy to set up but also a delightful way for kids-and the young at heart-to unleash their artistic flair. Non-toxic and perfect for messy play, this craft lets imaginations run wild while creating unique masterpieces that can be proudly displayed at home. Whether you're looking for an entertaining activity or a chance to bond, this whimsical art project will inspire joy and laughter, bringing the magic of color right into your kitchen. Grab your ingredients, and let's get bubbling!
Why Bubble Painting Art for Kids is a Must-Try?
Non-Toxic Fun: This craft is made with simple, safe ingredients that give parents peace of mind, making it ideal for little artists.
Easy Setup: Within minutes, you can transform your kitchen into a vibrant art studio. Just mix, blow, and create!
Endless Creativity: Each bubble burst leads to unique color patterns, ensuring no two masterpieces are alike.
Messy Play Made Simple: With just a few supplies, clean-up is a breeze, allowing everyone to focus on the fun.
Perfect for All Ages: Whether it's a group of toddlers or teens, this project keeps everyone engaged and entertained.
Create Lasting Memories: Not only is this a great way to spend a rainy day, but it also fosters creativity and bonding. So gather your supplies, and dive into this delightful DIY craft that everyone will love!
Bubble Painting Art for Kids Ingredients
Get ready to bring color and creativity to life with these fun supplies!
For the Bubble Paint
- Dish Soap or Tear-Free Baby Wash - Essential for creating bubbly foam; stick with a mild dish soap to keep it safe for kids.
- Water - It's the key to diluting your paint mixture for the perfect bubbling consistency; use room temperature for best results.
- Liquid Watercolors or Food Coloring - These vibrant colors will transform your artwork; feel free to add a few drops for richer hues!
For Mixing and Application
- Plastic Cups or Small Bowls - Handy containers for mixing colors; ensure they're small enough to minimize spills.
- Straws - Use them to blow into the mixture and create those magical bubbles; both reusable and disposable options are great!
For the Painting Surface
- Heavyweight Paper (Watercolor Paper or Cardstock) - A sturdy canvas that holds the paint and prevents curling; thinner paper may not withstand the wet paint.
- Optional - Aprons or Old T-Shirts - Keep clothes clean and mess-free during this exciting bubble painting session!
With these simple ingredients ready, you're all set to embark on a bubble painting adventure that promises fun and creativity for everyone!
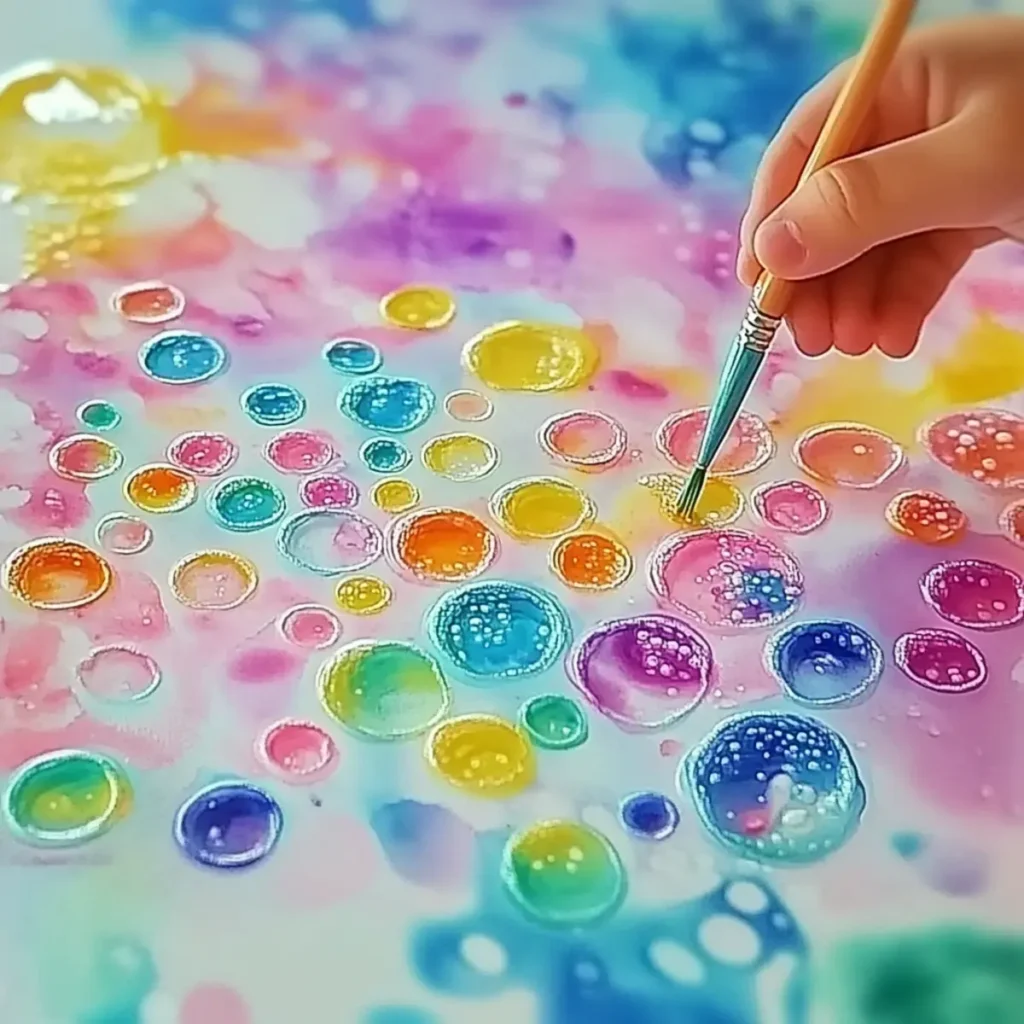
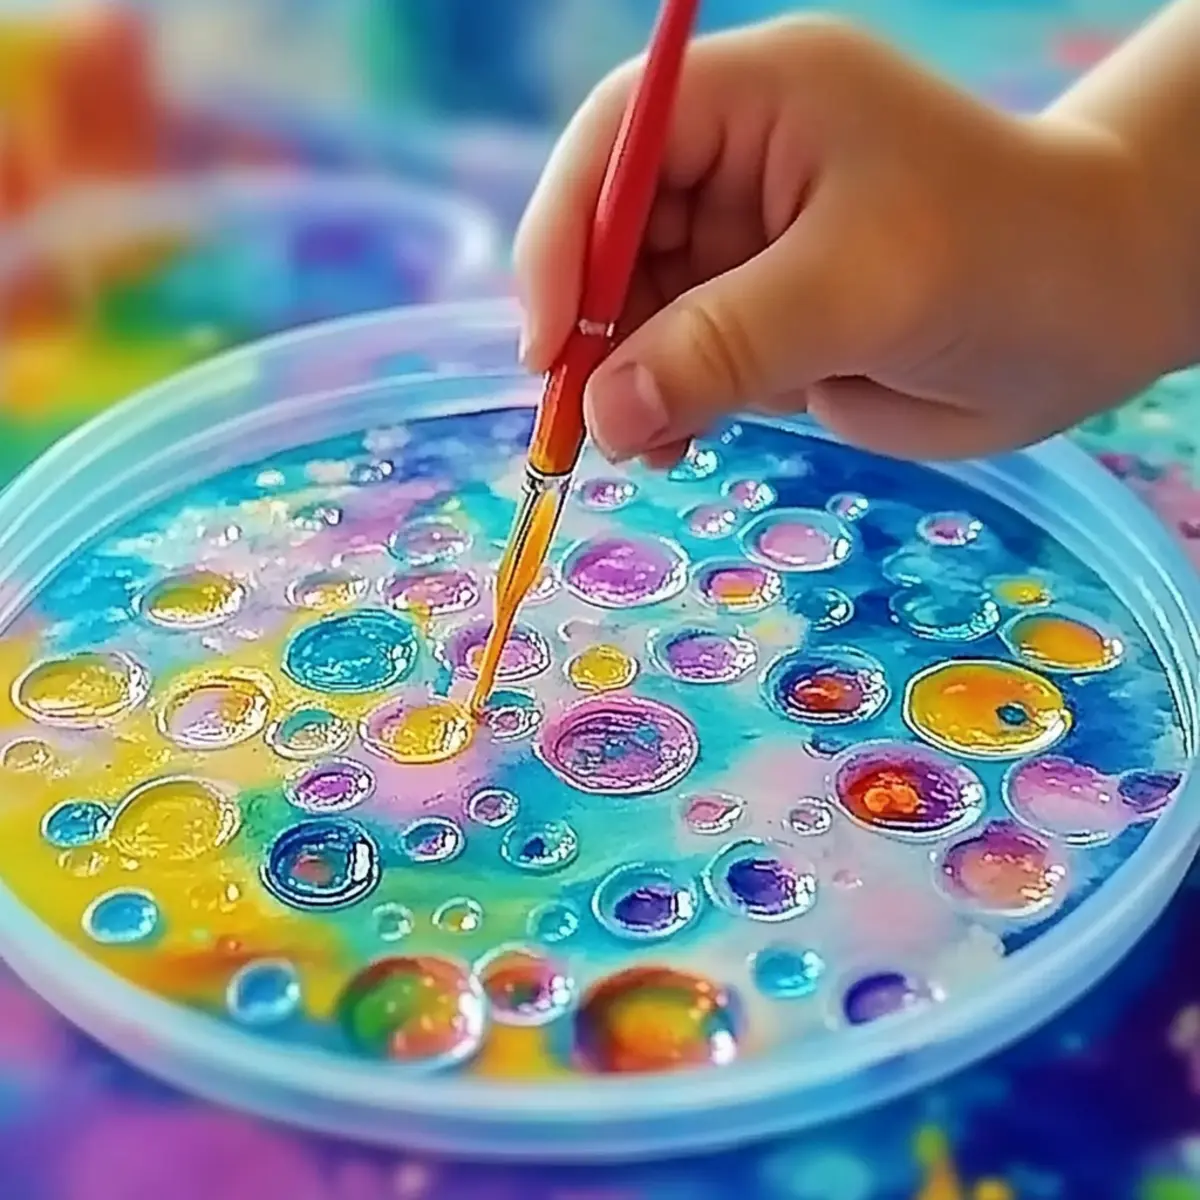
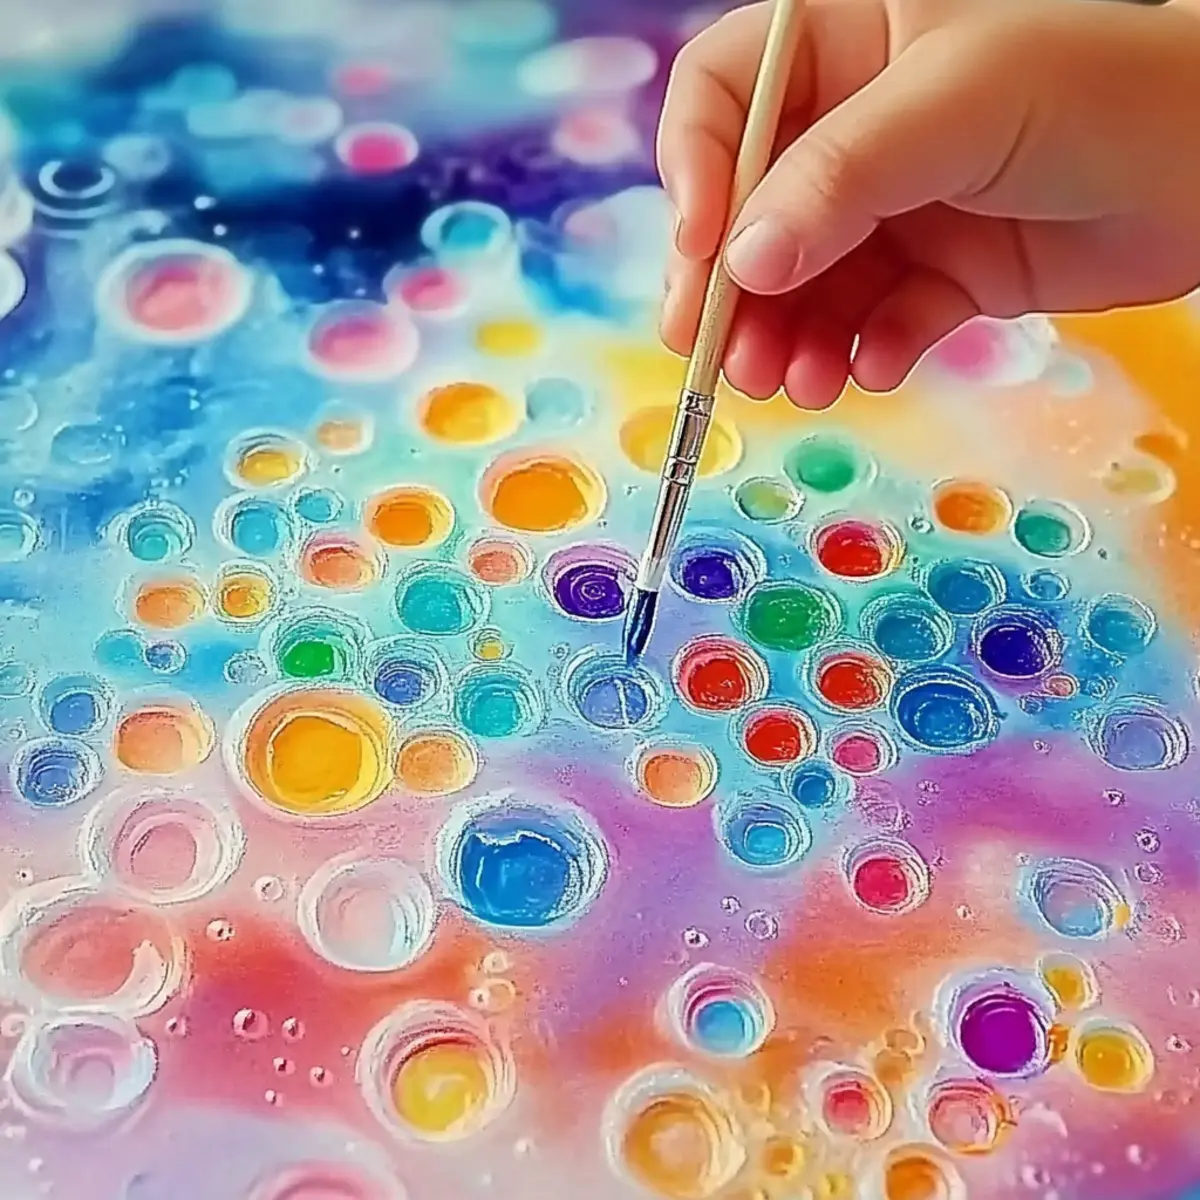
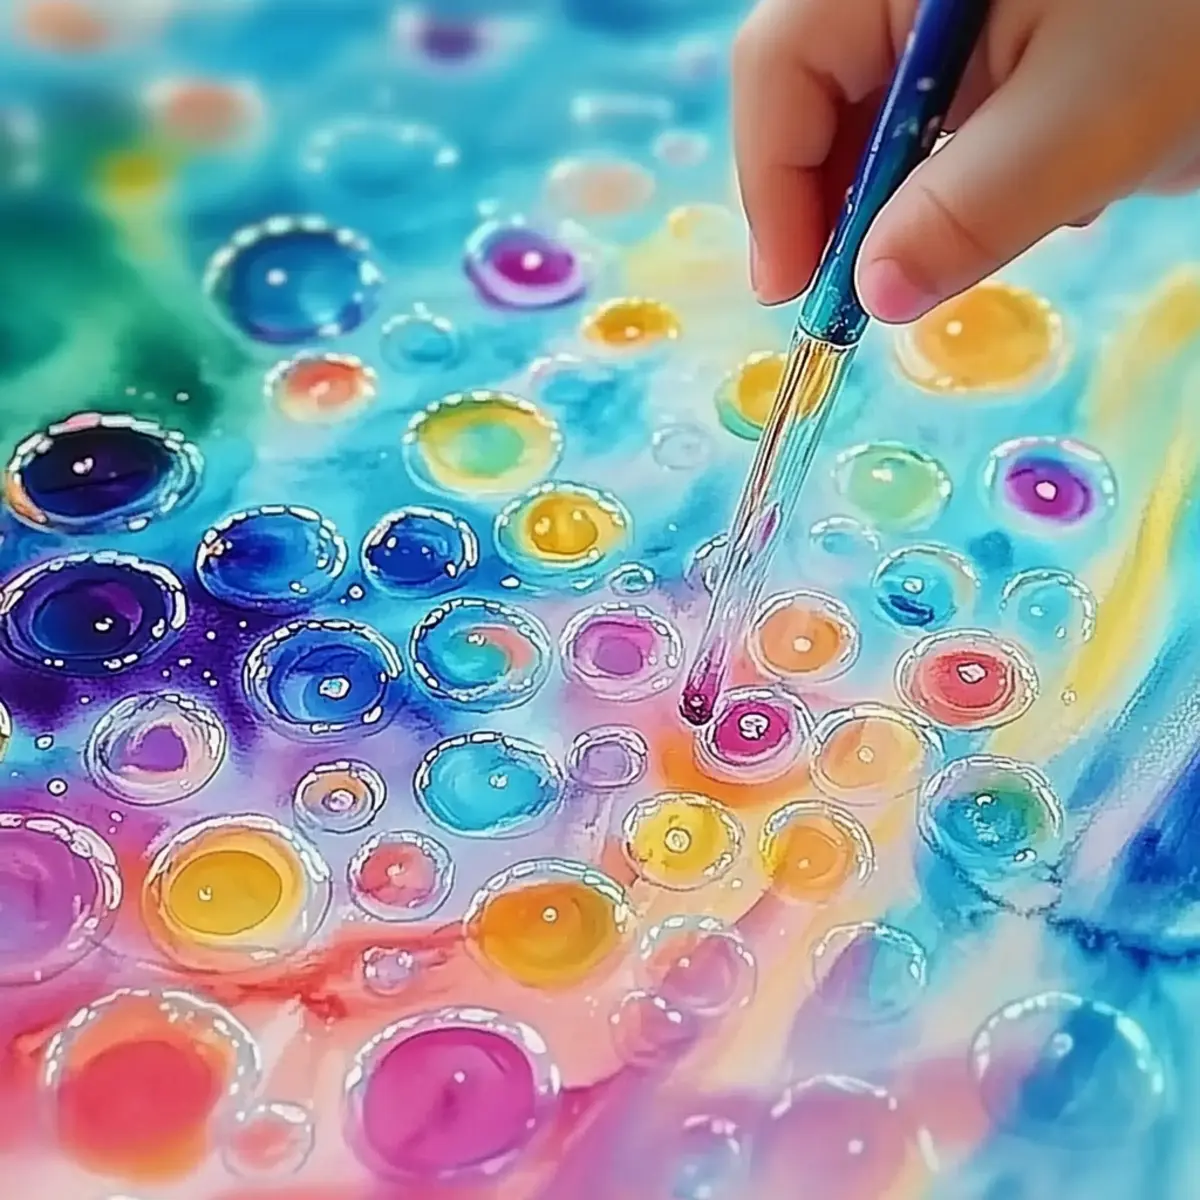
How to Make Bubble Painting Art for Kids
-
Mix Ingredients: In each plastic cup or bowl, combine 2-3 tablespoons of dish soap with 0.25 cup of water. Add a few drops of liquid watercolors or food coloring, mixing until fully combined and bubbly.
-
Create Bubbles: Gently blow into the mixture using a straw. Watch as captivating bubbles rise above the cup's edge, bursting with beautiful colors.
-
Transfer Color: Carefully place the heavyweight paper on top of the bubbles, allowing the colors to transfer onto the paper. This will create enchanting patterns and designs!
-
Repeat for More Colors: Remove the paper, and if desired, repeat the process using different colors to add more vibrancy to your artwork.
-
Dry the Artwork: After all your bubble masterpieces are created, let the painted paper dry completely. Once dry, you can display or gift your colorful creations.
Optional: Add a sprinkle of glitter to the paint for an extra touch of sparkle!
Exact quantities are listed in the recipe card below.
What to Serve with Bubble Painting Art for Kids?
Imagine immersing yourself in a world of color and creativity, where laughter mingles with vibrant patterns-perfect for an unforgettable day at home.
- Colorful Snacks: A platter of rainbow fruit skewers can mimic your colorful artworks and keep the fun going while the masterpieces dry.
- Refreshing Lemonade: Serve up some zesty lemonade to quench thirst and purify the palate after playful art sessions, keeping everyone refreshed and energized.
- Art-themed Cupcakes: Brightly decorated cupcakes with colorful frosting allow kids to indulge while celebrating their artistic achievements-every bite a sweet victory!
- Mini Sandwiches: Craft tiny sandwiches in fun shapes that can serve as a delicious fuel source, ensuring little artists have enough energy for their creative bursts.
- Fruit Popsicles: Perfect for a warm day, these icy treats echo the vibrant colors of the bubble paint, making them an instant hit for kids and adults alike.
- Family Game Time: To extend the fun, follow up with a board game or interactive activity that encourages teamwork and laughter, uniting everyone in a joyful experience.
Let the joyful atmosphere flow, keeping your kids inspired as they create their bubble painting masterpieces!
Make Ahead Options
These DIY Bubble Painting Art for Kids preparations are perfect for busy parents looking to save time! You can mix the bubble paint ingredients (dish soap, water, and food coloring) in advance and store them in airtight containers for up to 3 days. This way, when creativity strikes, you'll be ready to go! Just ensure to keep the containers in the refrigerator to maintain freshness. When you're ready to dive into the art project, simply take the prepped paint out, blow bubbles with straws, and transfer the color onto heavyweight paper. Your kids will create wonderful masterpieces without any hassle, providing a delightful, mess-free experience!
How to Store and Freeze Bubble Painting Art for Kids
Airtight Containers: Keep any prepared bubble paint in airtight containers for up to 3 days in the fridge. Label them with the date to ensure freshness.
Fridge: If you plan to use leftover bubble paint, store it in the fridge to maintain its consistency and vibrancy. Make sure to shake or stir well before use.
Freezer: For longer storage, bubble paint can be frozen in ice cube trays for up to a month. Once frozen, transfer the cubes to a resealable plastic bag for easy thawing and use.
Reheating: Allow frozen bubble paint to thaw in the fridge overnight before using. Gently stir to revive its original consistency for colorful creations!
Expert Tips for Bubble Painting Art for Kids
• Supervise Safely: Always keep an eye on younger children during the process, especially when using straws and mixing ingredients, to prevent any mishaps.
• Bubble Size Matters: Adjust your blowing technique to vary bubble size; shorter breaths will create smaller bubbles, while longer blows produce larger ones for dramatic effects.
• Use Quality Paper: Choose heavyweight paper or cardstock to prevent curling and ensure the surface can soak up water without tearing or warping.
• Easy Cleanup: Lay down a plastic sheet or newspaper under the painting area to catch drips and spills for a hassle-free cleanup experience.
• Color Mixing Fun: Encourage kids to experiment by mixing different colors before painting; it can lead to exciting new shades and unexpected art results!
• Embrace Imperfections: Remind kids that art is about creativity, not perfection. Encourage them to enjoy the process of creating unique bubble painting art without worrying about making it "perfect."
Bubble Painting Variations
Feel free to let your imagination run wild with these delightful twists on your bubble painting adventure!
-
Natural Colors: Use fruit juices or vegetable purees instead of food coloring for a more eco-friendly option. Kids will love seeing how their favorite snacks become colorful art!
-
Add Glitter: Mix in some glitter or metallic paint to your bubble solution for a sparkling, shimmering effect that adds a magical touch.
-
Larger Surfaces: Experiment with big, flat containers like baking sheets to create larger bubble paintings. This opens up new possibilities for collaborative art sessions!
-
Scented Bubbles: Incorporate a few drops of essential oils into the bubble mixture to introduce delightful scents. Lavender for calmness or citrus for energizing fun will make the experience even more engaging.
-
Textured Surfaces: Try painting on textured paper or canvas materials for added dimension in the final artwork. This can take your creations to the next level!
-
Color Layering: After the first layer dries, reintroduce other colors on top to create stunning layered designs. The overlapping bubbles will surprise you with their beauty!
-
Different Tools: Swap out straws for bubble wands to create varied bubble shapes. The different tools will inspire unique artistic expressions!
-
Painted Patterns: Encourage kids to blow bubbles in certain shapes (like hearts or stars) before transferring them to paper. They'll find joy in painting familiar patterns that truly shine!
DIY Bubble Painting Recipe FAQs
What type of dish soap should I use?
Absolutely! A mild dish soap or tear-free baby wash works best for this bubble painting project. Avoid soaps with harsh chemicals, as they can be irritating for little hands. A gentle soap will create plenty of bubbles while keeping everything safe and fun.
How long can I store leftover bubble paint?
You can keep prepared bubble paint in airtight containers in the fridge for up to 3 days. It's a good idea to label the containers with the date so you can use it while it's at its best. Be sure to give it a gentle stir before using again!
Can bubble paint be frozen for later use?
Yes, you can absolutely freeze bubble paint for up to 1 month! Pour the mixture into ice cube trays and freeze until solid. Once frozen, transfer the cubes to a resealable plastic bag for easy thawing. When you're ready to use, simply take out a cube and allow it to thaw in the fridge overnight.
What if my bubbles aren't forming properly?
If you're having trouble getting good bubbles, start by checking the consistency of your mixture. Make sure you're using the right proportions of dish soap to water-about 2-3 tablespoons of soap to 0.25 cup of water is ideal. Also, try varying the force and distance when blowing through the straw; gentle puffs create small bubbles, while stronger breaths produce larger, dramatic bubbles.
Is the bubble paint safe for pets and children?
Absolutely! The ingredients for this DIY bubble painting are non-toxic and generally safe for children to use with supervision. However, if you have a pet, it's best to keep them out of the play area just to be on the safe side. Always ensure children do not ingest the paint, even though it's non-toxic.
What's the best paper to use for bubble painting?
I highly recommend using heavyweight paper such as watercolor paper or cardstock for this activity. These types of paper can absorb more water without curling, allowing for vibrant, detailed bubble patterns. Regular paper can work, but it may warp or tear if it gets too wet.

Bubble Painting Art for Kids – A Fun and Easy DIY Project
Equipment
- Plastic Cups or Small Bowls
- Straws
- Heavyweight Paper (Watercolor Paper or Cardstock)
Ingredients
For the Bubble Paint
- 2-3 tablespoons Dish Soap or Tear-Free Baby Wash Use a mild soap for safety.
- 0.25 cup Water Room temperature for best results.
- few drops Liquid Watercolors or Food Coloring Add for vibrant colors.
For Mixing and Application
- 1 Plastic Cups or Small Bowls Mixing containers.
- 1 or more Straws For blowing bubbles.
For the Painting Surface
- 1 sheet Heavyweight Paper (Watercolor Paper or Cardstock) Sturdy enough to hold paint.
- Optional – Aprons or Old T-Shirts To keep clothes clean.
Instructions
How to Make Bubble Painting Art for Kids
- In each plastic cup or bowl, combine 2-3 tablespoons of dish soap with 0.25 cup of water. Add a few drops of liquid watercolors or food coloring, mixing until fully combined and bubbly.
- Gently blow into the mixture using a straw. Watch as captivating bubbles rise above the cup's edge, bursting with beautiful colors.
- Carefully place the heavyweight paper on top of the bubbles, allowing the colors to transfer onto the paper. This will create enchanting patterns and designs!
- Remove the paper, and if desired, repeat the process using different colors to add more vibrancy to your artwork.
- After all your bubble masterpieces are created, let the painted paper dry completely. Once dry, you can display or gift your colorful creations.


Leave a Reply