
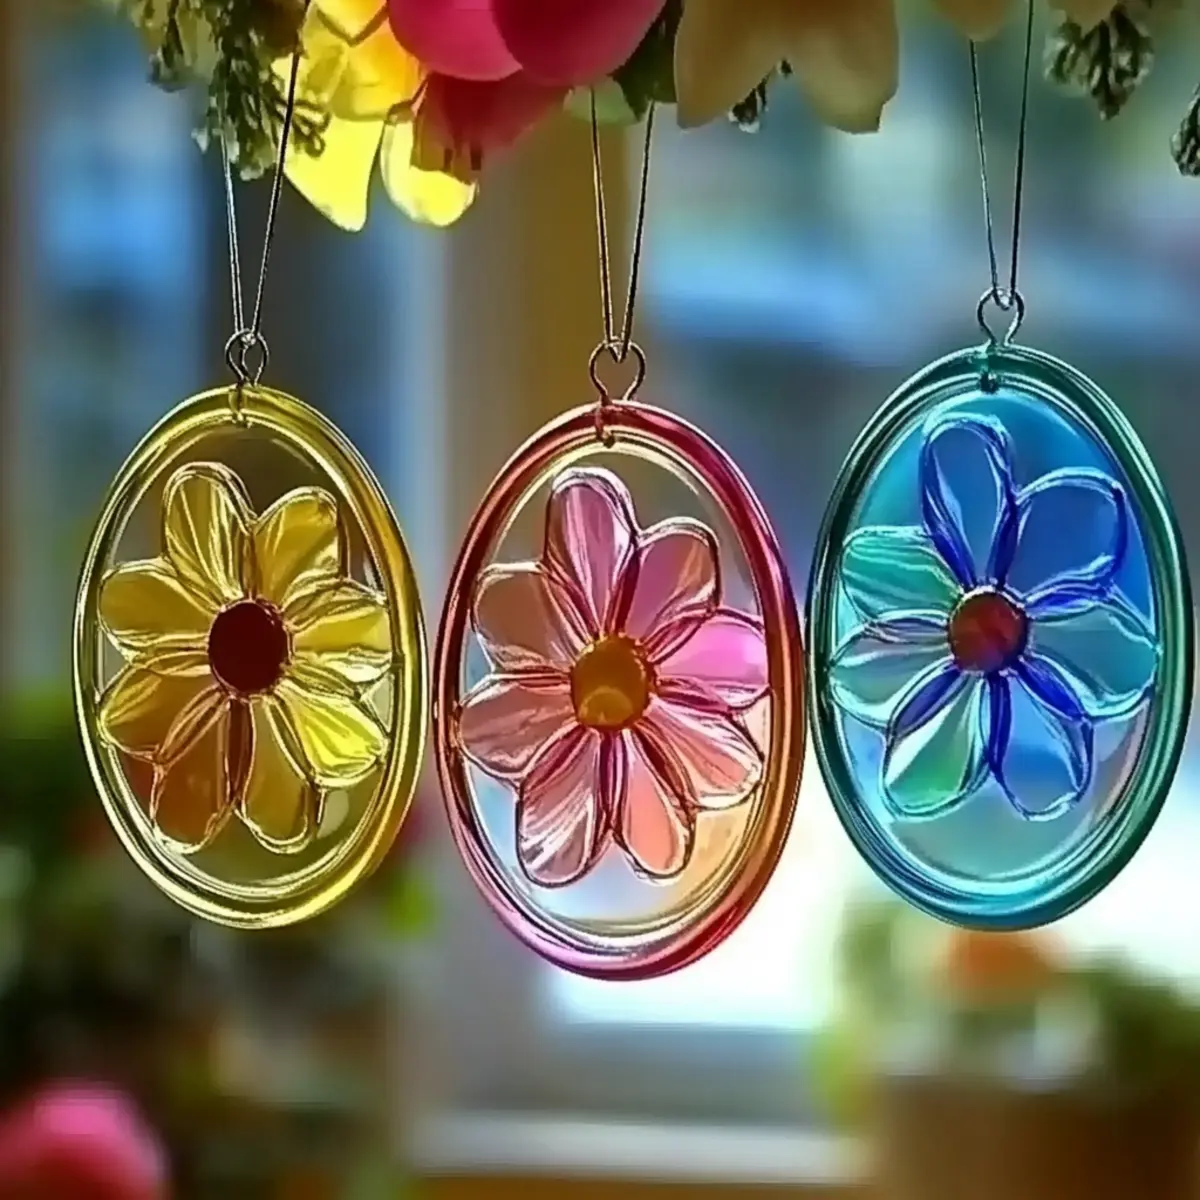
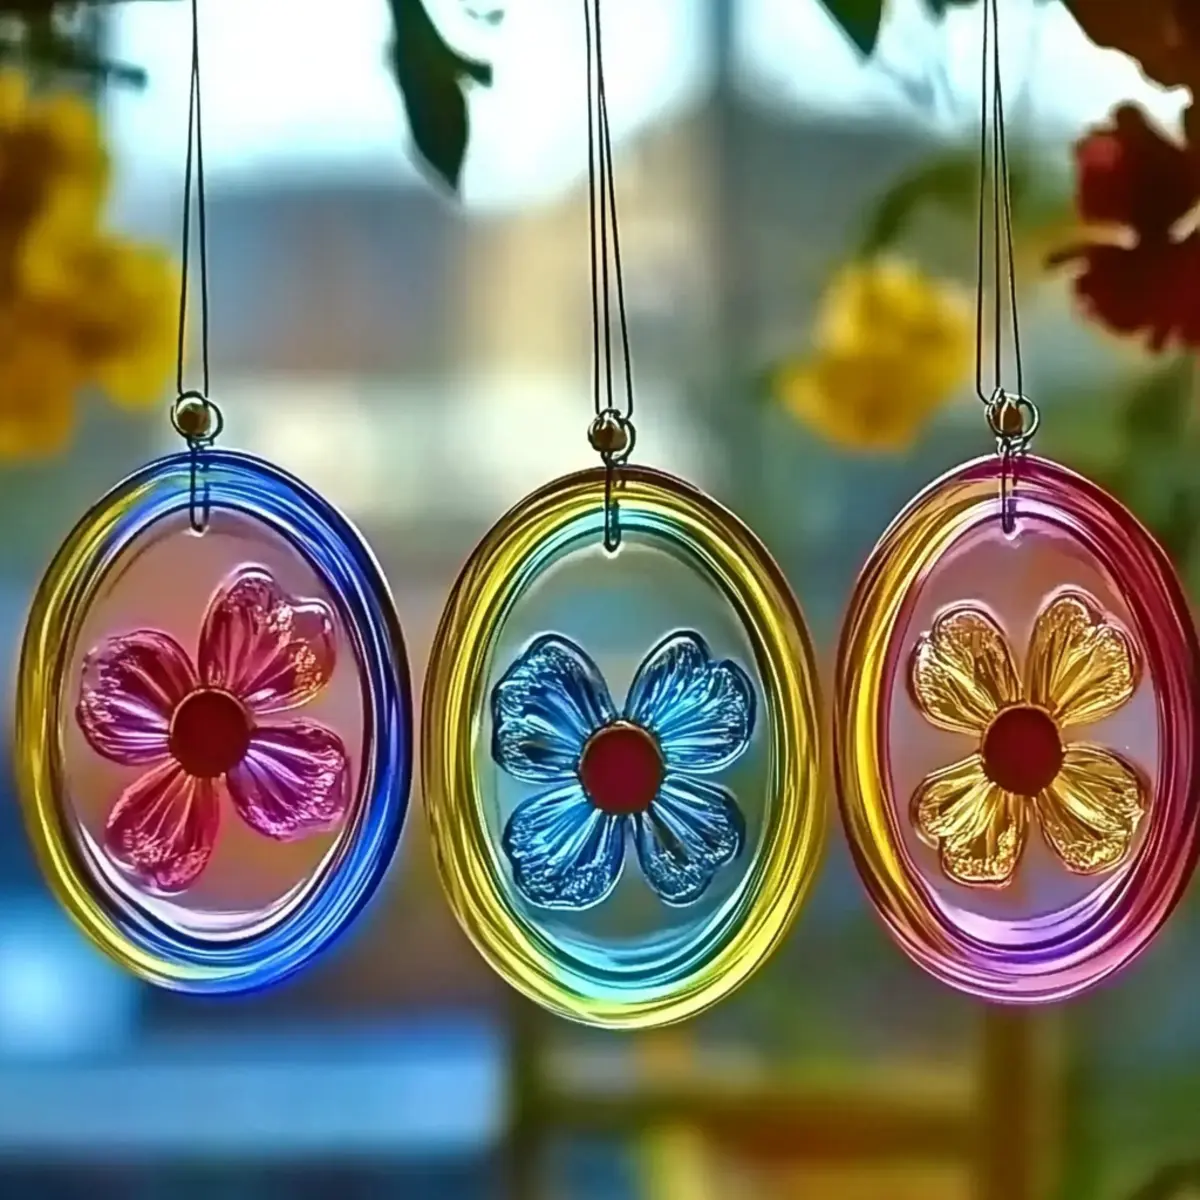
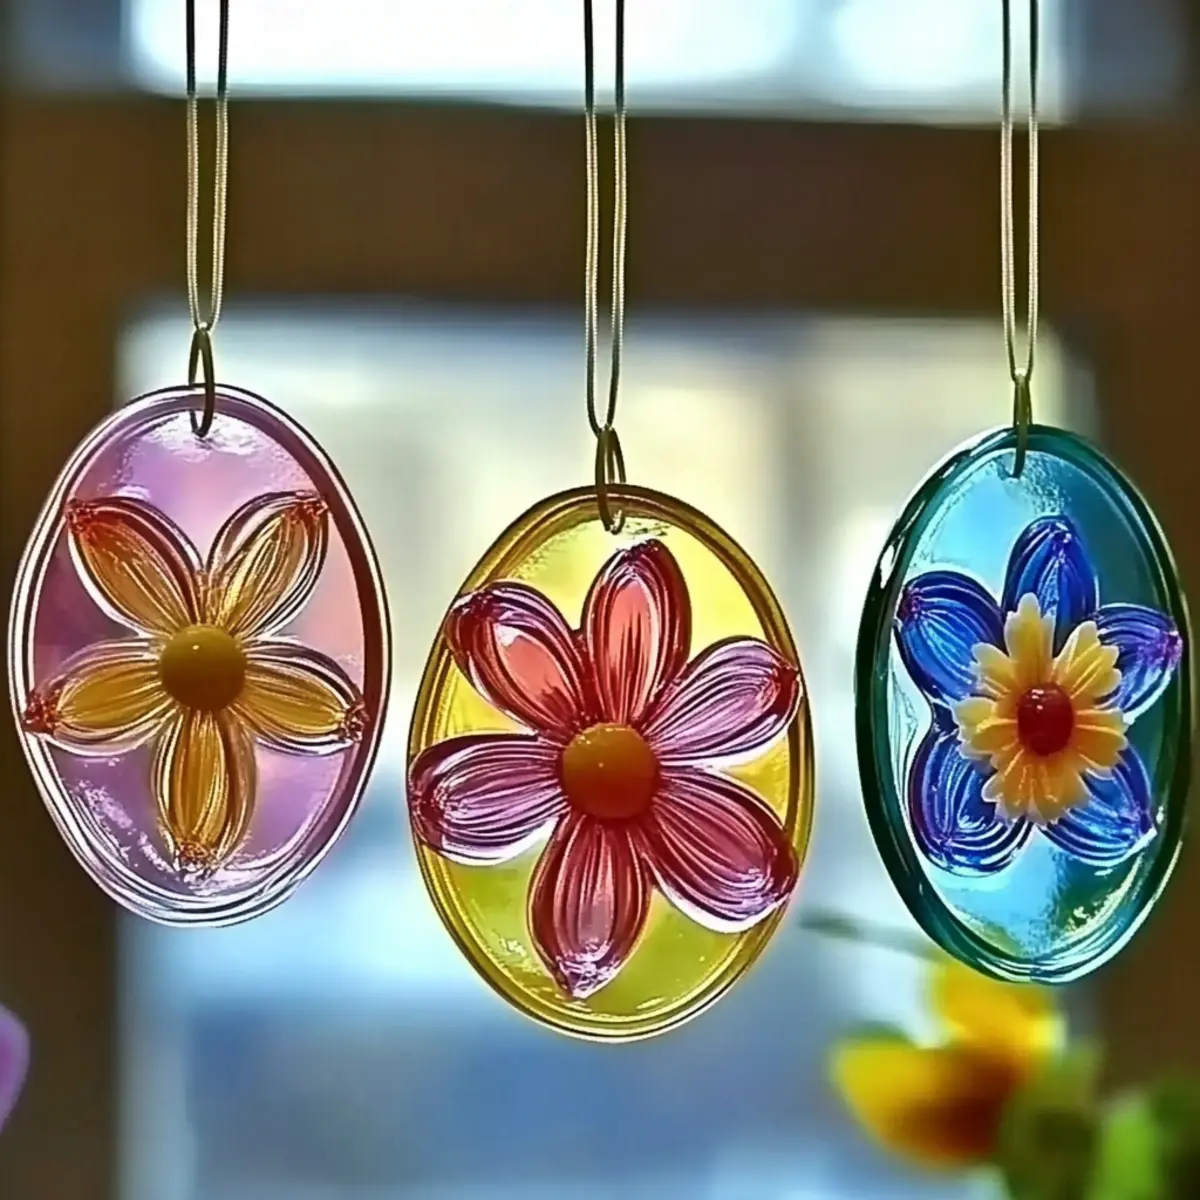
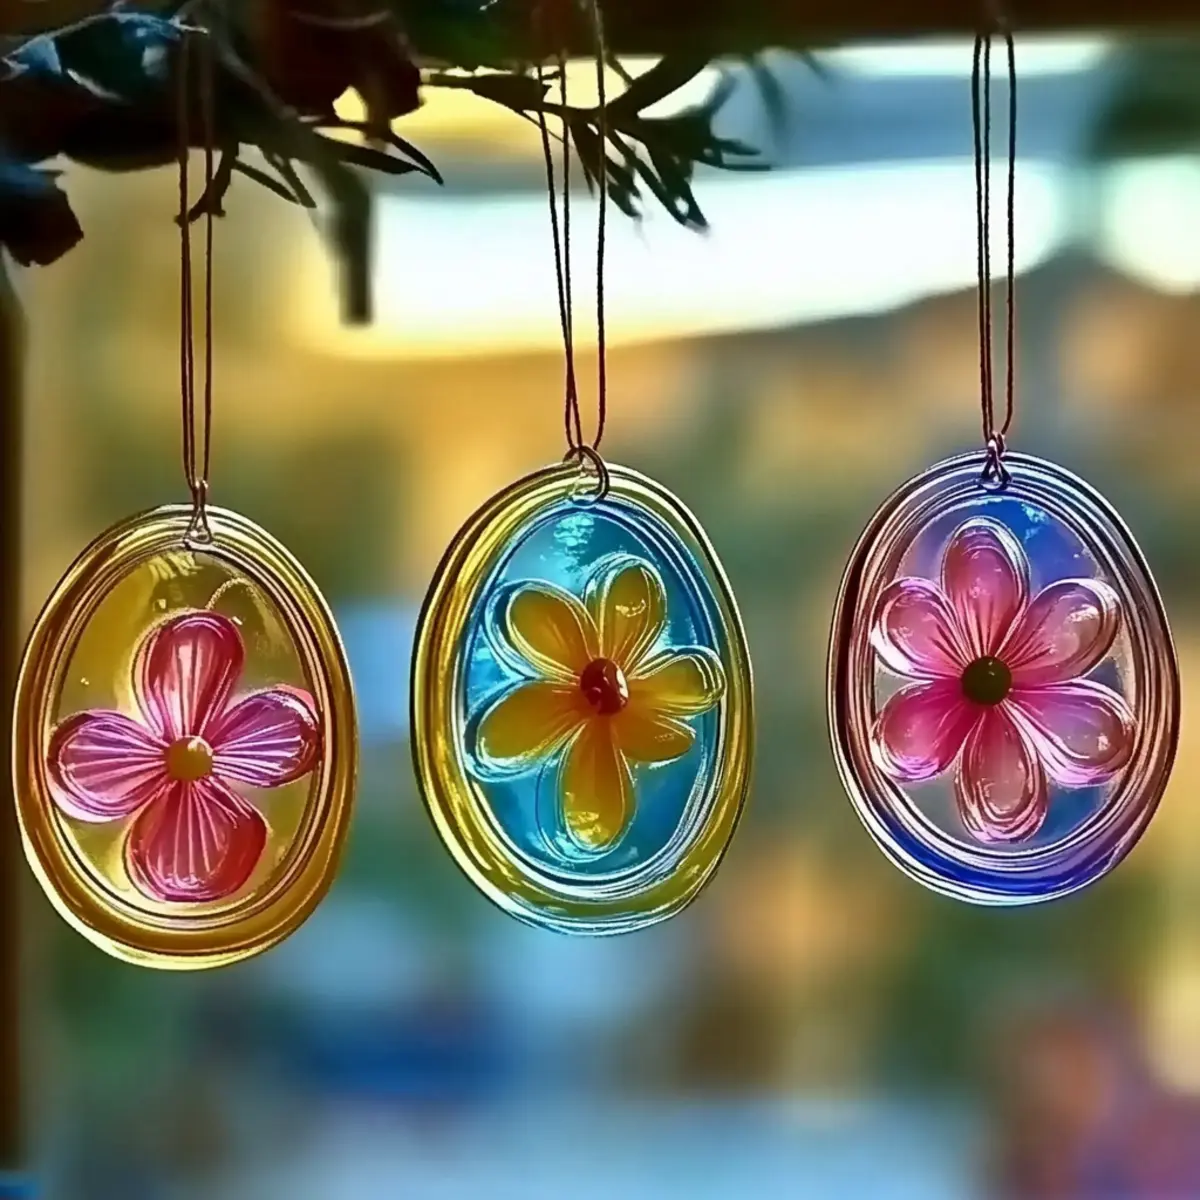
There's something magical about capturing light and turning it into art-especially when it's an eco-friendly masterpiece! 🌞 I recently discovered the joy of creating Bioplastic Suncatchers using simple, sustainable ingredients found in my kitchen. This delightful craft not only brightens up your living space but also serves as a perfect activity for kids eager to explore creativity while learning about environmental stewardship.
Imagine the sunlight pouring through your windows, illuminating vibrant colors reminiscent of stained glass. That's what these beautiful, homemade suncatchers will achieve! With minimal effort and natural materials like cornstarch and vegetable glycerin, you can craft gorgeous decorations that are as kind to the planet as they are to your home. So, let's roll up our sleeves and dive into this fun, hands-on project that makes being eco-conscious a beautiful affair!
Bioplastic Suncatchers: Why You'll Love This Craft
Simplicity at its Core: Creating Bioplastic Suncatchers is a breeze, using just a few simple ingredients you likely have at home.
Vibrant Light Play: Hang these suncatchers in sunny windows and watch as they transform light into a dazzling display of colors.
Eco-Friendly Choice: This project promotes sustainability, helping you and your kids learn about eco-conscious crafting while being playful.
Fun for All Ages: Perfect for family activities, it encourages creativity and bonding while promoting environmental awareness.
Customizable Designs: Add pressed flowers or natural dyes for stunning, personalized touches that showcase your unique style!
Bioplastic Suncatchers Ingredients
Gather Your Supplies for Fun: Here's what you'll need to create your gorgeous Bioplastic Suncatchers!
For the Base Mixture
- Cornstarch - Provides structure; substitute with arrowroot powder for a similar effect.
- Water - Acts as a solvent for mixing ingredients; no substitution needed.
- White Vinegar - Balances pH and helps set the mixture; alternatives include lemon juice for similar acidity.
- Vegetable Glycerin - Adds glossiness and flexibility; can be replaced with clear corn syrup if necessary.
For Color and Decoration
- Food Coloring (optional) - Used for aesthetic purposes; try natural dyes like beet juice or turmeric as substitutes.
- Glitter or Embellishments (optional) - Use to add sparkle and creativity to your suncatchers; this makes each piece truly unique!
Now gather these ingredients and let your creativity shine as you craft stunning Bioplastic Suncatchers!
How to Make Bioplastic Suncatchers
-
Combine Ingredients: In a non-stick saucepan, measure and pour in the cornstarch and water. Stir until smoothly blended, creating a uniform mixture that's ready for cooking.
-
Heat the Mixture: Add the white vinegar and vegetable glycerin to the saucepan, then place it over medium heat. Stir continuously to avoid lumps as it heats-stay attentive!
-
Thicken the Paste: Continue stirring for 5-7 minutes until the mixture thickens into a gel-like paste. It should resemble a glossy, smooth substance with a slight viscosity, perfect for shaping.
-
Incorporate Color: Remove the saucepan from heat. If you're using food coloring, add it now. Mix until the colors are vibrant and well-distributed throughout the paste for a stunning effect.
-
Spread the Mixture: Carefully pour the thickened mixture onto a sheet of wax paper or a silicone mat. Spread it into a thin, even layer, approximately ¼ inch thick to ensure even drying.
-
Decorate While Wet: Before the mixture begins to set, sprinkle glitter or embellishments on top. Get creative by swirling the colors together for a marbled effect, making each suncatcher unique!
-
Dry the Suncatchers: Allow your creations to dry for 24-48 hours in a cool, dry area. They should become glossy and firm; patience is key for the best results.
-
Cut and Display: Once fully dried, carefully peel the suncatchers from the wax paper. Use scissors or punches to cut out your desired shapes, and hang them in sunny windows to enjoy the full effect!
Optional: Add a ribbon or string for easy hanging and extra charm!
Exact quantities are listed in the recipe card below.
Bioplastic Suncatchers: Customization Ideas
Dive into the world of creativity by exploring different ways to enhance your suncatchers!
- Natural Embellishments: Incorporate pressed flowers or leaves into your designs for a beautiful, organic touch. This adds texture and a personal flair!
- Additional Colors: Mix in pigments from spices or vegetables like beet juice or turmeric to create vibrant natural hues that stand out against the sun.
- Glitter Galore: Use iridescent or metallic glitter to catch the light and create a stunning shimmer that dazzles any onlooker. The sparkle will elevate your suncatchers!
- Layering Techniques: Experiment with layering multiple colors for a marbled effect that's visually stunning. Swirl the colors together while the base is still wet for a unique look.
- Shape Play: Instead of traditional shapes, get creative with different designs like animals, stars, or hearts to further captivate your audience. Each shape tells a different story!
- Scented Options: Add a few drops of essential oil to the mixture for a subtle fragrance. Imagine your sunny window also smelling like a refreshing garden!
- Heat Factor: Want to spice things up? Consider adding crushed chili flakes or pepper to the mixture for a surprising twist-just be cautious with the quantity!
- Textural Variations: Blend in sand or tiny beads into the mixture for a textured finish that adds dimension and visual intrigue. Your suncatchers will become tactile works of art!
What to Serve with Eco-Friendly Bioplastic Suncatchers?
Create a vibrant atmosphere while you work on your beautiful, eco-friendly craft with these delightful pairings that engage the senses.
-
Lemonade Stand: A refreshing glass of homemade lemonade adds a zesty and invigorating contrast to your crafting session, keeping everyone refreshed while creating.
-
Fruit Skewers: Colorful fruit skewers bring a playful, sweet touch to your crafting experience, making the environment cheerful and inviting for kids.
-
Herbal Tea: A warm cup of aromatic herbal tea can create a soothing backdrop as you and your family gather around to craft together, encouraging relaxation and focus.
-
Natural Snack Mix: Prepare a homemade trail mix with nuts, seeds, and dried fruits for a wholesome, energy-boosting snack that complements the eco-friendly theme of the day.
-
Smoothie Bar: Set up a smoothie station with fruits and veggies, allowing everyone to blend their unique concoction, promoting creativity in both crafting and snacking.
-
Colorful Cheese Platter: A vibrant cheese and veggie platter provides a delicious, savory counterbalance to the sweet treats, encouraging creativity on both the plate and the craft table.
-
Party Playlist: Create a lively playlist to enjoy while crafting, keeping the energy high and enhancing the joyful experience of making your suncatchers together.
-
Fresh Baked Cookies: Serve up warm, gooey cookies straight from the oven to sweeten the air and satisfy cravings, turning your crafting time into a delightful memory.
Storage Tips for Bioplastic Suncatchers
Cool, Dry Place: Keep your dried Bioplastic Suncatchers in a cool, dry area to ensure they maintain their vibrant colors and integrity. This will help preserve their beautiful shine for longer.
Avoid Direct Heat: Never store your suncatchers near heat sources like radiators or direct sunlight, as this may cause them to warp or lose shape over time.
Long-Term Safekeeping: If you want to save them for future seasons, wrap them in soft tissue paper and place them in a sealed container to avoid scratching and UV damage.
Cleaning Tips: To clean or refresh their look, gently wipe with a damp cloth. Avoid harsh chemicals that could dull the vibrant colors.
Tips for the Best Bioplastic Suncatchers
-
Non-Stick Cookware: Using a non-stick saucepan is crucial for easy release of your finished suncatchers, ensuring they don't stick during the drying process.
-
Humidity Matters: Avoid crafting on humid days, as moisture in the air can prevent your suncatchers from drying properly and achieving a firm texture.
-
Cooling Off Time: Before cutting your suncatchers into shapes, be sure they are completely dried; this will maintain their integrity and prevent unwanted tearing or bending.
-
Creativity Unleashed: Don't hesitate to mix natural dyes or add decorative elements like pressed flowers or glitter. It elevates your Bioplastic Suncatchers to showcase your family's personal touch.
-
Optimal Display: For the best visual effect, hang your suncatchers in bright, sunny spots in your home where they can catch light and color beautifully.
Make Ahead Options
Creating Bioplastic Suncatchers is an excellent choice for meal prep enthusiasts! You can mix the base ingredients (cornstarch, water, vinegar, and glycerin) and store this mixture in an airtight container in the fridge for up to 3 days. When you're ready to craft, simply reheat the mixture over medium heat until it reaches the desired consistency, adding any food coloring for vibrancy. The dried suncatchers themselves can be made in advance and will retain their glossy appearance if kept in a cool, dry place, just ensure they are fully dried for 24-48 hours before handling. This way, you can enjoy the creative process without the last-minute rush!
Bioplastic Suncatchers Recipe FAQs
What is the best cornstarch substitute if I can't find it?
Absolutely! If you're unable to find cornstarch, I recommend using arrowroot powder. It provides a similar thickening effect with a comparable texture, making it a perfect alternative in your Bioplastic Suncatchers.
How should I store my dried Bioplastic Suncatchers?
Store your dried Bioplastic Suncatchers in a cool, dry place to maintain their vibrant colors and firmness. Keeping them away from direct heat sources like radiators or sunlight is essential, as this can cause warping. If you're preserving them long-term, wrap each piece in soft tissue paper and place them in a sealed container to protect against scratches and UV damage.
Can I freeze my Bioplastic Suncatchers for later use?
While freezing isn't recommended for suncatchers, as they're made from a bioplastic material that can lose its integrity in low temperatures, I often suggest creating them fresh when needed. These suncatchers dry quickly and can be made in advance for special occasions or brightening your home on gloomy days-just allow them to dry completely before storing!
What should I do if my suncatchers don't dry properly?
If your Bioplastic Suncatchers haven't dried correctly, it may be due to high humidity or insufficient curing time. I recommend placing them in a well-ventilated area with low humidity for an additional 12 to 24 hours. If they remain tacky, gently heating them with a hairdryer on a low setting can help, but be cautious not to melt them!
Can pets be around when I make these suncatchers?
It's best to keep pets away while making your Bioplastic Suncatchers. The mixture contains ingredients like vegetable glycerin, which could be ingested by curious pets. Ensure they're out of reach during the crafting process, and once dried, they can safely enjoy the sunny display-just check for any parts that may be tempting to chew!
How can I improve the colors of my Bioplastic Suncatchers?
For richer color options, consider experimenting with natural dyes like beet juice or turmeric instead of artificial food coloring. You can mix these with your base mixture before spreading it out, allowing you to create stunning marbled effects by adding multiple colors together during the decoration phase!
Bioplastic Suncatchers: A Fun, Earth-Friendly Craft to Love
Equipment
- non-stick saucepan
- measuring cups
- spatula
- wax paper or silicone mat
- scissors
Ingredients
For the Base Mixture
- 1 cup Cornstarch Substitute with arrowroot powder if needed.
- 1 cup Water No substitution needed.
- 2 tablespoons White Vinegar Lemon juice can be used as an alternative.
- 2 tablespoons Vegetable Glycerin Can be replaced with clear corn syrup.
For Color and Decoration
- as desired Food Coloring Optional; try natural dyes as substitutes.
- as desired Glitter or Embellishments Optional; for added sparkle.
Instructions
How to Make Bioplastic Suncatchers
- In a non-stick saucepan, measure and pour in the cornstarch and water. Stir until smoothly blended.
- Add the white vinegar and vegetable glycerin to the saucepan, then place it over medium heat. Stir continuously to avoid lumps as it heats.
- Continue stirring for 5–7 minutes until the mixture thickens into a gel-like paste.
- Remove the saucepan from heat. If you’re using food coloring, add it now and mix thoroughly.
- Carefully pour the thickened mixture onto a sheet of wax paper or a silicone mat, spreading it into a thin layer.
- Before the mixture sets, sprinkle glitter or embellishments on top for a unique look.
- Allow the creations to dry for 24–48 hours in a cool, dry area.
- Once dried, carefully peel the suncatchers from the wax paper and cut out desired shapes.


Leave a Reply